Sunday, December 29, 2013

Ashen Stars - Reflect, Reorient, Reboot


Our group's Ashen Stars game went on hiatus earlier this year. After running two published adventures, something felt off. That unease grew as I read through the other published adventures. Unable to put my finger on it, I put the game on pause while we tried other games.

But that feeling didn't go away.

There was the potential for a good game in Ashen Stars. One that I wanted to run. A better one than I had been running. Where was it?

There could be no ongoing story if I was running a series of unrelated published adventures. I knew that going in. The whole point was to test-drive the game without a major creative commitment. That wasn't the issue.

I had a hard time working the characters arcs into the game. The first two adventures I ran had no room for them. The ones that were in the pipeline didn't either. That bothered me.

I talked about it with the players. They pointed out that, of the two adventures they played, neither had a conclusion that flowed from what the player characters discovered before. They felt that there were no real hints to what the ending would reveal. The solutions felt outside the context of the adventures. From their perspective, it would be like Sherlock Holmes find out that the criminals were the Martians from H.G. Wells' War of the Worlds.

It was good feedback. The issue may have been with those two specific adventures or my handling of them. But that explanation didn't satisfy me.

I thought it over some more. Then it hit me. There was a core issue that I needed to address.

Our group restarted the campaign. A complete reset with new characters and character arcs linked to an ongoing plot. That would provide a solid narrative structure that the previous campaign lacked. The first session was right before the holidays.

More importantly, I dumped the game that I ended up running for the game I wanted. I didn't want space police procedurals of the week with the player characters as interstellar private eyes poking around for clues, finding bodies, interviewing witnesses, and getting in over their heads. In particular, reading through Ashen Stars' attempt at noir left me cold.

Ashen Stars and GUMSHOE should be able to handle more than space cops.

There is a cycle that exists in most TV space opera stories. Star Trek, Babylon 5, classic and reimagined Battlestar Galactica, and Firefly all use it to some extent.
  • The crew gets involved in a situation.
  • The crew gathers information and takes action.
  • As a result of that action, the crew gather more information.
  • Now better informed, the crew takes further action.
  • This cycle continues until the crew has enough information to take actions to resolve the situation.
In these stories, the crew is not explicitly looking for clues to solve a mystery. (Unless the episode is a mystery story this week.) They are getting information and working out how to solve a problem with that information. A key difference between a mystery and a space opera story is when the action takes place. A mystery is about what happened, how it happened, and why it happened. A space opera story is about what is happening, why it is happening, and how to resolve it before past tenses are used to describe it.

What I want is a space opera game. What I was presented with was a mystery game. Fortunately, Ashen Stars and GUMSHOE can do both.

Looking at the published materials with new eyes, I can see the game I want there. It is supported by some of the published adventures. Unfortunately, those adventures are not enough to hang a campaign on. An ongoing plot of my own devising was in order.

And so, a casting off of baggage, a break in continuity, and a fresh start for a game with a little less Mike Hammer and a little more Mass Effect.

Saturday, December 28, 2013

Workbench #7 - Hexagon Construction Landing Pad and Industrial Spire

These are a couple of new terrain pieces built from a pair of Hexagon Construction Sets. The sets are currently distributed in the United States by Pegasus Hobbies. These have been available for awhile, so you likely have seen them before in some form.

A Large and Small Set caught my eye back at Millennium Con. I've been interested in picking them up for awhile now, but not enough to place an online order. But with two of them sitting right there with some cash burning a hole in my pocket, well...

...I've been playing around with them ever since.

My understanding is that the Hexagon Construction Sets were originally made for a Russian wargame scaled for 25mm. They comfortably scale for anything from 15mm to 28mm with a little management of details like ladders. The doors are undersized for 28mm, assuming that the doors are intended to be walked rather than crawled through.

The parts are well detailed with high tech looking greebles. The overall appearance of a finished assembly tends towards unrefined and functional. A terrain piece made from these sets would fit in well with a gothic or steampunk aesthetic.

All of the parts are made of plastic and are held together by plastic clips. Different clips allow for the parts to be assembled at different angles. I did run into an issue with flash on the sprues gumming up a few of the clips. However, the large number of clips available on the sprues make this a minor concern.

Landing pad ramp-side view with two Titan Marines (15mm) and a Sky Scorcher for scale.

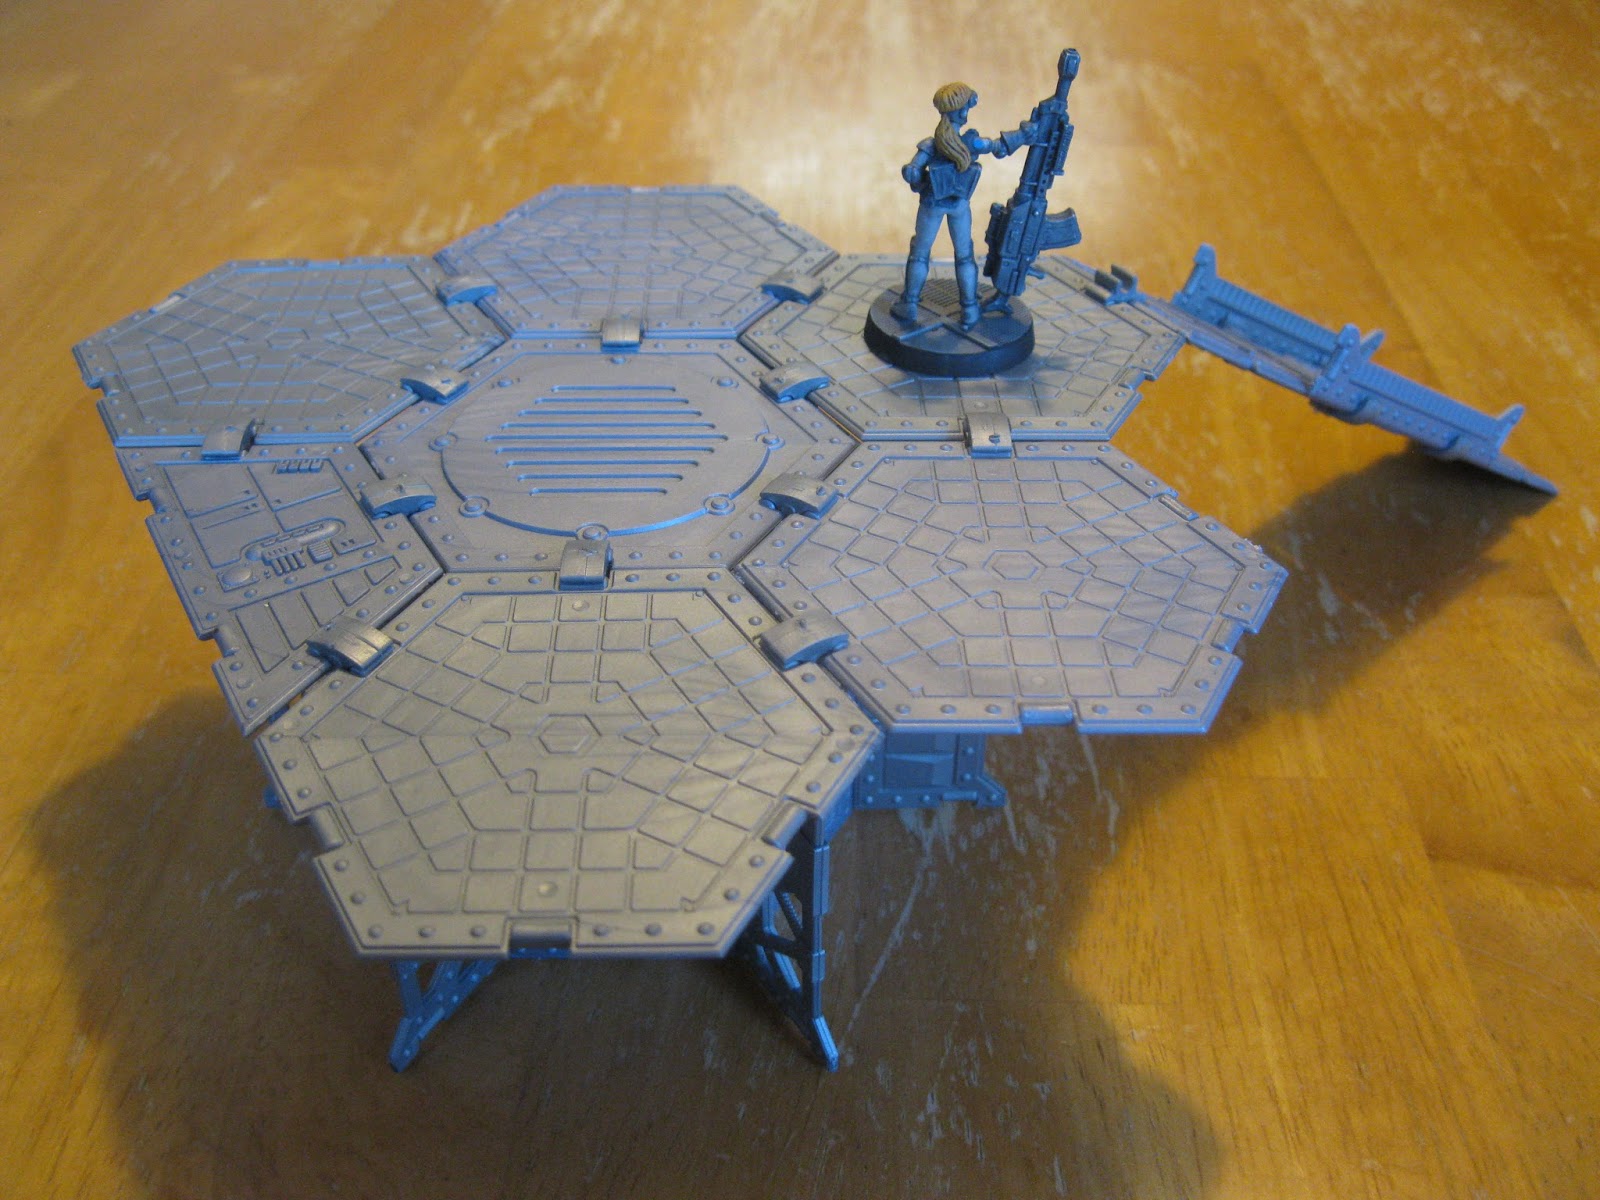
This piece fills a hole in my terrain collection - a landing pad and ramp. The design is based loosely on a couple of pieces I saw at Millennium Con 12+1 in 2010. The pad itself is built from 1 half-hexagonal and 6 hexagonal parts. It is supported by 6 rectangular parts. 6 parts originally intended as 25mm scale handrails act as buttresses to reinforce the whole structure. The ramp is built from 2 rectangular parts reinforced with 2 smaller "handrail" parts. The structure is quite sturdy and lightweight. Unpainted.

Landing pad alternate view with Sarah Blitzer (28mm) for scale.

The landing pad is ideal for 15mm. Every 15mm-compatible flying craft in my collection fits on the pad with plenty of room to spare. Of course, that might change if I ever buy some behemoth of a dropship. Using the pad for 28mm scale is a little more problematic. A small shuttle or flying car would fit, though.

Industrial Spire with a Titan Marine (15mm) and Sarah Blitzer (28mm) for scale.

This industrial looking piece is an exercise in what I could make with a bunch of triangular parts. It could be an atmosphere processor, a solar power station, or a widget replicator, However, I think we all know its main job is to block lines of sight. The piece is intended to work with 15mm or 28mm scale figures. Unpainted.

I'm still playing around with the considerable amount of parts still in the sets. The large square parts look handy for a larger structure. The smaller parts have possibilities for scatter terrain once the bigger ones are used up. Overall, I'm glad I picked up these sets.

Saturday, November 16, 2013

Millenniumcon 16 Saturday Morning

The second of two games I played at Millenniumcon 16 last weekend. This was one of the best morning convention games I have ever attended - the hosts brought donuts, kolaches, and coffee.

Wolves from the Sea

Saturday morning slot. GMs: Matt Kibbe and Adam Rios.

Best. Morning. Game. EVER.

Saga is a miniatures skirmish game set during the Dark Ages by Gripping Beast. It is a historical game, but not in the sense of accurately modelling combat in a specific period. Rather, it depicts what might be said about a particular battle after the fact. The kinds of tales that come out late in the evening after a few drinks, a fine repast, and a few more drinks. This was another game I heard about from Meeples and Miniatures and looked forward to giving a try.

This was an open demonstration. Players were paired off against each other and given a selection of four point armies to choose from. I ended up playing the Irish against the Vikings. The scenario started with the warlords from both sides already in close combat range and the rest of their armies deploying on the edges of the board.

Overall setup. Both mats were divided, allowing 8 players to play in 4 simultaneous games.

First Impressions - Pros:

The core game system is light and fast. Granted, this was a stripped-down demonstration game, but all of the players seemed to pick up the rules quickly. Play time was roughly two hours, including instruction time.

The Irish and the Vikings have a very different flavor and rely on different tactics. The Irish use missile fire to soften up their opponents as the range closes. The Vikings favor melee combat. The special abilities of each faction further add to their strengths.

The custom Saga dice determine what a player can do with his army on a particular turn. Units (other than the warlord) must be allocated dice to act in a given turn. Symbols and combinations of symbols can activate special abilities.

The action on the board is very fluid. Units move up to engage and losing units fall back. The back and forth maintains focus. My attention never wondered far from the board, even when it was my opponent's turn.

First Impressions - Cons:

I generally regard "I-go, you-go" initiative as a weakness in a system. It is not as noticeable in Saga. The fluid nature of the game results in relatively little down time during the other player's turns. The period also helped. There were no large fields of fire to encourage players to hunker down in cover and result in a static game.

Each faction has their own custom Saga dice. Each set of six dice costs around $20.00 USD. I regard that as a little on the expensive side.

Overall:

I had a fun time. The game is challenging and kept my attention until the end. Saga is a candidate for my next game, but I have a number of projects to complete until I can take on a new period.

Millenniumcon 16 Friday Night

Millenniumcon 16 was held in Round Rock, TX last weekend. I only managed to play in two games due to a combination of schedule conflicts and game slots filling up. Of course, that's double the number of games I get on a "good" weekend, so I'm pretty happy with that.

Chain of Command Boot Camp

Friday night slot. GM: Tom Primrose.

Central board set up and initial deployments.

Chain of Command is a game that I've been interested in trying since hearing about on the Meeples and Miniatures podcast. It's a WWII platoon level skirmish game by Two Fat Lardies. Normally, I don't play much in the way of historical games, but this one caught my attention.

This was a demonstration game offering a taste of the system without getting bogged down. The scenario featured an American patrol and a German patrol running into each other in the ruins of a European town. The GM took us through force construction, the patrol phase, using command points, the initiative mechanics, and combat.

American G.I.s pile in and around a ruined house for cover.

First Impressions - Pros:

Chain of Command force construction is based on historical deployments. This helps to avoid the "Tiger Problem" found in some WWII games. No showing up to a minor skirmish in a no-name town with every last Tiger tank historically deployed to this part of the front.

The patrol phase and the fact that neither side starts with forces on the board gives the game a very different feel. It avoids the race line start seen in many other miniature games. Instead, two forces grope to find the enemy and scramble to get available forces into the fight.

The initiative system uses dice to determine which units can activate in a particular round. Officers can use command points to activate other units. Senior officers can activate more units than junior officers since they have more command points. A unit with an attached officer is more flexible than one without an officer. This shows the importance of leadership on the battlefield.

The game succeeds at showing the differences between national armies. Each American rifleman had good firepower in the M1 Garand, but the BAR could only provide limited support. This had the effect of spreading out American firepower. Every rifleman not getting in line of sight to a target led to a measurable loss of firepower.

On the other hand, German infantry was armed with a bolt-action rifle, but was supported by belt-fed machine guns with a rapid rate of fire. This meant that their firepower was concentrated in those machine guns. Getting the machine guns into position was the critical part of maneuvering for the Germans.

Decision point: German infantry deploy to stop the American advance.

First Impressions - Cons:

The game never really came together for me. Every rule makes sense - I understand and approve of the logic behind each individual rule. But I never felt those rules flowing together into a system. The game remained a collection of rules. Part of this might be lack of repeated play or the convention experience of splitting a side up among multiple players.

Endgame: the Americans wipe out the defending Germans with a courageous, but costly charge.

Overall:

This is a good game and I had a good time with it. The tactical challenges were interesting and the game was close up until the end. Chain of Command is a game I'll be keeping an eye on, but it might not be my next game.

Monday, October 28, 2013

Painting By Numbers #11 - Rebel Minis Titan Marines Infantry

This is a test batch of some Titan Marines Infantry by Rebel Minis. I felt the need for more sci-fi 15mm infantry to use as OPFOR and these guys won out over the alternatives. The stosstruppen look really sold me. Sometimes there is a need for OPFOR that dress the part.

I was very pleased with these guys when they showed up in the mail. Order fulfillment was fast. The details are good and there are a variety of poses. The mold lines were easy to deal with. The integral bases were small, but I was planning to glue them on washers anyway.

Picking out a color scheme was tough. There was the neo-samurai scheme with blood red armor plates over blue cloth. (I might revisit the idea for a command or elite unit.) A desert camouflage scheme which would have been khaki with a brown wash. (Dull.) A jungle camouflage scheme which would have been olive drab with a brown wash. (Dull.) I even considered a "Space Imperium" sturmtruppen scheme with white armor plates over black cloth. (Funny for awhile, but the joke would get real old, real quick.)


In the end, a quick, efficient scheme for batch painting made the cut. A dark grey primer was followed by a coat of Reaper Stormy Grey (09088). Over that went a coat of Citadel Badab Black Wash. The wash shaded the figures and brought out the details, but that was secondary to darkening the grey base coat. The lenses were picked out with Reaper LED Blue (09288). The basing was my usual sand/paint/water mix drybrushed with a sandy color. The figures got a layer of Testors Dullcote after everything had a day to dry.

This scheme will end up being the standard for my Titan Marine infantry collection. It looks good and is practical for production-style painting. Now I just need to get the rest ready to paint.

Saturday, October 26, 2013

Reaper Miniatures Bones II: The Decision

So, I ended up backing Reaper Miniatures' latest Kickstarter. I actually made the decision a little over a week ago, but I kept up with the updates to see if Reaper came up with something to change my mind. In the end, I stuck it out - a $1.00 pledge, a few add-ons, and a little bit of sales tax (since Reaper and I are in the same state).

In the end, I just didn't want to be stuck with miniatures I didn't have a need for. While there were individual pieces in the Core Set and each Expansion Set that caught my eye, there were many that would end up as clutter. And I have enough gaming-related clutter to deal with as it is. Besides, it's not like this Kickstarter will be the only way to get the pieces I liked. They'll hit the shelves in a year or so. In the meantime, I've got a backlog to work through.


Sunday, October 6, 2013

Reaper Miniatures Bones II: Still Thinking It Over

I'm conflicted on how much money I'm going to be throwing at this one. The "WOW!" feeling I got from the first Reaper Bones Kickstarter just isn't there. And there is the big painting backlog that I've got to get under control.

Looking over the Core Set was a little bit of a disappointment for me. It has about a dozen "I gotta have it" models in it. Plus a dozen more "be nice to have" models. Buying all of those at retail price once they are out would cost less than the $100 of the Core Set. Even better, I could spread the cost out over time.

Some of the Options are really tempting though. The Water Elementals would nicely balance out the transparent Bones I already own. Dungeon Decor II looks handy. And I could always use a Gelatinous Cube and a couple of slimes.

And there is all the unpainted metal, resin, and plastic around my workbench to consider. Do I really need another pile of Reaper Bones to dump on top of all that?

I got nobody but me to blame for the backlog. I spent just shy of $250 on the first Reaper Bones Kickstarter. It's going to take me months to get to the majority of them. Taking advantage of various sales to get "new shiny" figures in 15mm and 28mm on top of that wasn't the smartest move. I just have to shop less and paint more.

Maybe I should just pledge $1 and get a few, carefully selected add-ons? And then I could buckle down on painting until they show up late next year?

Nice theory. Fortunately, I've got time to think it over.

Sunday, September 22, 2013

Painting By Numbers #10a - Reaper Bones Great Worm UPDATE

Chief Lackey Rich over at The Miniatures Page suggested that I post a "down the throat" image of Jimmy. As he pointed out, the mouth is one of the best features of the model. I snapped a quick picture today in Jimmy's natural environment - the inside of my display case.

RAWR!

Thanks for the suggestion, Chief Lackey Rich!

Friday, September 20, 2013

Painting By Numbers #10 - Reaper Bones Great Worm


This is the Great Worm (77006) from the Reaper Bones line. Like Rolf, I bought the Great Worm to experiment on while learning how to work with Reaper Bones plastic. Also like Rolf, I came up with a name to avoid typing "the Great Worm" more often than I have to. "Jimmy" sounded pretty good.

By the way, Rolf is taking a long bath in Simple Green on the recommendation of the folks on the Reaper forum. There might be something strange in the plastic mix used to make Rolf. That "something" did not react well with the Krylon spray paint I used as a base coat. I'll be exploring alternate techniques with him later, but Rolf has been pushed back in the queue in favor of other projects.

In this experiment, I decided to simply approach it like I would a metal miniature. Nothing new and nothing fancy. Just a coat of spray primer, followed by a base color, washes, and details.

The first challenge was to make Jimmy sit flat on a surface. The miniature was deformed in a way that made falling over a concern. I glued Jimmy on a 50mm plastic base from Privateer Press. The wider base made the miniature very stable, particularly after basing material was added.

The spray primer was by Design Master. It has provided a good coat on every material I have ever tried it on - metal, various plastics, and resin. Unfortunately, the smooth surface it provides is not the best for acrylic paint. The paint tends to flow rather than "hold" long enough to dry. This was not a major issue in this case, since I planned to use washes to provide most of the color on Jimmy.


I've seen the underbelly painted a different color from the main body, but decided on a single color for simplicity. The base coat was Reaper Amethyst Purple (09024). Over that went a wash of Reaper Burgundy Wine (09025), Amethyst Purple (09024), and water. Once that was dry, I applied a second layer of wash - Citadel Leviathan Purple.

The fleshy parts of the mouth were painted with Reaper Bright Skin (09233) and given a wash of Citadel Baal Red. Reaper Graveyard Bone (09272) was used for the teeth and the rocks around the body. The rocks embedded in the body were also painted with Reaper Graveyard Bone, but with a touch of Citadel Ball Red after it dried to simulate irritated flesh.

The basing material is sand held in place by a mix of brown craft paint, tacky glue, and water. I overbrushed some linen craft paint over the sand. This gives the base a more natural appearance than a single layer of color could. The outer edge of the base was painted black.

The final step was to seal the miniature and base with Testors Dullcote.

Overall, I like how it turned out. The whole process was free of problems. One surprise was the level of detail. The white of the unpainted Bone material seems to obscure the figure even on close inspection. The washes brought out the more subtle features. Even the coat of gray primer allowed me to pick out more details than before.

Saturday, August 10, 2013

Half Price Books Finds #3 - Four More AD&D Modules


The most recent gaming finds from Half-Price. All were in fine shape - no handwritten notes, no stains, and the corners were still sharp. Which made it rather annoying when it came time to remove the price tags. Taking them off also tore off bits of the covers. Even worse, removing the adhesive that the tags left behind also damaged the covers.

Three of these modules are from the Slave Lords series. The entire series of four modules were recently republished by Wizards of the Coast in a single hardcover volume - Against the Slave Lords. I prefer the originals both for nostalgia and for ease of use. Speaking from personal experience, running a dungeon crawl is easier if the map and encounter book are separate and if both can be laid flat.

The Slave Lords series is considered a classic, but does have flaws. I found the first two modules - A1 Slave Pits of the Undercity and A2 Secret of the Slavers Stockade - to be the strongest of the series. Both are straightforward dungeon crawls with challenging encounters and memorable NPCs. A3 Assault on the Aerie of the Slave Lords suffers from being two very different adventures leading to a foregone conclusion. In the first part of the adventure, the party has to infiltrate the Slave Lords' stronghold. This is a interesting change from plowing through monsters and traps. In the second, the stronghold funnels the party through a deadly set of encounters only for the party to end up captured through the use of a deus ex machina. This renders the party's previous efforts moot. If the party is going to end up captured no matter what they do, why bother spending all that time running through the stronghold? On a meta level, the capture is necessary to set up the next module in the series, but that isn't a satisfying reason for many players. A4 In the Dungeons of the Slave Lords starts up with the party thrown into a dungeon with none of their equipment or usual selection of spells. Taking away their hard-won cool stuff in a game that is based on killing things and getting their stuff is guaranteed to annoy players. The challenge is for the party of use their limited resources to escape the dungeon. Confronting the Slave Lords and getting their stuff back is possible, but not automatic.

The other module is D1-2 Descent into the Depths of the Earth. It is part of the series that starts with G1-2-3 Against the Giants, continues with D3 Vault of the Drow, and ends with Q1 Queen of the Demonweb Pits. This series was critical in introducing the Drow and the Underdark to D&D lore. If I ever manage to get a copy of D3 Vault of the Drow, I will be able to do something I never got the chance to in the old days - running a party through the entire series.

Sunday, July 28, 2013

Painting By Numbers #6a UPDATE - Second Shot at Sarah Blitzer, IMEF Sniper

"You want to know why I slugged that guy? I literally just stepped off the dropship after a week in the bad guys' backyard. What's the first thing I see? Some numbskull with a microphone and his pet camerabot in tow. He wanted to ask me some questions. They wanted me to take a few minutes to pretty myself up for the camera. Right. There wasn't an inch of me that wasn't covered in dust, dried mud, and old sweat. I stank. The nap I took on the trip up was the first good sleep I had since the mission started. I had been gulping down prepackaged field rations in between moving, avoiding detection, monitoring targets, calling down strikes on anything that looked expensive enough to be worth breaking, and taking the odd shot at anyone stupid enough to present a target. I wanted a shower, a nap, and a hot meal."

"Of course I punched him. No, the camerabot didn't get the shot. It was too busy laughing its tin head off."

- IMEF Staff Sergeant Sarah Blitzer, Deep Space Carrier Decatur (SCVN-2814)


I've painted this miniature before, but wasn't happy with the results. Fortunately, it's easy to remove paint from a miniature with Simple Green, a little time, and a brush.

This time I used a lighter grey for the body suit (Reaper MSP Alien Flesh 09293) while keeping a dark grey for the armor pieces and rifle (Reaper MSP Stormy Grey 09088). The greater contrast prevents the effect from being lost in slightly dimmer light conditions. I also used metallic paint more aggressively on the armor and rifle to suggest wear (Citadel Boltgun Metal).

Some details, including the lenses on the goggles and scope, were picked out in Reaper True Blue (09017) with Reaper LED Blue (09288) as a highlight. Again, the goal was greater contrast than on the original paint job.

I tried various things with the face, but settled on a mix of Reaper Tanned Skin (09044) and Reaper Fair Skin (09047) with a wash to bring out details. Painting eyes is just something I haven't mastered yet.


Overall, I like this attempt better than the first. The greater contrast between the different parts of the miniature brings out more the details. The contrast also has a neater appearance. It all adds up to a better expression of the concept.

Incidentally, I did take a few minutes to compare this miniature (Reaper Chronoscope 50274) with the Bones version (80021) released as part of the Reaper Bones Kickstarter Vampire Box. The Bones version comes with an integral base resembling metal plating. The detail on both miniatures are comparable, but I think the metal version looks a little crisper and better defined. That said, I'm not sure if the differences really matter once the miniatures are painted and on the tabletop.

My current plans for the Bones version of Sarah is to match her with the rest of the IMEF Marines included in the Vampire Box. This will allow them to be fielded as a squad. Right now, I'm thinking of a primary color like blue or red for the armor rather than grey.

Saturday, July 27, 2013

Learning Experiences, Case #3a UPDATE - Reaper Bones Werewolf (77009) "Rolf"

Shortly after receiving my Reaper Bones Kickstarter rewards package, I figured out the following:

  1. That's alot of miniatures.
  2. I need to find out more about how to work with the material Reaper uses for the Bones line.
  3. My Reaper Bones Werewolf needs a bath in Simple Green.
  4. My Reaper Bones Werewolf also needs a name so that I don't keep typing "Reaper Bones Werewolf" when writing these posts. I gave "Worf" and "Shaggy" careful consideration, but decided on "Rolf" for now.

Regarding point #2, there is a vast amount of information available about working with the Reaper Bones line. Unfortunately, much of it is contradictory. Different people have different experiences with the same techniques. Many folks report good results from painting directly on the surface. My own experiences convinced me of the need to prime first. The trick is to figure out what to use as a primer.

On point #3, Simple Green worked fine on Rolf. An overnight immersion followed by some scrubbing with a brush took the paint right off. The Simple Green smell took a few days to fade away. I followed up by cleaning the miniature with dish soap and water.

A trip out to the garage revealed that I had a fair selection of spray primers and paints on hand. I decided against my usual grey auto body primer. This was an experiment and I wanted to push the envelope a little.

I settled on a can of Brown Krylon Camouflage Paint. It was left over from another project and I had no other plans for the rest of the can. The stuff is supposed to work on "most plastics, PVC, hard vinyl, ceramic glass, wood, metal and wicker". Given that Bones is a soft vinyl, I wasn't sure about what the results would be.

After waiting for a lower humidity day (sometimes tough to find during a Texas summer), I hit Rolf with the Krylon Camouflage Paint. The spray flowed evenly with no clogs. Two thin layers provided a good basecoat with no gaps in coverage.

Then came the wait. I could see that the paint had dried after 15 minutes, but Rolf was sticky to the touch. Rolf was still sticky an hour and a day later. Rather than abort the attempt, I decided to leave Rolf in an out of the way spot until the paint cured completely.

It took about 3 - 4 weeks until Rolf was no longer sticky to the touch. I not sure about the exact time since I got out of the habit of checking daily.

(I purchased another Reaper Bones miniature while waiting on Rolf as another test piece. Also, I really wanted a purple worm for my next D&D or D&D-flavored fantasy game. I'm experimenting with some alternate techniques with that miniature. More on that project once it's complete.)

Rolf still lacks the smooth feel of a completely dried coat of paint or primer. There is a faint tacky sensation when handling the miniature. Still, this is a vast improvement over a few weeks ago.

Rolf's coat is also shiny, which would be fine for a real canine, but is odd for a layer of flat, non-reflective paint. The shine and the long curing time suggests some kind of reaction between the Bones material and the Krylon paint.

It doesn't come out well in this photo, but look closely and you can see the shine.

At this point, I'm not recommending using this technique. Although the brown does produce a rich basecoat, the long drying time is not really practical. I might put some paint over the Krylon basecoat sometime in the future, but Rolf was pushed back in the project line during the wait.

Sunday, July 7, 2013

Ashen Stars - Three Unofficial Reasons Behind the Boogey Conundrum

The Boogey Conundrum is part of the background of Ashen Stars. The Combine - something like Star Trek's United Federation of Planets - fought a devastating war against the Mohilar The war started seventeen years ago and ended seven years ago. Since then, nobody in the Combine can remember details about the Mohilar Their culture, weapons, language, tactics, and even their appearance is unknown. Trying to recall these facts leads to a state of confusion. Records exist, but accessing those records causes black outs and periods of missing time. Even trying to research the effect itself is problematic. In the end, the Combine just slapped the label "Boogey Conundrum" on the effect and called it a day.

Ashen Stars author Robin D Laws states in the rulebook that the Boogey Conundrum is not part of a metaplot. It is entirely up to GMs and players to work out what it is within their own campaigns. He does offer some suggestions, but no definative answers.

Below are three ideas I fleshed out a little. None of these ideas are official, but certain elements requite a knowledge of the game's background.


Civil War Cover Up

There was never a race named the Mohilar They never showed up with fleets and living weapons, never laid waste to the Combine, and never disappeared. It was all a cover story cooked up to hide a devastating secret - the Combine went to war with itself.

There were always tensions within the Combine. The Seven Peoples had all fought each other at one time or another. Their interests did not always align perfectly. Cooperation had brought great prosperity, but for how long?

How did it start? Perhaps the careful control of the Balla slipped. Maybe the newly developed Cybes were a step too far. Durugh trickery is an easy answer. The ambition and extremism of the Humans, fueled by their boundless energy, may have become an intolerable threat to the other races. The Tavak could have struck at the other races to preserve the Combine before it tore itself apart. Or the Kch-Thk might have just gotten really hungry. In any event, the Combine shattered under the stresses placed on it.

All of the races found themselves fighting for survival. The early war's surgical strikes failed to be the decisive. The middle of the war saw a steady escalation as fleets maneuvered and alliances were forged and broken. By the end of the war, there was only horror as population centers were bombarded out of existence.

At the end of a decade of war, somebody made a deal with the Vas Kra. The cosmic consciousness had watched the conflict with sadness as the once-proud Combine committed suicide. The Vas Kra could not reverse the damage or restore the lives lost - they were powerful, but not gods. What they could do was alter the memories of the survivors. Blame for the devastation would be cast on a race of mysterious invaders. It was hoped that this - and the implied threat of their return - would unite the Combine as it rebuilt.

The Vas Kra knew that it would take almost all of their power to accomplish the task. They did it anyway, becoming the Vas Mal. Their work was imperfect, but good enough to conceal the real reason of the near-destruction of the Combine. Unfortunately, the restored Combine is not as unified as the Vas Kra hoped it would become.


The Mad Gods

D’jellar was not the only Vas Kra to go mad, only the first. More branches of the Vas Kra turned away from the cosmic consciousness to satisfy sadistic urges. The malignancy spread quickly. Soon, the majority of the Vas Kra began to delight in using their powers to torment and destroy.

There seemed to be no defense and no hope as the decade of madness stretched on. Fleets and worlds were wiped away. Countless lives were lost as the Vas Kra amused themselves. The Combine and Durugh formed a desperate alliance, but their depleted forces were helpless against the rampage.

In the end, a way was found to reconfigure the anomaly the Vas Kra used to manipulate reality. It was widened into a gate and a weapon designed to disrupt the energy forms of the Vas Kra was sent through it. The Vas Kra were devolved into the misshapen forms of the Vas Mal.

But the crude weapon had side effects. There was a huge psychic backlash as the Vas Kra fell. The malignancy the drove the Vas Kra mad was itself a cosmic power and found itself devolving with them. Its decade of madness and joy was over, but it would go down fighting. It rode the psychic backlash, ravaging every mind in reach to create a myth. The false story of the Mohilar would serve as a distraction until it could find a way to wield real power again.


The Mohilar Went Home

The Mohilar were rolling over the Combine. The Combine's fleets were pressed up to the wall. Combine worlds burned in the night. Only a little more time and the Mohilar emerge victorious.

Then... they packed up and left.

The Mohilar's armies regrouped, withdrew from the front lines, and boarded their assault craft and transports. The Mohilar reorganized their logistics - dismantling their bases and loading everything up for the trip home. The warships of the fleet guarded the evacuation effort. Slow moving cargo ships joined convoys and turned for the home systems. Nothing was left behind.

The Boogey Conundrum was one of a number of carefully calculated acts designed to slow the Combine's recovery until the Mohilar returned. The bombardment of Earth and the fall of the Vas Kra were other parts of this plan. Leaving some of their living weapons behind was not part of the plan - the Mohilar just couldn't be bothered to gather them all up. A disrupted Combine without the aid of the Vas Kra or even any memories of the Mohilar would be ill-equipped to deal with another invasion.

Why did they go? A military campaign could be called off for any number of reasons.

Politics:
  • Loss of popular support back home.
  • A restless population or civil war.
  • A new set of legitimate leaders who see no point in continuing the conflict.
  • A political process that the leaders of the campaign need to go and participate in.
Weird:
  • A religious rite that must be observed personally every 10 - 15 years.
  • Some biological cycle that has already been delayed for as long as it can.
Practical:
  • Ran out of slave troops and their living weapons weren't considered reliable enough.
  • Ran out of the unobtainium that their technology runs on.
  • Ran out of royal jelly for their queens.
  • Ran out of money.
Whatever the reason, the Mohilar left. But they'll be back once they deal with whatever caused them to leave. And the Combine won't be ready.

Wednesday, July 3, 2013

Reaper Bones Kickstarter Update - A Package from Reaper Appears!

I've got some updates on recent projects to post. Later. Expect them over the course of the next week or two. Right now, a major new project showed up at my door yesterday.

I'm gonna need more paint.

Sorting everything included in my Reaper Bones Kickstarter rewards package took about three hours. Checking what I received against what I ordered revealed one missing miniature out of about three hundred. That's not something I can really get worked up about, all things considered. More importantly, all the multi-part figures were complete. Everything went into labeled bags for easy retrieval later.

Now I've got to make some plans...

Sunday, May 19, 2013

Learning Experiences, Case #3 - Reaper Bones Werewolf (77009)

The latest update puts my package from the Reaper Bones Kickstarter sometime in July or August. Maybe. Some folks are really unhappy with that. Me? I'm looking on the bright side. At least my Vampire box plus add-ons won't show up while I'm away on my June vacation. And I'll have more time to knock down my project backlog.

One of those projects is slapping some paint on a Bones miniature to see how things work out. Word from Reaper is that primer is not needed for good results on Bones. The vinyl material, once cleaned with soap and water, is supposed to bond effectively with undiluted acrylic paint.

Before painting. Kind of hard to see the details on the miniature.

I tried that awhile back. After leaving the paint to dry for a couple of days, a close inspection revealed some patchy spots in the paint. A few light scratches with my thumbnail and the paint came right off.

I wouldn't call that a success. Although I now know that Simple Green works as well as it does when stripping a metal miniature.

These are the results of my second attempt. Clean miniature. No primer. This time I was using craft paint. It was a little thick, so I did use some flow improver in it.

First basecoat. Note how the paint brought out the details and the lack of paint on the raised areas.

The first basecoat flowed nicely over the miniature. Note the details that are difficult to see when the miniature is still unpainted. Unfortunately, the paint acted more like a thick wash than a basecoat. The paint
flowed off the raised areas, leaving them lightly stained or white.

I mixed the second basecoat thicker than the first. The coverage was better, but not even.

Second basecoat. The coverage is better, but there are uneven patches not obvious from the photo.

The worst was when I returned to the miniature a day later. I noticed some patchy areas similar to my first attempt to paint the figure. Some light scratching confirmed my suspicion - the paint came off easily. See the white area on the ear? It's not a reflection, it's where the paint came off. The paint job would not have survived normal storage, much less wear and tear on the tabletop.

Looks like the werewolf will be getting another bath in Simple Green. Next time, I'm hitting it
with some spray primer and going from there.

Tuesday, April 30, 2013

Ashen Stars - Dead Rock Seven


Recently ran another Ashen Stars adventure.

Got mixed feelings about it.

The adventure in question is Dead Rock Seven, from the adventure collection of the same name. It wasn't my first choice. I planned on running the group through the adventures in the collection in order, but ran into issues with the first adventure - The Pleasure Bringers. The noir feel that it tries to evoke fell flat for me. Also, The Pleasure Bringers is set on a pleasure planet with human male-oriented descriptions of what pleasure is. Kind of problematic for a player character group of two female humans and an insect-like male. After wrestling with the amount of rewriting it would take to make it work for our group, I set it aside and went looking for a better option. Dead Rock Seven seemed promising. It starts with a murder mystery and takes place in a remote asteroid mining outpost. Best of all, it has a pretty straightforward structure.

I know what you're thinking. "This is the part where I read about how it all crashes and burns." And you would be wrong.

There were, however, a couple of near-misses.

The are several NPCs in Dead Rock Seven, which took some getting used to on my part. These weren't just "stay in the background" NPCs either. They all had things to relate to the player characters. Of the eight NPCs in the adventure, I only managed get six into play. One got himself killed before meeting the player characters. The other never got on stage at all, but did get a mention here and there. Of the six that got screen time, one got dropping from a potentially major role into a bit part. The five remaining NPCs did get good scenes interacting with the player characters. This points to an area that I need to strengthen as a GM. I generally don't have more than three or four "speaking role" NPCs in an adventure.

Keeping the game going was a challenge. Our group tends to be goal-oriented problem solvers with a strong tactical sense. They nearly short-circuited the adventure by driving straight for the solution. This would have left them without information they needed to resolve the climax. I reacted by throwing in a couple of things from a little later in the adventure to slow things down enough to get the information in the player character's hands.

Keeping the game short was also a challenge. Ironically, after stretching out the adventure a but, I had to shorten the end and cut short the after game wrap up to finish at a reasonable time.

Our group is starting to settle into Ashen Stars. The players are adapting elements of their more tactical play style to an investigative game. We're all still climbing the learning curve, though.

There was some good background bits presented in Dead Rock Seven that I would like to see expanded a little. The outlaw planet presented in some of the NPCs' backgrounds sounds like a good place for some player characters to find trouble.

Overall, our group is having fun with Ashen Stars. The differences between it and other games make it interesting, but also add to the difficulty of picking it up. I'm still struggling with it, but I can't put my finger on why.

I'll have to put some thought into it.

Sunday, April 7, 2013

Magnetic Vent Covers - A Revised Storage Solution for 15mm Miniatures

New fix for an old problem.

Old fixes sometimes stop working. It almost always happens at the least convenient time. Like when other things are demanding attention and money.

This time around, the old fix was the storage solution for 15mm miniatures I settled on awhile back. With my collection of painted 15mm metal men growing nicely, I needed more storage space. "No problem," I thought, "I'll just throw together another container and move on to the next project."

The first sign of trouble showed up when I inspected the container I magnetized earlier for reference. The strips of magnetic material showed clear signs of damage. Even the limited wear and tear from figures coming loose and bumping into the edges was enough to cause chipping. This sparked some concerns about the durability of the material.

My concerns grew deeper when I took the roll of magnetic material out of storage. It was even more damaged. Granted, I look through my storage bins fairly often, but the roll was placed to avoid knocking into anything else.

Curses!

Worse, when I started to cut strips of material off the roll, I found that the stuff would not uncurl. Even laying the strips flat overnight under some books was not enough to remove the curl. I tried using the strips anyway, but they would start curling up in the container. Even gluing them down with super glue failed to combat the problem.

In the end, I had to start over from scratch. Researching a new fix was not something I wanted to spend time on, but I was out of options. I had to find a solution that would fit into a limited budget and would avoid the wear and curling issues.

I found out about magnetic vent covers after a little time with Google. This stuff is normally used for sealing up unused metal vents in a central air system. A set of three 8x15 inch sheets is less than $5 (US). Cheap enough to justify picking up a pack to experiment with while keeping other options open.

Sheets cut to fit.

The material comes in smooth sheets. One side is colored white to blend into walls. The business side is a dark brown. It cuts easily with a good set of scissors.

Seems to be working alright.

Multiple layers are ideal. A single layer produces a fairly weak magnetic field. 15mm miniatures based on steel washers will tend to slide around and come loose. Laying down additional layers on top of each other increases the magnetic attraction, but the sheets have poles like any other magnet. Laying down a sheet in the wrong direction will weaken the overall strength of the magnetic field. A little trial and error is enough to work out the best placement. As a bonus, the additional layers do not need to be glued down. They stick to each other on their own.

Overall, this looks like a winner. It is as effective as any other fix I have seen. The cost is very modest. And, since the sheets are easy to cut, it is simple to customize to fit the container I have available.

Monday, April 1, 2013

Matchbox Finds for 15mm #3

Sky Scorcher


An aggressive looking attack helicopter, part of Matchbox's Sky Busters line. The design is well suited for a near future setting. The weapons load out is impressive - missiles, rocket pods, and twin chin guns. The scale might be better suited for 10mm than 15mm judging from the two seats in the cockpit. My plans are to use it to represent off-board air support for games like Tomorrow's War. It looks pretty good right out of the package. I might not even bother with a complete repaint. Covering up the markings, a quick wash, and touching up some of the details might be enough for the tabletop.


Blade Force


I couldn't resist picking up this cargo helicopter with the Sky Scorcher. It's also part of the Sky Busters line. The overall look fits in well with the Sky Scorcher and some of my other Matchbox aircraft. Not visible in the picture is a cargo hook between the rear landing gear. This piece is not likely to see much use on the board except as an objective parked on a landing pad. Of course, a scenario where cargo has to be moved off the board using this as model might be workable.


SWAT Truck


A fairly generic looking armored truck, not based directly on a real world vehicle as far as I know. A repaint in a more realistic color is definitely required before these pieces hit the table. They could be handy as battlefield taxis or vehicles in a civilian security force. Adding a weapon to the top would complete the look.


Oshkosh M-ATV


This little guy is based on a real world vehicle. The long version of the name is the MRAP All-Terrain Vehicle. MRAP itself stands for Mine Resistant Ambush Protected. Basically, its a utility vehicle armored against the kinds of conditions found in recent conflicts. The top is almost ready-made for a support weapon. There is some nice detailing, but much of it is obscured by the paint job. The doors make it a little small for 15mm modern, but a repaint would make it well suited for 15mm sci-fi gaming.


The Bat


This is obviously a licensed product. Part of the Sky Busters line. The tiny seat in the cockpit looks like a very tight squeeze for a 15mm figure, but covering the canopy with paint will go a long way in concealing the scale.. A repaint could turn it into an alien gunship or armored anti-grav vehicle. The main reason I picked these pieces up was to make up for my current lack of alien vehicles. I'll have to keep an eye out of suitable flight stands.

Saturday, March 30, 2013

Ashen Stars - The Witness of My Worth


I ended up spending a fair amount of time looking for a good starter adventure for Ashen Stars. The demo offers up a taste of what the game is like, but I didn't want to kick off the campaign with it. I bought and read all the Ashen Stars adventures available to date. They were good, but not as jumping off points. I considered writing an adventure, but I didn't feel confident enough with the system. In the end, I sheepishly decided to run the adventure provided in the core book.

Yeah, I know. Core book adventures tend to be mediocre. Writing for a group that is, naturally, unfamiliar with the game means keeping things simple. The need to introduce game concepts and mechanics overshadow the things that make for a memorable game. Cunning plot twists and strong NPCs might take away from the process of learning how the game works. These assumptions, based on long experience, were why I initially didn't even consider the one in Ashen Stars. I changed my mind after reading through it while looking for ideas.

Oh, right. Robin Laws wrote this. Maybe I should have picked up on that particular clue a little sooner.

"The Witness of My Worth" did the job of introducing Ashen Stars without feeling like there were training wheels attached. The multiple ways through the adventure gave the players meaningful choices. The plot, based firmly on space opera troupes (specifically Star Trek), kept the players engaged throughout the session. Important elements of the setting were presented in a way that did not interrupt the flow of the action. Mechanics were introduced without feeling forced. The group felt challenged by a "real" adventure rather than going through "AS 101: The Keep Along the Borderspace."

The players initially had trouble getting into the mindset of an investigative game. While there are events moving in the background, there is no GM directed story to sweep the player characters along a predetermined course. It requires player characters to assert themselves over the adventure and drive it forward. Simply reacting to events doesn't work. They have to ask questions, get answers, and use those answers to determine their next step.

Likewise, the GM has to be willing to give up some control to the players. Ashen Stars is neither a railroad or a sandbox. It hands the GM a road map, shows the road signs to the player characters, and lets the players decide between the highway, the back streets, or the shortcut through Albuquerque.

I was surprised to blow through the whole thing in one session. I expected to run it in at least two sessions, since the group tends to give out after three hours. The desire to find that next piece of the puzzle kept the players going until the climax. The need to solve the mystery kept them going to the end.

We're all looking forward to the next time.

Thursday, March 21, 2013

Half Price Books Finds #2 - How to Make Wargames Terrain (In Stereo!)

New school from a decade ago and old school from almost two decades ago. The 2003 How To Make Wargames Terrain (left) and the 1996 How To Make Wargames Terrain (right), both by Games Workshop.

I found these awhile back on separate trips and decided to compare them. The two books present some sharp contrasts. While both books cover the same topic, each takes an approach firmly rooted in the trends of its time.

Now, to be clear, this isn't a full review of the books. I do offer some opinions on each book, but the focus is contrasting the two due to the differences in publication date.

The 1996 version is written as an instruction book for someone new to the process of creating terrain. Everything is laid out in logical steps. It starts off with much terrain is needed for Games Workshop miniatures games as they existed at the time, so a newcomer can plan out what he needs. It explains the tools and materials needed for terrain projects. And it presents some simple projects to start off with and continues with progressively more advanced projects as the reader's skill level develops. This approach was necessary at the time due to the lack of alternatives. The vast amount of online resources covering the topic didn't exist back then, after all.

The 2003 version assumes some familiarity with the subject matter. It leads with the need to construct a game table and creating terrain for that table. This is quite a challenge for somebody just starting out, but is a good place for someone with experience to start the planning process. Descriptions of tools and materials is pushed to the back. Most of the book is organized by terrain type: hills, woods, water, buildings, etc. Overall, the book is better suited as a reference work for someone who has already picked up the basics.

The 1996 and 2003 versions reflect very different views on materials. The 1996 presents less expensive materials as a viable option. The 2003 is set solidly in the insulation foam, plasticard, and MDF era. Granted, there are excellent reasons for using the more expensive materials - they look good and are very durable. On the other hand, someone new to the hobby does need to know about the less expensive options. Cardboard and styrofoam may not look as convincing and will not last as long as MDF and insulation foam, but they are more accessible to a hobbyist with a limited budget. Besides, the first few projects for someone starting out will be learning experiences, so why bother driving up the price of materials?

The pictures in each book really bring home the different times they were published in. The terrain in the 1996 book is less detailed, lacking the professional polish of the terrain in the 2003 book. Likewise, the models in the 1996 books are boldly painted with the green bases of the "paint it red" period. The 2003 book's models look more familiar to a current gamer. Each one shows the full panoply of techniques and materials: blending, highlighting, washes, and various basing materials. Neither approach is wrong, mind you. I certainly wouldn't feel comfortable painting a model without washes, static grass, and paints available in triads. But the look of the models in the 1996 version does have a certain charm.

In the end, both books are products of their respective times. Side by side, the two provide alternative views on the same subject. The 2003 version is relatively current. Mastering the materials and techniques in the 2003 version will allow the reader to make quality terrain. The only big change in the decade since the book was published is the growing availability and quality of pre-made terrain, something well outside the scope of this discussion. However, the 1996 presents an alternative view - older techniques using cheaper materials can also produce quality terrain. Will it lack the polish of the terrain in the 2003 book? Maybe, but for many gamers, that doesn't matter. There is good stuff in both books, depending on the project and the situation.

Sunday, March 10, 2013

A Look at Character Creation in Ashen Stars

Spent last month's gaming sessions working up new characters. The group is new to Ashen Stars, so it took awhile. The mechanical parts were relatively straightforward. The emphasis the game places on character development took the players a little off guard.

Mechanics

The players divide up shipboard and groundside roles between them. The shipboard roles relate to the operation of the player's ship in combat. The groundside roles define what each character brings to an investigation. The mechanical aspect of the roles amount to a title and a list of the skills needed to be effective in the role. The roles are not as restrictive as classes. Players can even opt out as a group from using roles and simply pick out their skills directly.

Skill selection is a simple point buy. There are no conversions between experience or other points to skill points. One point buys one rank in a skill. Points may be banked for use after character generation. These banked points can be used later, even during an adventure, to purchase new skills.

Equipment is simple. No need to go through lists to purchase every single item. Player characters are assumed to start with what they need to perform their role. This includes a sidearm, a communications device, and a data retrieval/scanning device. The only time players need to pour over lists is when big ticket items like cyberwear or their ship come into the picture.

Character Arcs

Players create a character arc with a beginning, middle, and (if desired) conclusion. These arcs relate to some goal of each player character (find a lost sister, reestablish and uphold lawful government, have a grand adventure and look good doing it). The goal and each step in achieving it are presented as one sentence ideas. These are the seeds for future adventure subplots. It is still up to the GM to incorporate these ideas into the campaign. The details (who, what, where, when, and how) are controlled by the GM, but this allows the players input into the development of their characters.

Reactions

The group had no problems with the mechanical aspects of character generation. Looking up what each skill or piece of cyberwear did take time, but grasping the concepts was not an issue.

Coming up with character arcs was a little more challenging. It's an approach to character development that places more on the players' shoulders. It is more proactive than writing up a backstory and seeing what, if anything, the GM decides to use. It allows the player to decide what is important to their character and how that effects future game sessions.

Wednesday, March 6, 2013

Painting By Numbers #9 - More Earth Exploration Teams

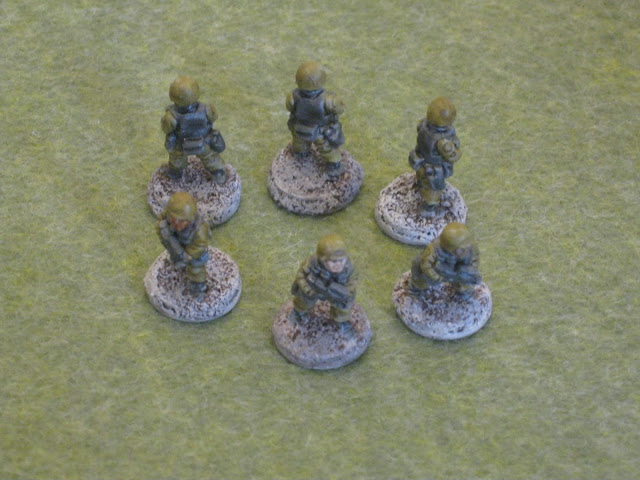
The appearance of these 15mm soldiers is inspired by a popular and long-running science fiction franchise. They'll be useful as security or light infantry in near-future or hard science fiction settings.


Note that one group has helmets and the other has patrol caps.

Base colors as follows:

Uniforms: Reaper Camouflage Green.
Vests, weapons, and boots: Reaper Stormy Grey.
Faces: Reaper Fair Skin or Russet Brown.

Washes as follows:

Vests, weapons, and boots: Citadel Badab Black.
All other areas: Citadel Gryphonne Sepia, followed by Devlan Mud.

I was going to paint the vests, weapons, and boots black. This would have resulted in a flat appearance. The dark grey with a black wash looks dark enough while letting the details show.

The first wash of Gryphonne Sepia was too subtle and too red for the effect I wanted. Going over the same areas with Devlan Mud provided the shading the models needed.

Monday, March 4, 2013

Painting By Numbers #8 - Earth Exploration Team

These are 15mm miniatures inspired by characters from a popular and long-running science fiction franchise. In addition to representing those characters, they will be useful as team leaders for security or light infantry teams.


The sunglasses on the one model is a nice touch.

Sunday, March 3, 2013

Painting By Numbers #7 - Space Portal Guards

Part of my latest completed 15mm painting project. These alien warriors with their jackal-shaped helmets are pretty distinctive. That distinctive appearance limits their overall utility, although they could be used as a Egyptian themed army in a pulp or space opera setting.


The one with gold armor is the squad leader. The team leaders are picked out with blue details. The regular troops have red details in homage to a certain science fiction franchise.

Painting was straightforward. The armor was based with a medium grey followed by an overbrush of metallic silver. The gold areas were based with brown and overbrushed with metallic gold. All areas got a diluted dark wash followed by a brown wash to bring out the details and weather the figures a little.

A Little Overdue for an Update

Yeah, so... it looks like I missed out on updating this blog for... all of February. I'll take all the blame for that one. There was alot on my plate last month and something had to give. Blogging had to take the hit to free up the time I needed to get things done. I'm sorry and will do my best to make sure it doesn't happen again. Until next time.

I did spend time thinking about this little blog, though. Up until now, I've done little more than chronicle my painting and terrain projects with a few reviews on the side. Those are worthy pursuits and will continue. But I do have ideas on other topics to add to the mix. I hope that you will enjoy the greater variety of posts.

Saturday, January 19, 2013

Initial Thoughts on Ashen Stars

I finished reading through Ashen Stars during the holidays. I gave the rules another going-over and ran my group through a demo last week to get a feel for the game. Ashen Stars is a sc-fi tabletop RPG using the GUMSHOE system. Both the game and rules system were created by Robin D Laws. It is published by Pelgrane Press.

GUMSHOE solves an issue with "investigative" games. In an adventure that relies on giving the player characters information needed to continue the story, what happens when they fail to acquire that information? Many systems require a successful skill check to get information. If none of the player characters have the skill needed to find a particular clue, they don't get that clue. If one of them does have the skill, but fails the roll, they also don't get the clue. Without that key piece of information, they cannot continue the adventure.

Faced with that situation, a GM has three basic options. One, accept that the player characters have failed to complete the adventure and deal with the fall out. This is like a murder mystery where the detective doesn't catch the killer. It can be done, but may not be a satisfying end. Two, fudge the skill check and hope the players don't notice. In that case, why require a skill check in the first place? Three, find another way of getting the information into the hands of the player characters. Again, this brings requiring a skill check into question.

GUMSHOE circumvents the whole issue by just putting the information into the hands of the player characters. During character generation, the players determine which character buys a given investigative skill. The entire range of investigative skills is doled out between the player characters. This avoids the issue of not having a specific skill. If a player character possesses the required skill to obtain a particular clue, they find the clue automatically. This is a more elegant solution that keeps the adventure running seamlessly.

Note that this only applies to core clues - those that are needed to continue the adventure. Information that is helpful or optional, but not critical to keeping the game going, is not automatically given.

The core mechanic for Ashen Stars is simple. A single die (d6) is rolled against a target number based on the difficulty of the task. The die roll result can be modified by spending points from a skill pool refreshed at the beginning of an adventure. The difficulty is adjusted due to circumstances. For example, the base difficulty for hitting a target with a disrupter pistol is a 3. However, trying to hit a target using cover and in poor lighting would change that to a 5. The player has the option of offsetting the increased difficulty by spending points from the Shooting skill pool.

Combat is quick, but abstract and dependent on GM descriptions to provide context and flavor. There is no map and modifiers are kept to a minimum. Such a simple system might not hold the interest of a group with a more tactical play style. Fortunately, the investigative system and the task resolution mechanic are easily separated from each other. This allows a group to run the GUMSHOE investigative system with a more robust combat system. I might try combining GUMSHOE with Savage Worlds in a game with a bigger emphasis on combat. But that will have to wait.

The setting for Ashen Stars tries to solve some issues related to sci-fi roleplaying. It sticks to the usual troupes of space opera to keep things familiar. But there are enough twists on those troupes to make the setting interesting.

A specific issue that Ashen Stars addresses is the military or paramilitary command structure in many sci-fi settings. The usual approach to space opera is a big ship with a big crew run with a hierarchical organization. This implies rules, regulations, and a chain of command that players may find confining. There is also the issue of creating adventures that the players can bludgeon into submission with their capital starship and crew of specialists.

Ashen Stars makes the player characters independent problem solvers working under contract. Their ship is something small enough to run with a crew of about half a dozen people. This makes the player characters less like starship bridge officers from Star Trek and more like the crew from Firefly.

The Ashen Stars setting mixes utopian and dystopian concepts and explores the conflict between the two. It takes an interstellar civilization of high ideals and wrecks it with a decade-long war. Picture the difference in tone between Star Trek the original series and late-season Deep Space Nine. The player characters are
faced with the desire to live up to the example of a golden age and the desperate needs of a now that is barely getting by.

Ashen Stars avoids being too grimdark with a Reputation mechanic. Players have to balance the temptation of having their characters take pragmatic or self-serving actions versus upholding a more idealistic and moral stance. In some ways, this reminds me of similar mechanics in the Mass Effect games.

Overall, the game looks pretty good. I'll be running my group through some published adventures until we all get a solid grasp of the game. Then I'll see about working up a short campaign to fill out the next couple of months.