Showing posts with label Trash Bash. Show all posts

Tuesday, May 30, 2023

After Easter: Plastic Egg Sci-Fi Scatter Terrain

I ended up with a significant number of plastic eggs this past Easter.

Lacking ideas of my own, I posed the question of "how can I use these for tabletop gaming terrain" in various places online. There were plenty of helpful suggestions and I'll be exploring those ideas for as long as the supply of plastic eggs holds out. I'm grateful to everybody who took the time to reply.

Needing a quick and easy project to get back into the swing of things, I picked out one that came with a detailed build guide. Dice Mechanic Games has a comprehensive "Micro Reactor" tutorial on their website. The tutorial includes needed tools and materials in addition to build instructions. One thing that's not clear at first glance is that this build requires plastic eggs that are a bit on the small side.

Rosie scores more salvage.

Construction

The basic idea is to glue an egg half on top of a plastic bottle cap. Handling the egg halves can get tricky - the plastic is prone to cracking, but I avoided breaking either of them. This uncomplicated process results in an interesting shape that can be enhanced with any greeblies that might be on hand. I ended up playing around a little to see what techniques I could carry forward to future projects.

I might have overdone the wires, but it's good practice.

The blue one is an experiment in using short lengths of salvaged electrical wire to represent cables or hoses. The wires were added after priming and painting. The terminals and connectors are plastics beads from the craft store. It is a good way to add mechanical complexity to a model by connecting various parts.

To be honest, I'm not sure which is the front and back on this model.

I attached a few stickers to what would become the red one to represent after market panels covering up improvised "improvements" and repairs. Looking at it now, the panels seem too uniform to be convincing, but the idea works well enough. If I were to build something of more ramshackle construction, I might go for covering much of it with overlapping stickers.

The "hat" on top of the red one is the plastic valve from a bag of coffee. Here's a short video on how I wrestled it out:


Priming and Painting

I spray primed both pieces with some black Krylon from a can that I'm trying to finish off. That got followed up with some Tamiya Surface Primer (L) in gray, sprayed in a zenithal pattern from the top. Masking off the sections that would later be painted metallic, I reached for a couple more cans of Krylon I was trying to use up. The blue is Krylon ColorMaster Paint + Primer Satin Iris and the red is the same brand in Matte Poppy Red.

Don't let the name fool you - this stuff comes in all kinds of colors.

The metallic sections offered me a chance to try out something new to me. FolkArt Treasure Gold came to my attention thanks to one of the many hobby YouTubers I follow. I brushed a coat of 5554 Antique Silver over the black primer, being careful to leave some black showing in the recesses. A little 5552 Platinum worked well as a highlight layer on the metallic areas. I also brushed on both metallic paints on various places to simulate scratches and other wear.

FolkArt Treasure Gold, despite the name, comes in a variety of colors. It works well for dry brushing and similar techniques, but seems a little thick for using as a base coat. I'll have to use it some more to get a better feel for how to use the stuff.

The pieces still looked too pristine. This called for a coat of wash. I mixed up some Liquitex Matte Medium, Liquitex Soft Body Payne's Grey, and water. Despite wiping off the excess, I still spotted some pooling when I took a look at the photos I shot for this post. It's one of the dangers of photographing miniatures - every flaw becomes obvious after clicking on the photo and seeing on the screen.

"The energizer's bypassed like a Christmas tree, so don't give me too many bumps."

Wrapping Up

This was a great little project to get me back into the hobby after an involuntary break. These will make good scatter terrain for my next sci-fi game. No idea what kind of machinery they're supposed to represent, though.

Monday, August 15, 2022

Trash Bash Sci-Fi Fuel Drum

This was a quick and dirty proof of concept I threw together over a hot summer afternoon. The goal was to see what else I could do with a couple of plastic soda bottle caps other than make another wheel for a sci-fi vehicle. It could be almost any kind of sci-fi widget, but I'm going to develop it as a sci-fi fuel drum for 28mm tabletop gaming. The execution needs more refinement before I crank out a bunch for scatter terrain.

One thing I can't complain about is the cost of the parts.

Parts List
  • Plastic soda bottle caps x 2
  • Coffee bag valve x 1
  • Plastic beads x 3

Preparation

The soda bottle caps and coffee bag valve got a good scrubbing with warm soap and water. Then I sanded down the edges and tops of the soda bottle caps. The edges were pretty rough and I wanted to improve how well they fit together. On the other hand, the tops were too smooth and I was concerned about how well glue, primer, and paint would bond to the surface.


Assembly

Pretty straightforward. I formed the main body by gluing the pair of soda bottle caps together. The coffee bag valve and beads were glued on what I arbitrarily decided was the top.


Spray Priming

Krylon Fusion All-In-One Matte Black

Coated all surfaces, including the underside.


Spray Painting

Krylon ColorMaster Paint + Primer Metallic Aluminum

A single coat. Since this was a proof of concept, I didn't feel the need to go further with the paint job. Later iterations will get a coat of wash and some details painted with a brush.


Moving Forward

It's good enough for a proof of concept, but there are some issues that I'll need to fix in the next iteration. I didn't notice the lettering on the coffee bag valve until after spraying on the metallic coat. That will have to get removed next time. I might play around with the number of beads and find something else to add as a detail. Reducing the number of beads from three to two would match the number of openings on a real world fuel drum. Adding an angular bit would contrast with all the curves everywhere else. Finally, I'd like to try another color for the base coat.

Monday, August 1, 2022

Trash Bash Monowheel Cycle FINISHED

Here's a monocycle model I cobbled together from reclaimed materials. It started off as an experiment with making a wheel with a pair of plastic soda bottle caps and grew from there. When I last posted about this project, all I had left to do was put it on a base and paint it up. Finding my way forward took awhile.

Rosie inspecting some Atmospheric Water Condensers during her frontier days.

Basing

I started by attaching the model to a round plastic base with Gorilla Super Glue. This bond was only intended to hold everything together long enough to apply texturing mix to the base. The mix of sand, PVA glue, paint, and water that I favor sets like concrete once dry. The combination of Gorilla Super Glue and texturing mix produces a strong and durable bond.


Spray Re priming/Base Coats

Krylon Fusion All-In-One Matte Coffee Bean Paint + Primer
Krylon Camouflage Ultra-Flat Khaki

At least one more coat of spray primer proved necessary when I ran into problems painting the wheel black. The Tamiya Surface Primer didn't seem to bond properly to the plastic soda bottle cap. The Krylon Coffee Bean covered well and provided a flat, dark brown base coat. I followed up with Khaki sprayed in a zenithal pattern.

A little dirty and dusty, but still purrs like a kitten.

Painting

Wheel

FolkArt 479 Pure Black

A couple of coats over the entire wheel surface to represent rubber or some sci-fi substitute.


Body

FolkArt 437 Lipstick Red
FolkArt 932 Calico Red

I considered yellow or orange for the body, but went with red for the speed boost. Lipstick Red works as a dark base color and Calico Red as a highlight color.


Clean Up

FolkArt 231 Real Brown

I changed my mind about where some of the red went and gave those areas a coat of Real Brown. The dark brown produced a good undercoat for the metallic and cloth areas.


Metallic Areas

Citadel Colour Boltgun Metal
Citadel Colour Mithril Silver

I don't know how, but these old bottles are still going strong. The Boltgun Metal coated the areas representing bare metal parts with Mithril Silver lightly brushed over as a highlight.


Cloth

FolkArt 420 Linen

Linen seemed like a good choice for the sandbag seat cushions and the bags in the stowage area.

The only thing kept clean on this ride is the holographic projector for the HUD.

Weathering

FolkArt 479 Pure Black (diluted with water)
FolkArt 231 Real Brown (diluted with water)
FolkArt 420 Linen

The monocycle is supposed to be made of salvaged parts – much like the actual model - and used in the wastelands of some frontier world. A showroom new appearance didn't seem like the right move. The diluted Pure Black and Real Brown were each applied as wash coats. A heavy brushing of Linen produced a dusty appearance. If I do another project like this, I might use a Silver Sharpie to add some chipped paint and other details before applying the washes and drybrushing.


Base Clean Up

FolkArt 231 Real Brown
FolkArt 420 Linen

I needed to cover up some of the red paint that ended up on the base. This step also ties the ground colors to the weathering colors.


Wire

Adding a wire to connect a couple of the parts together was always part of the plan. Unfortunately, I forgot about it until everything was painted, but before I started weathering the model. Fortunately, the wire color works with the rest of the model and the wash coats help to tie it in.


Heads Up Display

The final step was to attach one of the Warsenal Fluorescent Scifi Screens I purchased way back in 2020 to the part representing a holographic projector.

Rosie: "Now where did I pack that screwdriver?"

Fictional Background

Let's wrap up with another Kessler's Catalog entry. I often think of how elements of a model would fit into a fictional setting while working on it. Writing these thoughts up into a backstory gets them out of my head.

This monowheel vehicle is representative of those used in remote regions of thinly settled worlds throughout the frontier sectors. Such vehicles serve a variety of operators such as couriers, surveyors, salvagers, and scouts. Packs of similar vehicles see use in conflict zones as raiders.

The chassis is built on the remains of a planetary survey probe. The wheel was salvaged from the landing gear of a heavy interplanetary transport. The other components originated from sources to varied to be listed here. Reliability is surprisingly high, but some maintenance tasks are described as "a bit tricky" by our technical staff. Performance is good, but handling "takes some getting used to" according to our test drivers.

The wheel is a plastic drum with a synthetic rubber coating and a metallic core. It is electromagnetically suspended and rotated when the vehicle is in operation. Stability and control are provided by a variety of counter gravity and mass manipulation systems. While these systems reduce the effective mass of the vehicle while operating, true flight is not possible due to their limited output.

Energy storage is provided by a series of repurposed power packs distributed throughout the vehicle. These packs are tied into a single system and can be replenished at any standard recharging station. The large solar energy collection arrays standard for planetary survey missions are missing - likely removed and repurposed long ago.

Auxiliary power is supplied by an internal combustion engine designed for planetary exploration and colonial applications. The engine can burn a variety of hydrocarbon fuels, but is most efficient when using high octane synthetic gasoline or alcohol. There is evidence of another auxiliary power system based on a nuclear generator, but most of the components are absent.

- Kessler's Upcycling Sales Catalog

Thursday, June 23, 2022

Coffee Bag Freebie Greeblies

A quick video about a couple of bits useful for trash bashing salvaged from an empty coffee bag.


Since the video came out to 41 seconds, I decided to play around with the Shorts format for this one.

Saturday, June 11, 2022

Trash Bash Pill Bottle Stasis Tube

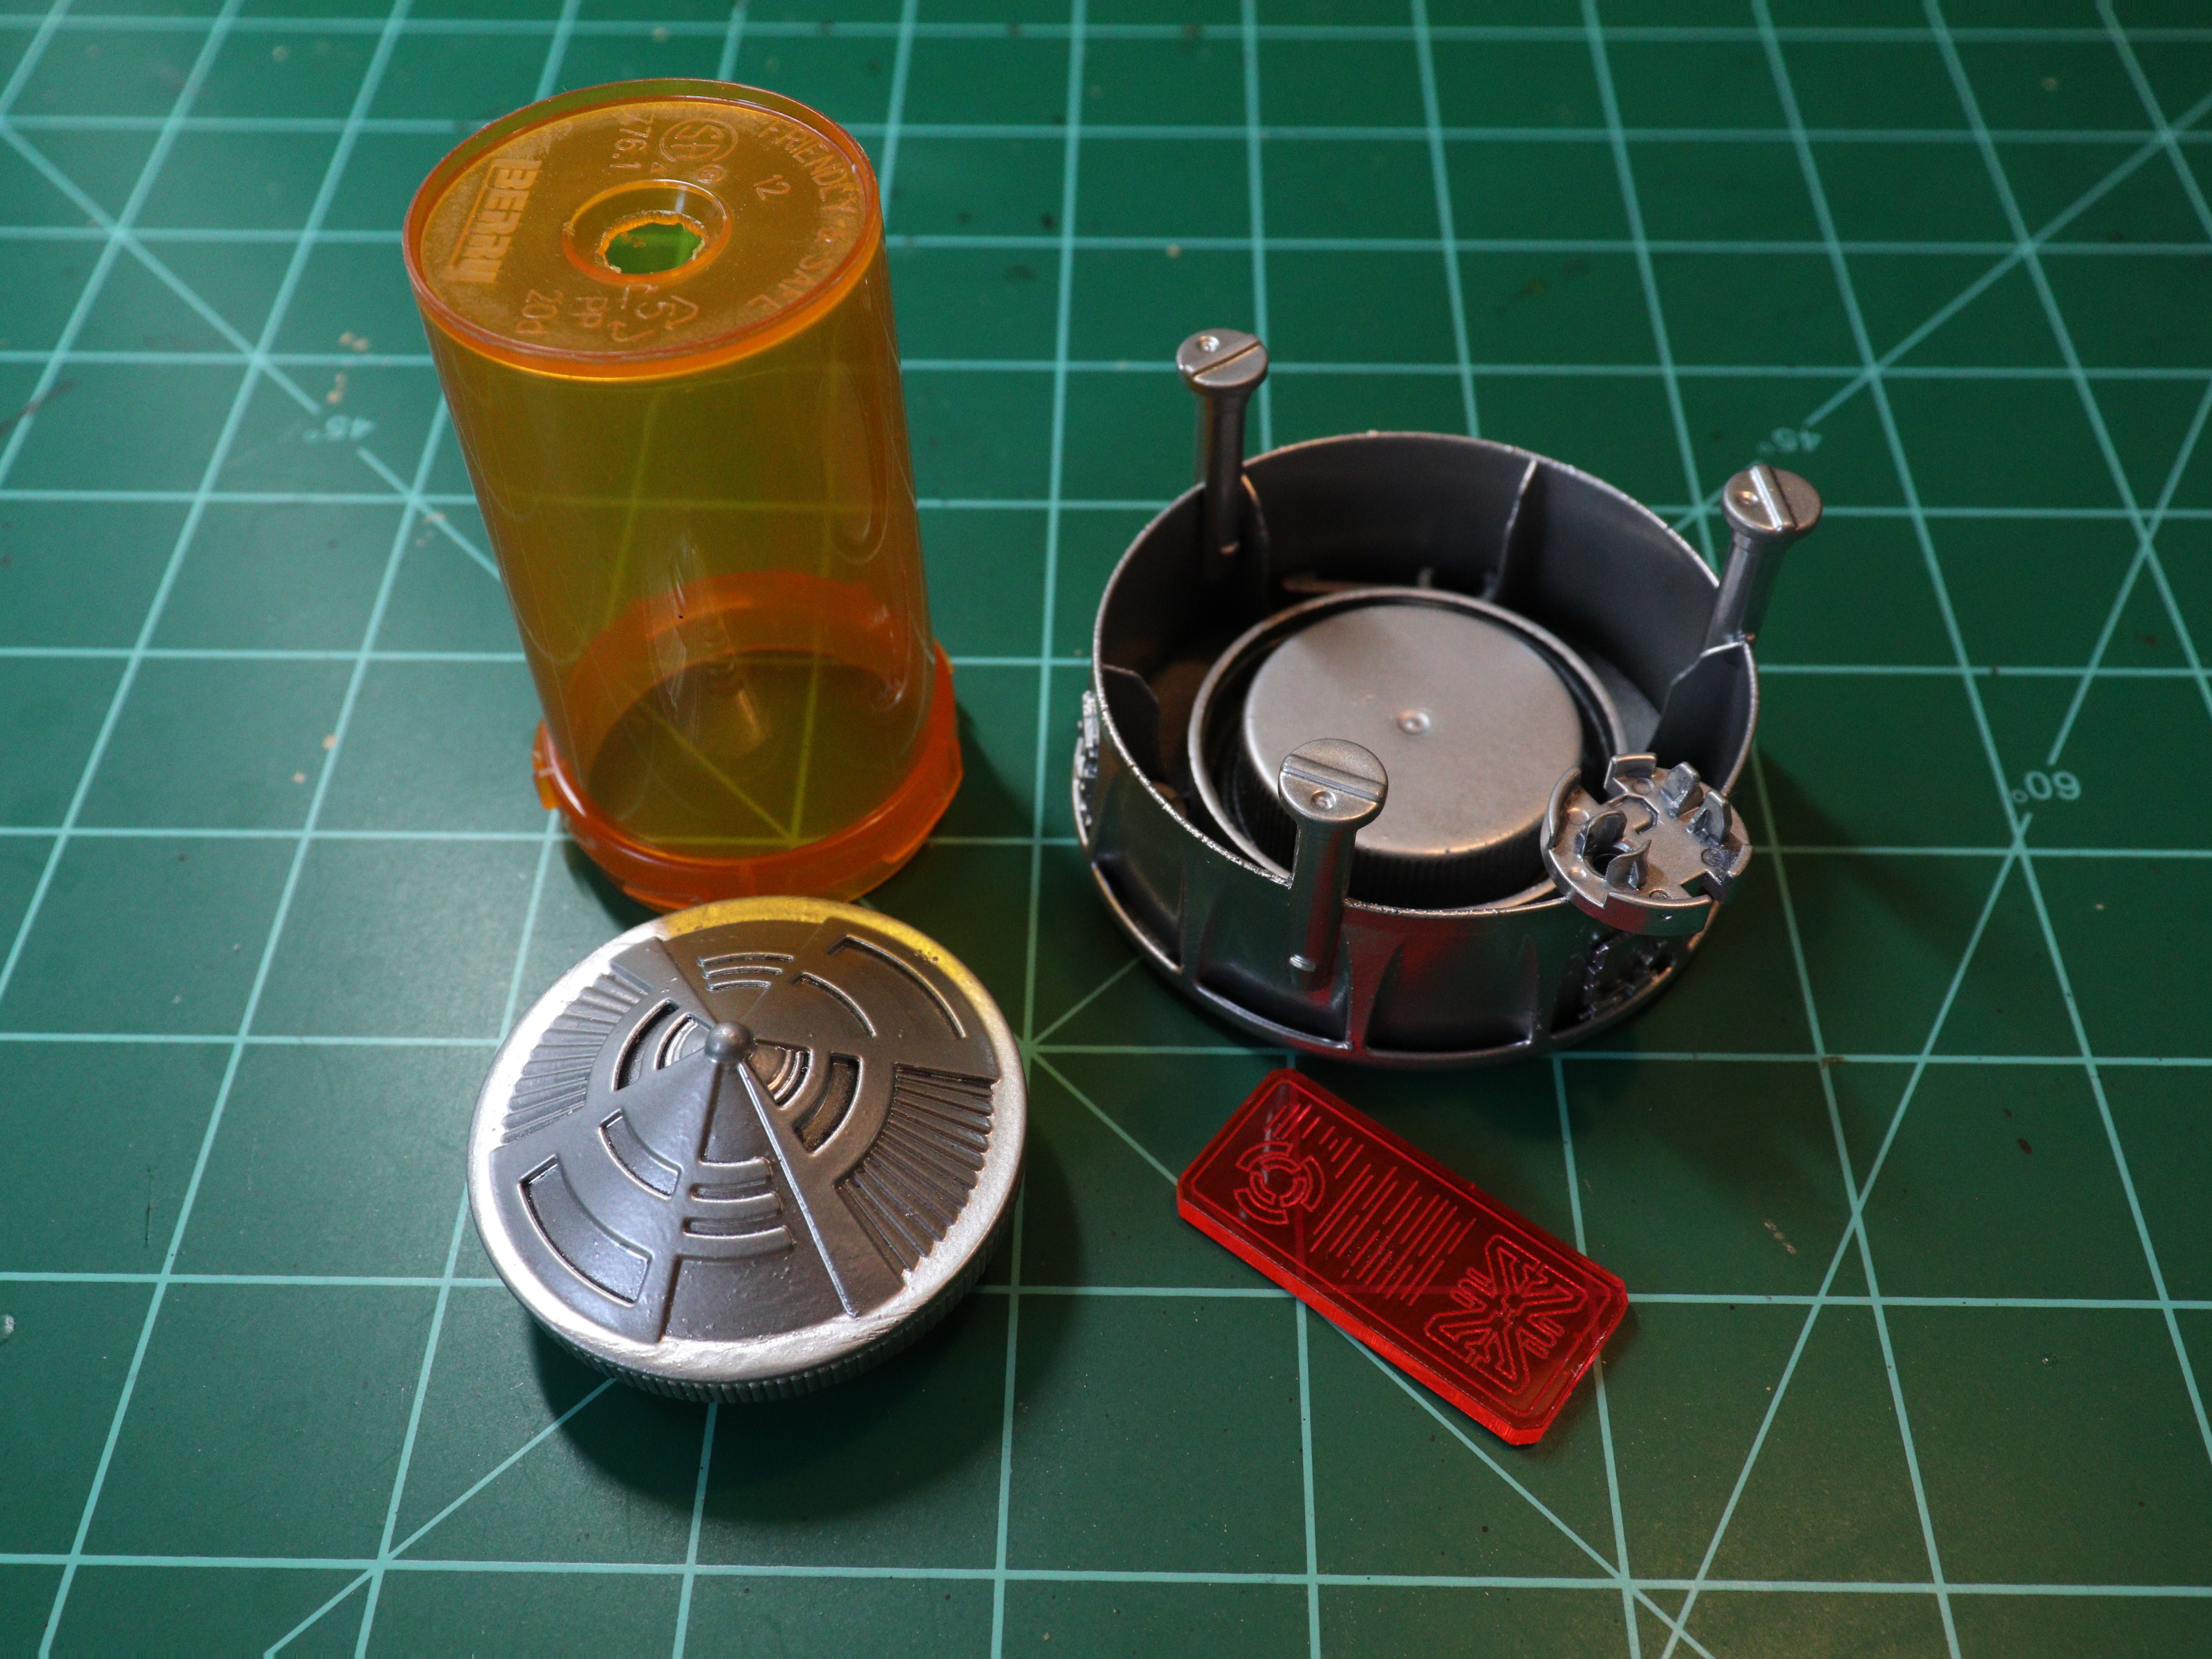
Awhile back, I made some Stasis Pods using pill bottles as a quick and dirty project. The idea behind this terrain is to be able to place a 28mm scale miniature inside and still see it through the transparent pill bottle. The original set met a sudden need for the campaign I was running at the time, but I knew I could do better. This is my second try at the concept.

Final test fitting. Just waiting for its first patient. Or victim.

Top Cap
This is a McDonald's Happy Meal toy from ages ago. I'm pretty sure it's a Star Wars themed spinning top. I wiped it down and realized that the protrusion would get in the way of mounting it on the pill bottle. I didn't relish the idea of cutting through the tough plastic of the toy, so I did the other thing.

Stasis Tube Body
A transparent pill bottle with the labels removed and cleaned with warm soap and water. I drilled a hole to accommodate the top piece's protrusion.

Mounting Hardware
The bottom piece is the cap from a juice bottle. I removed most of the threading to improve the fit of the pill bottle.

Initial test fit prior to painting.

Mounting Hardware Internal Platform
I glued a bottle cap inside the juice bottle cap to cover up some markings. It also raises up any figures placed inside the tube.

Display Panel
From a set of Fluorescent Scifi Screens from Warsenal. I purchased these awhile back to add exactly this kind of detail to my terrain projects. Not sure about the color, though. I'll try the blue and green options before gluing anything down.
Various Mounting Hardware Details
The towers are plastic clips of some kind. I don't recall the source. The round piece that I used to mount the display panel is a salvaged printer part. The square details were recovered from a nonfunctional keyboard. Finally, the parts glued inside to add some internal detail are the same as the ones I used as arms for the "Astromecha" robot. I may add some wires to simulate hoses running between them at some point.

Test fit after black spray coat.

Painting
The top cap and mounting hardware were spray painted black and then metallic. I then applied a dark wash, wiping off any excess with a sponge.

Major components after painting and prior to assembly.

Assembly
The spinning top and pill bottle fit together perfectly. It's almost snug enough to not require glue. Almost. The fit of the display panel is also good, but it will also be glued in place once I settle on the color. The pill bottle sits evenly in the juice cap and can be easily removed so that a miniature can be placed inside.

Tin Man Miniatures Princess Livia recovering from a beach trip.

I'm content with the results. but I still think I can do better. It's a more convincing terrain piece than the originals. It's missing something, though. I'll have to give it some thought and make another attempt later.

Thursday, June 9, 2022

Trash Bash "Astromecha" WIP

Something I threw together the other day. I was digging around in my bits collection for something else, noticed how well these parts fit together, and spent about twenty or thirty minutes building this robot miniature. Then I set it aside and got back to what I was doing in the first place.

Arms raised in threat, surrender, or just stretching?

In my defense, I've been considering cobbling together a trash bash robot for awhile now. I even collected a few images for inspiration. Maybe my brain seized on the first opportunity it came across.

Going from the bottom up to the top, the parts are:
  • A 25mm plastic slotted base. Pretty standard in the tabletop miniatures world. This particular one is from Games Workshop.
  • A pair of metal weights from a gaming mouse. Intended to customize the mouse to the exact specifications of the user. Salvaged after the mouse in question stopped working.
  • A plastic button from either a telephone or a fax unit. Again, salvaged after the unit they were once attached to stopped functioning. The plastic protrusions were clipped down so the mouse weight "wheels" would fit properly.
  • Three white plastic bits - the "arms" and "head" are separate parts. Printer salvage. I'm not sure, but I think they were paper feed roller parts from two different devices. How well the "head" fit on to the button "body" is what started this unplanned project.
  • The plastic "head" is hollow, so I glued in a flat sided plastic bead to partly fill the space.
Maybe not the droid she's looking for.

Everything is held together with Gorilla Super Glue. The bond with the base will be reinforced with my usual choice of basing material (sand, glue, paint, and a little water to improve flow) after the detail pass. The stuff sets like concrete. I'll just have to remember to tape the slot closed beforehand. Yes, I've made a mess by forgetting that step before.

The basic form is done. I've put off hitting it with a coat of spray primer until I can dive back into my bits collection and give it a detail pass. I'm hoping for an antenna or some access ports. Maybe something additional to fill in the empty "head" space. Until then, it's just not quite ready for painting yet.

Rear view showing the bead partly filling the space in the top piece.

More after I finish what I was working on in the first place and get back to this project.

Wednesday, May 4, 2022

May the 4th - More Atmospheric Water Condenser Terrain

I wanted a project that tied into May the Fourth Be With You, but I also didn't want to just pick up a Star Wars miniature or model. Instead, I looked through my mess to see if there was anything Star Wars inspired I could do. While last year's Atmospheric Water Condenser Scatter Terrain didn't start as such a project, it went that way after I slapped on a worn desert themed paint job. So I decided to make a couple more.

Original terrain piece in the middle for comparison. Rosie included for scale.

And I immediately ran into the problem of not having all the parts and paint to replicate the original Atmospheric Water Condenser exactly. The others could represent different models or field modifications using after market parts. In any event, discussing the original parts and their replacements might be instructional for those tackling their own projects.

Core parts from left to right: dial, hub, pull tab. Original terrain piece in background for comparison.

The circular section of the original terrain piece was assembled from a selector dial, a pull tab, a ballpoint pen part, and an upside down keyboard button. I had more dials and pull tabs, but didn't have the same pen parts or buttons. What I used instead were alternate pen parts and cylindrical bits that I can't remember the origins of. It was fortunate that I had some left, but I was prepared to use plastic lids, bottle caps, or other round parts for the dial.

The central tower is the hub of a paper feed roller from some model of printer. I found more in my collection. However, I had the idea of substituting the pump from a liquid soap dispenser or spray bottle while digging around for the hubs. All that was really needed was a tall section for the middle of the piece.

Alternatives to the core parts that I considered, but didn't have to use.

I built the circular sections, but did not attach the towers to make spray priming and painting easier. After priming everything in black, I ran into the next issue. My supply of Krylon Camouflage Ultra-Flat Khaki was down to a single, almost empty can that I've been reserving for another project. I substituted a gray for the khaki on the circular sections. This ultimately resulted in a less earthy tone to the finished pieces. It works fine, but I prefer the warmer color of the original. They were looking a little flat, so I brushed on some FolkArt 480 Titanium White over them to produce some highlights and weathering. For the towers, I went in an entirely different direction - metallic. A coat of Krylon ColorMaster Paint + Primer Metallic Aluminum over the black primer contrasted nicely with the dull gray circular assemblies.

Next, I attached the towers to the circular assemblies. Gorilla Super Glue wouldn't be enough to keep the towers in place by itself. The original used a mechanical solution that I repeated here. I drilled out the bottoms of the hubs and used an existing hole in the dials for a screw. I still applied a little glue to the hub as a backup.

I applied a dark wash. Unfortunately, it turned out to be way too dark, even after wiping off the excess. Correcting the colors involved brushing on some Citadel Colour Mithril Silver over the tower and more FolkArt 480 Titanium White over the circular assembly. I left the wash still showing in the recesses.

Original terrain piece in the middle.

And there they are. Some more scatter terrain that is reminiscent of Star Wars while not directly copying anything from the franchise. Doing Star Wars stuff was fun! Maybe I could do more this month?

Wednesday, April 27, 2022

Trash Bash Monowheel Cycle WIP

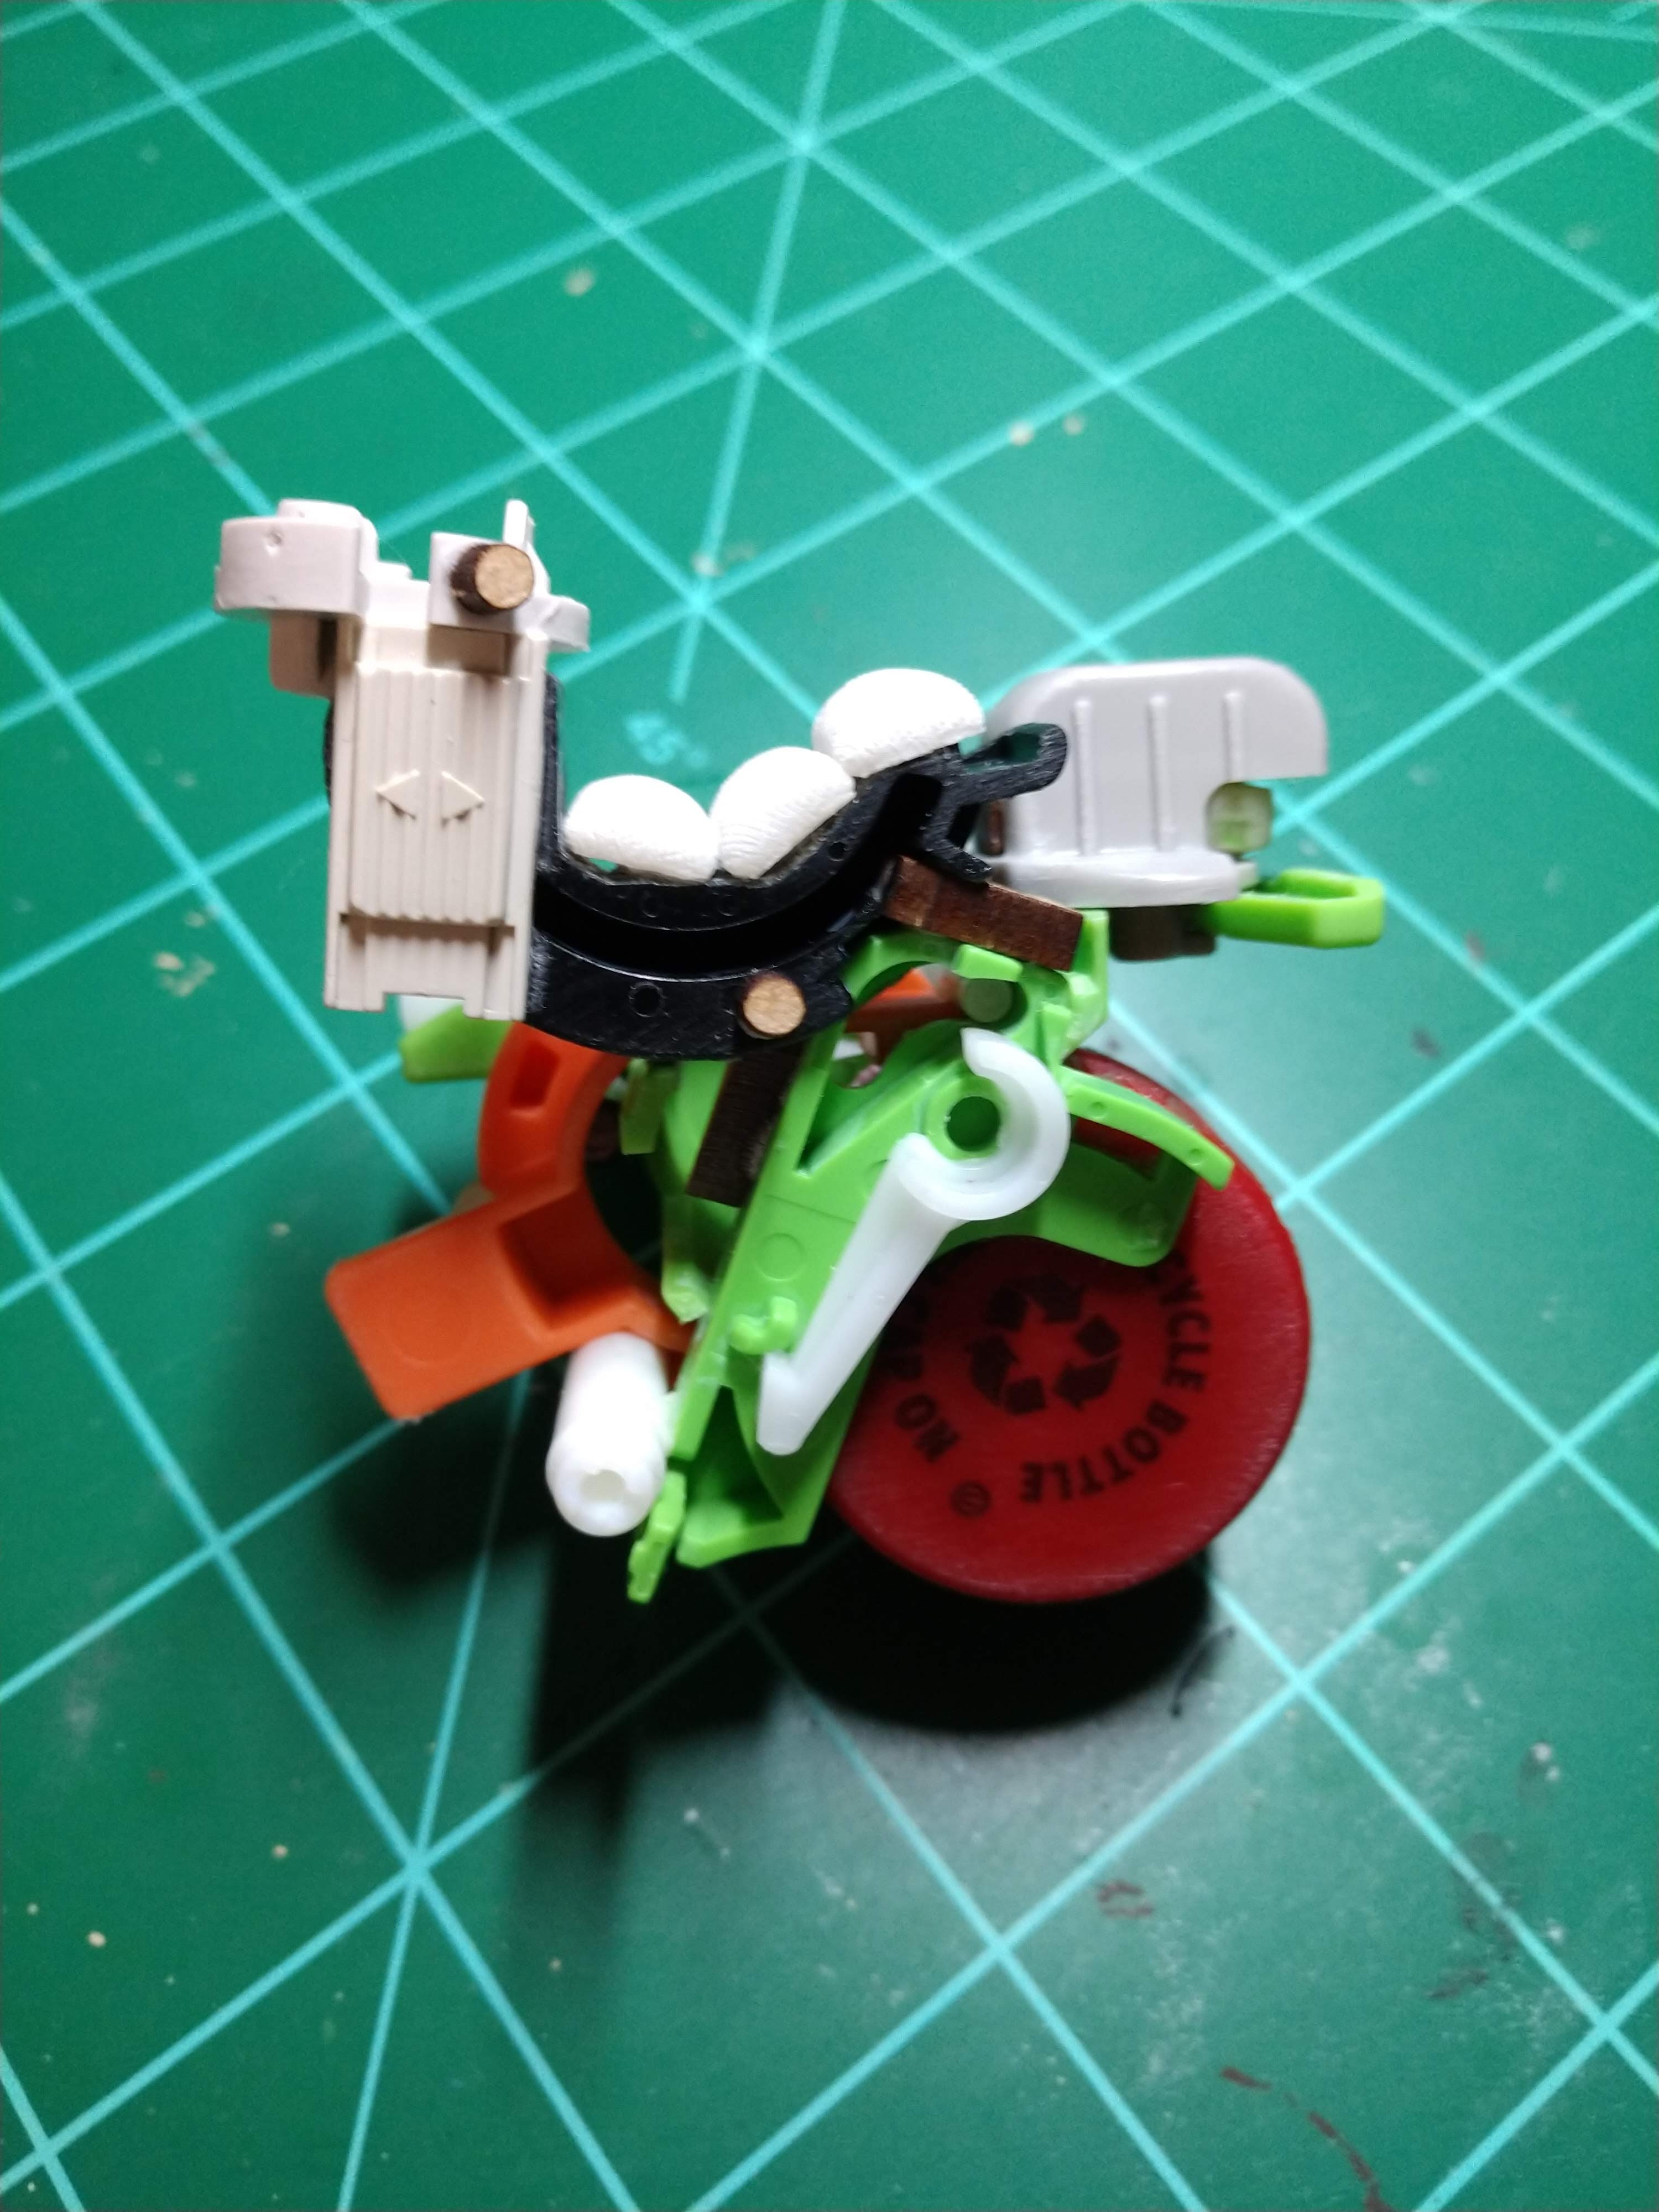
This started off as an experiment with making wheels for sci-fi models out of soda bottle caps. Then it turned into a unicycle robot build. It ended up as a monowheel cycle when I cobbled together a seat and threw on some stowage. Now that I see what it looks like with a coat of primer, I'm thinking of adding some wires and a couple more details after some initial painting.

Side view after priming.

Big Wheel Keep On (Not) Turning
The wheel is a pair of soda bottle caps glued together. The edges were sanded down a little so the two pieces fit flush and to give the glue a rougher surface to work with. The ends were also sanded in preparation for painting. The overall shape and the pattern molded into the plastic creates the appearance of a wheel and tread pattern. The idea will come in handy the next time I need wheels for a sci-fi ground vehicle, robot, or in the landing gear of an aerospace craft.

Rear three quarter view before primer.

Unicycle
I was intrigued by the possibilities of the model wheel in my hands. The idea of a single wheeled robot or vehicle has been in the back of my mind for awhile now. A little digging around the bits collection turned up a number of parts that either fit or could be convinced to fit around the wheel. I was initially going for a robotic probe equipped with sensors to explore some unknown world. That's a concept I may return to, but that's not the direction this project went.

Rear three quarter view after primer.

Monowheel Cycle
As I piled things on, the project's appearance diverged from the lines of a purpose-built planetary probe towards a vehicle built from salvage. I started deliberately going for the look of a custom vehicle built by someone who had to scavenge the parts. Greeblies suggesting an engine exhaust and suspension add mechanical plausibility. Some stowage and fuel containers from a Tamiya 1/48 Jerry Can Set give the impression of an owner on the move.

Top down view showing stowage and seat cushions.

The Seat and MDF Reinforcement
Adding a seat was a challenge. With no ready made options at hand, I built one from various plastic parts and used resin sandbags for the cushions. Unfortunately, glue alone wouldn't be strong enough to hold it in place. I used some small MDF pieces to reinforce the seat and add details. These were popped out of laser cut parts from previous projects. Using super glue between MDF and plastic creates a strong bond suitable for structural support.

Top down view after priming.

Priming
Tamiya Surface Primer (L) in Gray spray for full coverage. Priming a project like this is an almost magical moment. The chaotic mix of different colors and shapes turns into a single object, unified under a coat of flat gray.

Side view during assembly. A couple details were added before priming.

Moving Forward
I've got some ideas for putting this project on a plastic base, but there's some testing to be done first. After that, I might brush on some paint to see how it looks with some color on it. Final details will be added after that - I have some wire that will join together some of the mechanical details. And, of course, a couple of wash coats to bring out the details and add weathering.

Monday, March 14, 2022

A Trash Bash Weekend!

I spent this weekend's hobby time making things out of junk. Like many craft projects, it started with something simple and ended up consuming hours of time. Still, the process of fitting things together is always soothing, even if I'm not sure what to do with a couple of the results.

The only thing I spent on this was time.

"Trash Bash" isn't new. I've done it often enough to add it as a tag on this blog. Brian S. Roe champions the practice on his blog and on the Trash Bash International Facebook Group. There are older examples to be found in Games Workshop's "How to Make Wargames Terrain" books (1996, 2003). The appeal is the reduced cost compared to purchasing terrain. Plus, there is a certain satisfaction in repurposing materials otherwise destined for a landfill or recycling bin.

Big enough to fit a 28mm miniature inside.

This weekend's adventure in Trash Bashing began with a discovery. I found out that this pill bottle fits this juice bottle cap. The threading isn't compatible, but the pill bottle locks in place with minimal convincing. It might be handy for a future stasis pod or containment tube terrain project. I set the parts aside since I have no immediate need for such a terrain piece, but the bug had bitten me.

Aft view. I'm not sure about how the engine nacelles will hold up.

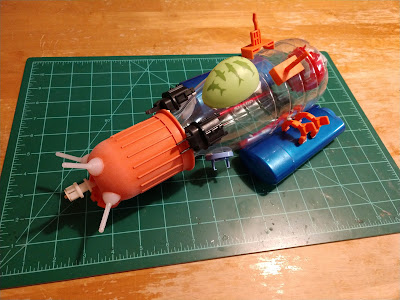
This spaceship is intended for use in my Five Parsecs From Home campaign, but I imagine that it will be handy for a variety of sci-fi games. The body is a coffee creamer bottle. I used tacky putty to attach the parts while trying different configurations. The nosecone was originally built for a project that proved unworkable, but its antenna array works as the forward sensors of an exploration ship. The engine nacelles are that staple of Trash Bashing – deodorant containers. The layout resembles a Star Trek shuttle. I'll likely play around with it a little more before committing to glue the parts together.

Needs more greeblies.

This is another spaceship, but on a different scale. The core part is half of a broken plastic laundry clip. I just added various parts from my collection until I had sometime kinda spaceship-like in my hands. It could work as a frigate with more details and a flight stand. Alternately, I might use it as a flying robot or rework it into a hover bike.

My Easter themed project?

This one was inspired by a variety of images and projects I've seen online. The curve of the spoons fit well with the form of the plastic egg. This could represent a reconnaissance drone, space probe, or a compact single occupant aerospace vehicle. I'm planning on pushing ahead and getting this one done as an Easter themed project for next month. The biggest issue will be finding ways to disguise the distinctive shape of the spoons. The solution for that will involve a deeper dive into my bits collection.

Looks like a racer.

I'll follow up with the ones I pursue further. The Easter egg project looks fun and I should have it done in time for April. I want to play around with the parts and putty on the others before applying any glue on them.

Monday, January 17, 2022

Trash Bash Sci-Fi Quonset Workshop

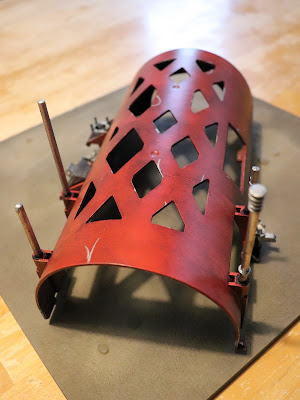
This terrain piece is built around a part from some kind of office machine. The core part immediately brought a Quonset hut to mind when I first laid eyes on it. I previously painted up my other one during my still-incomplete Electrical Box Sci-Fi Shelter.


Preparation
The first step was to cut off the plastic protrusions on the bottom of the core part that kept it from sitting flat on the table. Next came the application of elbow grease in the form of sanding and cleaning. I don't know what kind of plastic the part is made of and preparing the surface seemed to be a reasonable measure.

Antenna Assembly
The antenna are used printer parts - basically plastic rods. The core part had four holes drilled out for screws that were just a little to small to fit the rods. I used a hobby knife to widen the holes and glued the rods in place.

Technical Looking Bits Assembly
The core part had various protrusions originally used as attachment points. I sorted through my bits collection for parts to disguise them. A couple of keyboard buttons and a flat bead did the trick. They represent equipment attached to the outside of the structure.


First Spray Coat
Krylon Fusion All-In-One Matte Black sprayed for complete coverage on all surfaces.

Second Spray Coat
Krylon ColorMaster Paint + Primer Metallic Aluminum spray to coat the antenna and technical bits.

Third Spray Coat
I masked off the areas I wanted to stay metallic and sprayed Krylon ColorMaxx Paint + Primer Flat White to achieve a zenithal effect on the upper areas.


Fourth Spray Coat
Krylon ColorMaster Paint + Primer Matte Poppy Red on all exposed surfaces. I kept the masking on the metallic areas and did not spray the underside of the piece. The zenithal effect showed through the red with the upper areas being noticeably brighter than the lower ones.

Wash Layers
Next I applied multiple coats of black wash. Although I wiped off the excess, I also allowed the wash to build up in some areas for a grimy effect.

Detailing
I used Silver and Black Sharpies to further weather the piece. The silver was applied to the edges to simulate wear marks and on some flat surfaces as scratches. The black worked to dirty up the piece a little more and to draw some graffiti on a couple of spots.


The piece represents a workshop built from prefabricated or repurposed components. Used with 15mm models, it could be a garage or modest hangar. It's a little small for vehicle maintenance at larger scales like 28mm, but still conveys the appearance of a utility building.

Tuesday, December 21, 2021

Atmospheric Water Condenser Scatter Terrain

The Atmospheric Water Condenser is a device for extracting drinkable water from air. The harvested water can be stored in an adjacent collection tank or underground cistern. Piping the water directly to a hydroponic farm or into a settlement's infrastructure for immediate use is also common. Larger models are available for harvesting water in the quantities required for industrial applications, but arrays of standard models are also used for this purpose. Similar technology is commonly employed in agricultural projects on backwater worlds in a far away galaxy.

- Kessler's Upcycling Sales Catalog

I had no idea of what this piece would represent while building it. The process started when I noticed how well some of the recovered printer and computer parts fitted together. Things snowballed from there. I posted a WIP photo on the Trash Bash International Facebook group to get some feedback. Thanks to Gary Golding for inspiring the name!

Rosie giving another bit of tech the once over.

Assembly was straightforward - I just dug around my boxes of greeblies and fit things together where they looked good. Most of the parts are joined with Gorilla Super Glue. The main tower needed a more robust solution to convince it to stay put. Fortunately, all my scavenging has resulted in a collection of suitable screws.

First Spray Coat
Krylon Fusion All-In-One Matte Black sprayed evenly over the piece.

Second Spray Coat
Krylon Camouflage Ultra-Flat Khaki sprayed at a downward angle to achieve a zenithal effect with the black.

Wash Coat
I mixed a black wash and applied it to all surfaces, taking care to get it into the recesses. The excess was wiped off to prevent pooling.

First Dry Brush Coat
FolkArt 420 Linen. This was a heavy dry brushing to get a weathered, been-out-in-the-blazing-sun-too-long appearance.

Second Dry Brush Coat
FolkArt 480 Titanium White. I brushed on just enough to achieve some highlighting.

Sometimes glue just isn't enough for the job.

This piece will likely see the most use as scatter terrain in sci-fi games. I could use it as an objective marker. In that case, its stated function may change to a sensor array, communications relay, terraforming widget, or other technobabble gadget depending on the scenario.

Monday, October 25, 2021

Stackable Trash Bash Sci-Fi Building

This is made from a piece of plastic packaging I saved awhile back. It caught my eye due to its blocky, industrial-looking shape. A couple more turned up later and I also noticed how neatly they stacked up inside each other. I stored them away until I started my most recent project - cobbling together enough terrain to play a game of Five Parsecs From Home.

Rosie dabbing in real estate.

My goals for this project were:
  • Retain the ability to stack the finished pieces. This would greatly enhance the ability to store and transport them later.
  • Minimal resources. That meant using what I had on hand and not spending too much time. Good enough would be good enough.
  • Compatibility. They had to work with the terrain mats and tiles I had or would have ready. Muted, neutral tones would work best.
Retaining the ability to stack the finished pieces meant that my usual approach of putting glue all over something and rolling it around in my bits box was right out. Any bits sticking out too far from the sides would get in the way. The exception was the small surface on the top. There is a small gap between the pieces there when they are stacked. This allowed for thin parts to be glued to the top.

How many previous owners has this place had?

Preparation
I roughed up the packaging with a sanding pad to insure good bonds with the glue and paint I would be applying later. All surfaces were also cleaned with warm soap and water.

Assembly - Top
Some digging around in my bits collections turned up a couple of parts from a Hexagon Construction Set and a key from a USB keyboard. A test fit verified that they would not interfere with stacking if placed on top of the piece. My initial attempt to attach the parts used hot glue, but I found that Gorilla Super Glue provided a stronger bond.

Assembly - Sides
My solution to detailing the sides was using some self-adhesive warning labels I found awhile back. They add details to the sides without protruding far enough to interfere with stacking.

Finished piece and the next one with the bits used for detailing.

First Spray Coat
Krylon Camouflage Ultra-Flat Brown. This coat was sprayed for full coverage on all surfaces.

Second Spray Coat
Krylon Camouflage Ultra-Flat Khaki. Sprayed at an angle from the top to produce highlighting on the upper and raised surfaces.

Drybrushing Layer
FolkArt 480 Titanium White. This is an off-white paint with a gray tint. The stickers were too flush with the sides to catch much paint from a light drybrushing. I ended up using more and more paint to make these details visible. The more aggressive brushing did generate the worn appearance I was going for on the finished piece.

Wash Coat
FolkArt 221 Real Brown mixed with Liquitex Matte Medium and diluted with water. Brushed over all surfaces. I wiped off the excess and pooling with a dry cloth.

"Yard" Texturing
Mix of sand, tacky glue, and diluted FolkArt 221 Real Brown. FolkArt 480 Titanium White brushed on to the mix after it dried for contrast. I decided to texture the surface around the building to create a "yard" surrounded by a low fence.

The test piece stacked under the others.

Overall, it's not bad for a quick and dirty project. And the test piece still stacks under the others! I'll use the same techniques on the other two, but I might experiment with overlapping some of the stickers to simulate patchwork repairs to the walls.

Tuesday, December 15, 2020

Electrical Box Sci-Fi Shelter WIP Part 1

I decided to give a classic of scratch-built sci-fi terrain - the electrical box building - another try. My previous attempt was way back in 2012. I'm looking forward to applying what I've learned since then.

Test fit with the parts held together with putty.

The concept is a hostile environment shelter with an airlock and external workspace in 28mm scale. The functional and futuristic structures in movies like "The Martian" and video games such as "No Man's Sky" inspired this project. The details represent external equipment that can be monitored from inside the shelter. They could be experiment packages, sensors, or communications gear.

A PVC electrical box is an inexpensive core for a project like this. It looks like an industrial structure straight off the shelf. The flat sides are a blank canvas for adding the details needed to convey whatever look the maker is going for.

Step #1 - Diving into the Bits Bins

This step was mostly digging around my bits collection for the kind of parts that suggest some technical function. I also wanted a consistent appearance - a few bits went back into the collection because they were too detailed. They would stand out from the rest and throw off the look I wanted.

Step #2 - Test Fitting

Next was some trial and error. I used the kind of putty used to mount a poster on a wall to temporarily attach everything. This allowed me to rearrange the parts to find the best fit. A fair number of parts went back to the bins because they just didn't work for this project. I also had to move some things around to accommodate the "garage" piece.

The ladder raised an issue - simply attaching it to the side didn't look right. There's no place for anyone using the ladder to step onto. Cutting down a plastic gift card provided a platform and made the ladder look more plausible.

Test fit rear view with "garage" detached. Note that I already started surface preparation on the garage piece.

Step #3 - Surface Preparation

Electrical boxes need work for a project like this - stickers and unneeded protrusions need to be removed. I sanded all the parts and cleaned them with soap and water. This step makes gluing and painting much easier.

Step #4 - Assembly

I used the photos of Step #2 as a reference when gluing everything together. This is when a couple of previously undetected issues came up. The sides of this particular electrical box slope slightly. This made the "airlock" jut up rather than run parallel with the surface. I used a couple of foam bits and another cut down plastic gift card to create a "porch" to go under the airlock. I also added a few cut down straws to represent pipes and cabling to connect some of the details.

Assembled shelter. Note the "porch" added to support the airlock. The garage piece was already in the priming stage.

Parts List

Laundry detergent cap/measuring cup for the airlock body.
Ladder from Hexagon Construction Kit.
Door from Brian Roe's Trash Bash Bits: Sci-Fi Doors Kickstarter.
Pill bottle cap.
Pull tabs.
Cut down plastic gift cards.
Foam bits from packaging.
Various printer parts.

Upcoming - Priming and Painting

The next step is spraying on a layer of primer. Unfortunately, that depends on the weather. It's been varying between "too humid" and "too cold" if what the label on the can states is true.

Sunday, September 13, 2020

Homicidal Warbot Trash Bash WIP

was going to spend my free time this weekend on Kaladrax Reborn, but I got distracted by a shiny new idea. It occurred to me that certain bits from my collection of random junk could be assembled into a sci-fi defensive emplacement or robotic weapon system. I did put some paint on Kaladrax, but that was in between prepping and assembling this brand new project.

Someday I'll figure out how to make a plan and stick with it.

This figure is built around the plastic spigot of a liquid laundry detergent container. I noticed that the spigot appears vaguely like part of a turret awhile back, but I wasn't sure how to complete that look. Everything started to come together while I was rummaging through my bits bin for something else. The "barrel" - actually the hub of the feed roller for a printer - fit snugly into the spigot. An old pull tab fit around the barrel, evoking some kind of barrel shroud or sensor system. The big discovery was that the orange base part - originally a screw-on cap for a bottle of something or other - fit nicely under the "turret" piece. The rest of the parts were selected to add details to suggest various functions - communications, venting heat/fumes, etc. I have multiples of all the parts, giving me the luxury to experiment.

Initial bunch of parts used for this project.

Next came the test fit. On a practical level, this step confirmed that the parts could actually be assembled into a completed figure. Parts on builds like this often need a little "convincing" to fit. Test fitting also gave me a better idea of what the assembled figure would look like on the tabletop. I used a little mounting putty to hold everything together during this step.

Initial test fit. Some of the parts moved around for the final assembly and the side parts haven't been added yet.

The test fit revealed no assembly problems, but another issue appeared. The long barrel unbalanced the figure. It tended to fall over even when resting on a table or desk and was almost hopeless on terrain or felt. Possible solutions included weights, adding more parts, and gluing the figure to a wide base. I decided to plow ahead while I mulled it over.

Preparing the parts involved an abrasive sheet and a little elbow grease. Many plastics tend to be too smooth for glue and paint to "grab" - resulting in weak bonds. Roughing up the parts produces more surface area and allow glue and paint to bond properly. All parts were then washed with soap and water. No telling where these things have been.

Close up of newest bits.

While waiting for everything to dry, I found a couple more parts that fit on the sides of the figure. I have no recollection of what these parts are, but they are visually interesting and I have plenty of them. These parts counterbalance the barrel and the "legs" stabilize the figure. I'm still planning on putting this figure on a base, but I feel better knowing that it will rest on a flat surface on its own. The latest parts were prepared using the same techniques as the rest.

Rear view with various parts added to provide detail.

Assembly was straightforward. Test fitting provided good practice. All parts were bonded using cyanoacrylate glue.

The assembled figure looks like a cross between an astromech droid and a Dalek. I'm thinking less "static defensive emplacement" and more "homicidal warbot" for the future of this project. For now, I'm setting it aside for a few days. I don't want to get a bright idea on some new part to glue on after I've already primed and started painting it.