Awhile back, I made some Stasis Pods using pill bottles as a quick and dirty project. The idea behind this terrain is to be able to place a 28mm scale miniature inside and still see it through the transparent pill bottle. The original set met a sudden need for the campaign I was running at the time, but I knew I could do better. This is my second try at the concept.
 |
| Final test fitting. Just waiting for its first patient. Or victim. |
Top Cap
This is a McDonald's Happy Meal toy from ages ago. I'm pretty sure it's a Star Wars themed spinning top. I wiped it down and realized that the protrusion would get in the way of mounting it on the pill bottle. I didn't relish the idea of cutting through the tough plastic of the toy, so I did the other thing.
Stasis Tube Body
A transparent pill bottle with the labels removed and cleaned with warm soap and water. I drilled a hole to accommodate the top piece's protrusion.
Mounting Hardware
The bottom piece is the cap from a juice bottle. I removed most of the threading to improve the fit of the pill bottle.
 |
| Initial test fit prior to painting. |
Mounting Hardware Internal Platform
I glued a bottle cap inside the juice bottle cap to cover up some markings. It also raises up any figures placed inside the tube.
Display Panel
From a set of Fluorescent Scifi Screens from Warsenal. I purchased these awhile back to add exactly this kind of detail to my terrain projects. Not sure about the color, though. I'll try the blue and green options before gluing anything down.
Various Mounting Hardware Details
The towers are plastic clips of some kind. I don't recall the source. The round piece that I used to mount the display panel is a salvaged printer part. The square details were recovered from a nonfunctional keyboard. Finally, the parts glued inside to add some internal detail are the same as the ones I used as arms for the "Astromecha" robot. I may add some wires to simulate hoses running between them at some point.
 |
| Test fit after black spray coat. |
Painting
The top cap and mounting hardware were spray painted black and then metallic. I then applied a dark wash, wiping off any excess with a sponge.
Assembly
The spinning top and pill bottle fit together perfectly. It's almost snug enough to not require glue. Almost. The fit of the display panel is also good, but it will also be glued in place once I settle on the color. The pill bottle sits evenly in the juice cap and can be easily removed so that a miniature can be placed inside.
I'm content with the results. but I still think I can do better. It's a more convincing terrain piece than the originals. It's missing something, though. I'll have to give it some thought and make another attempt later.
The top cap and mounting hardware were spray painted black and then metallic. I then applied a dark wash, wiping off any excess with a sponge.
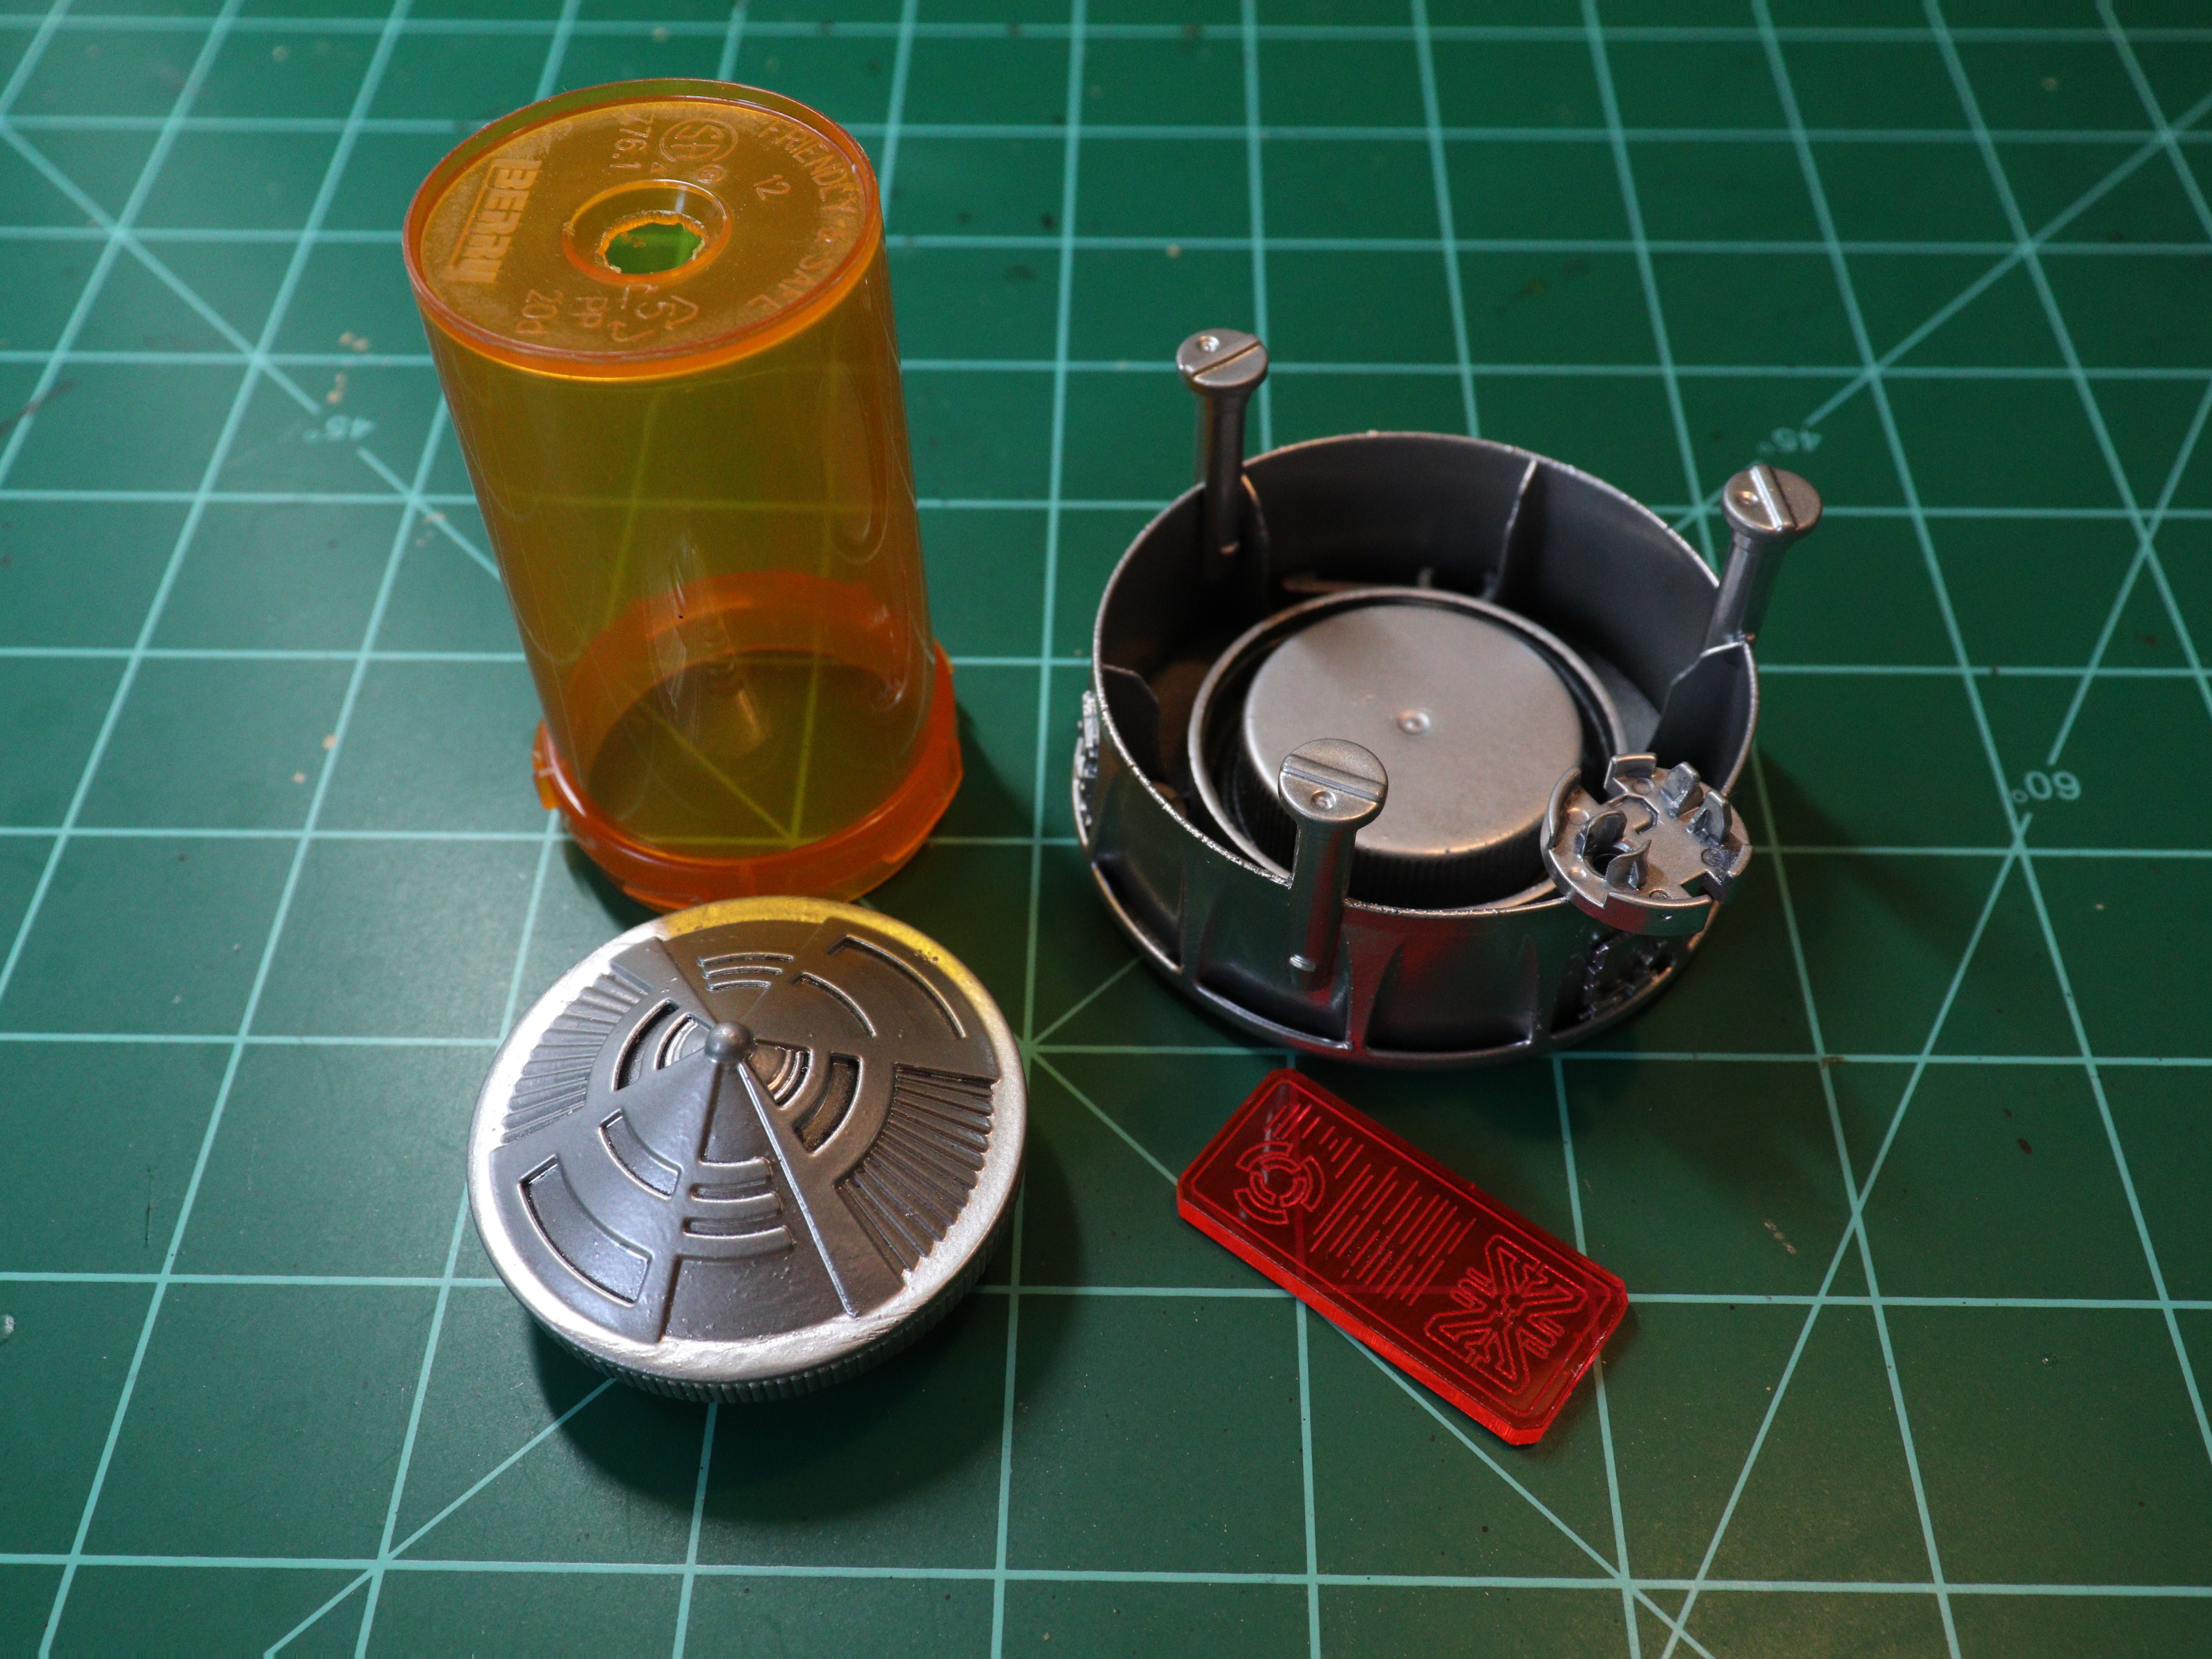 |
| Major components after painting and prior to assembly. |
Assembly
The spinning top and pill bottle fit together perfectly. It's almost snug enough to not require glue. Almost. The fit of the display panel is also good, but it will also be glued in place once I settle on the color. The pill bottle sits evenly in the juice cap and can be easily removed so that a miniature can be placed inside.
 |
| Tin Man Miniatures Princess Livia recovering from a beach trip. |
I'm content with the results. but I still think I can do better. It's a more convincing terrain piece than the originals. It's missing something, though. I'll have to give it some thought and make another attempt later.
This is a really ingenious use of materials. I wonder how it would look with the display panel mounted sideways instead of upright. I'd be tempted to put some numbering (decals maybe?) on the outside of the juicebox lid wall, or maybe some warning signage. Also stringing a "power cable" from the base to the top might sell it a bit more, though I'm not sure it needs it.
ReplyDeleteThanks for your suggestions! Turning the display would also turn the lines representing text etched on it, but there might be something else I could use in its place. Lettering and cables would definitely make the piece more convincing. I'm on the fence about continuing or taking what I've learned and making a fresh attempt. Right now, I'm considering different approaches and mulling it over.
Delete