Monday, December 27, 2021

Warsenal Garbage Dumpsters TR-MDF-INF003-2

There's a place on the tabletop for mundane terrain - street lamps, public transportation stops, cargo containers, etc. Not everything has to be an example of exotic technology or arcane processes. And there has to be someplace to put the trash.

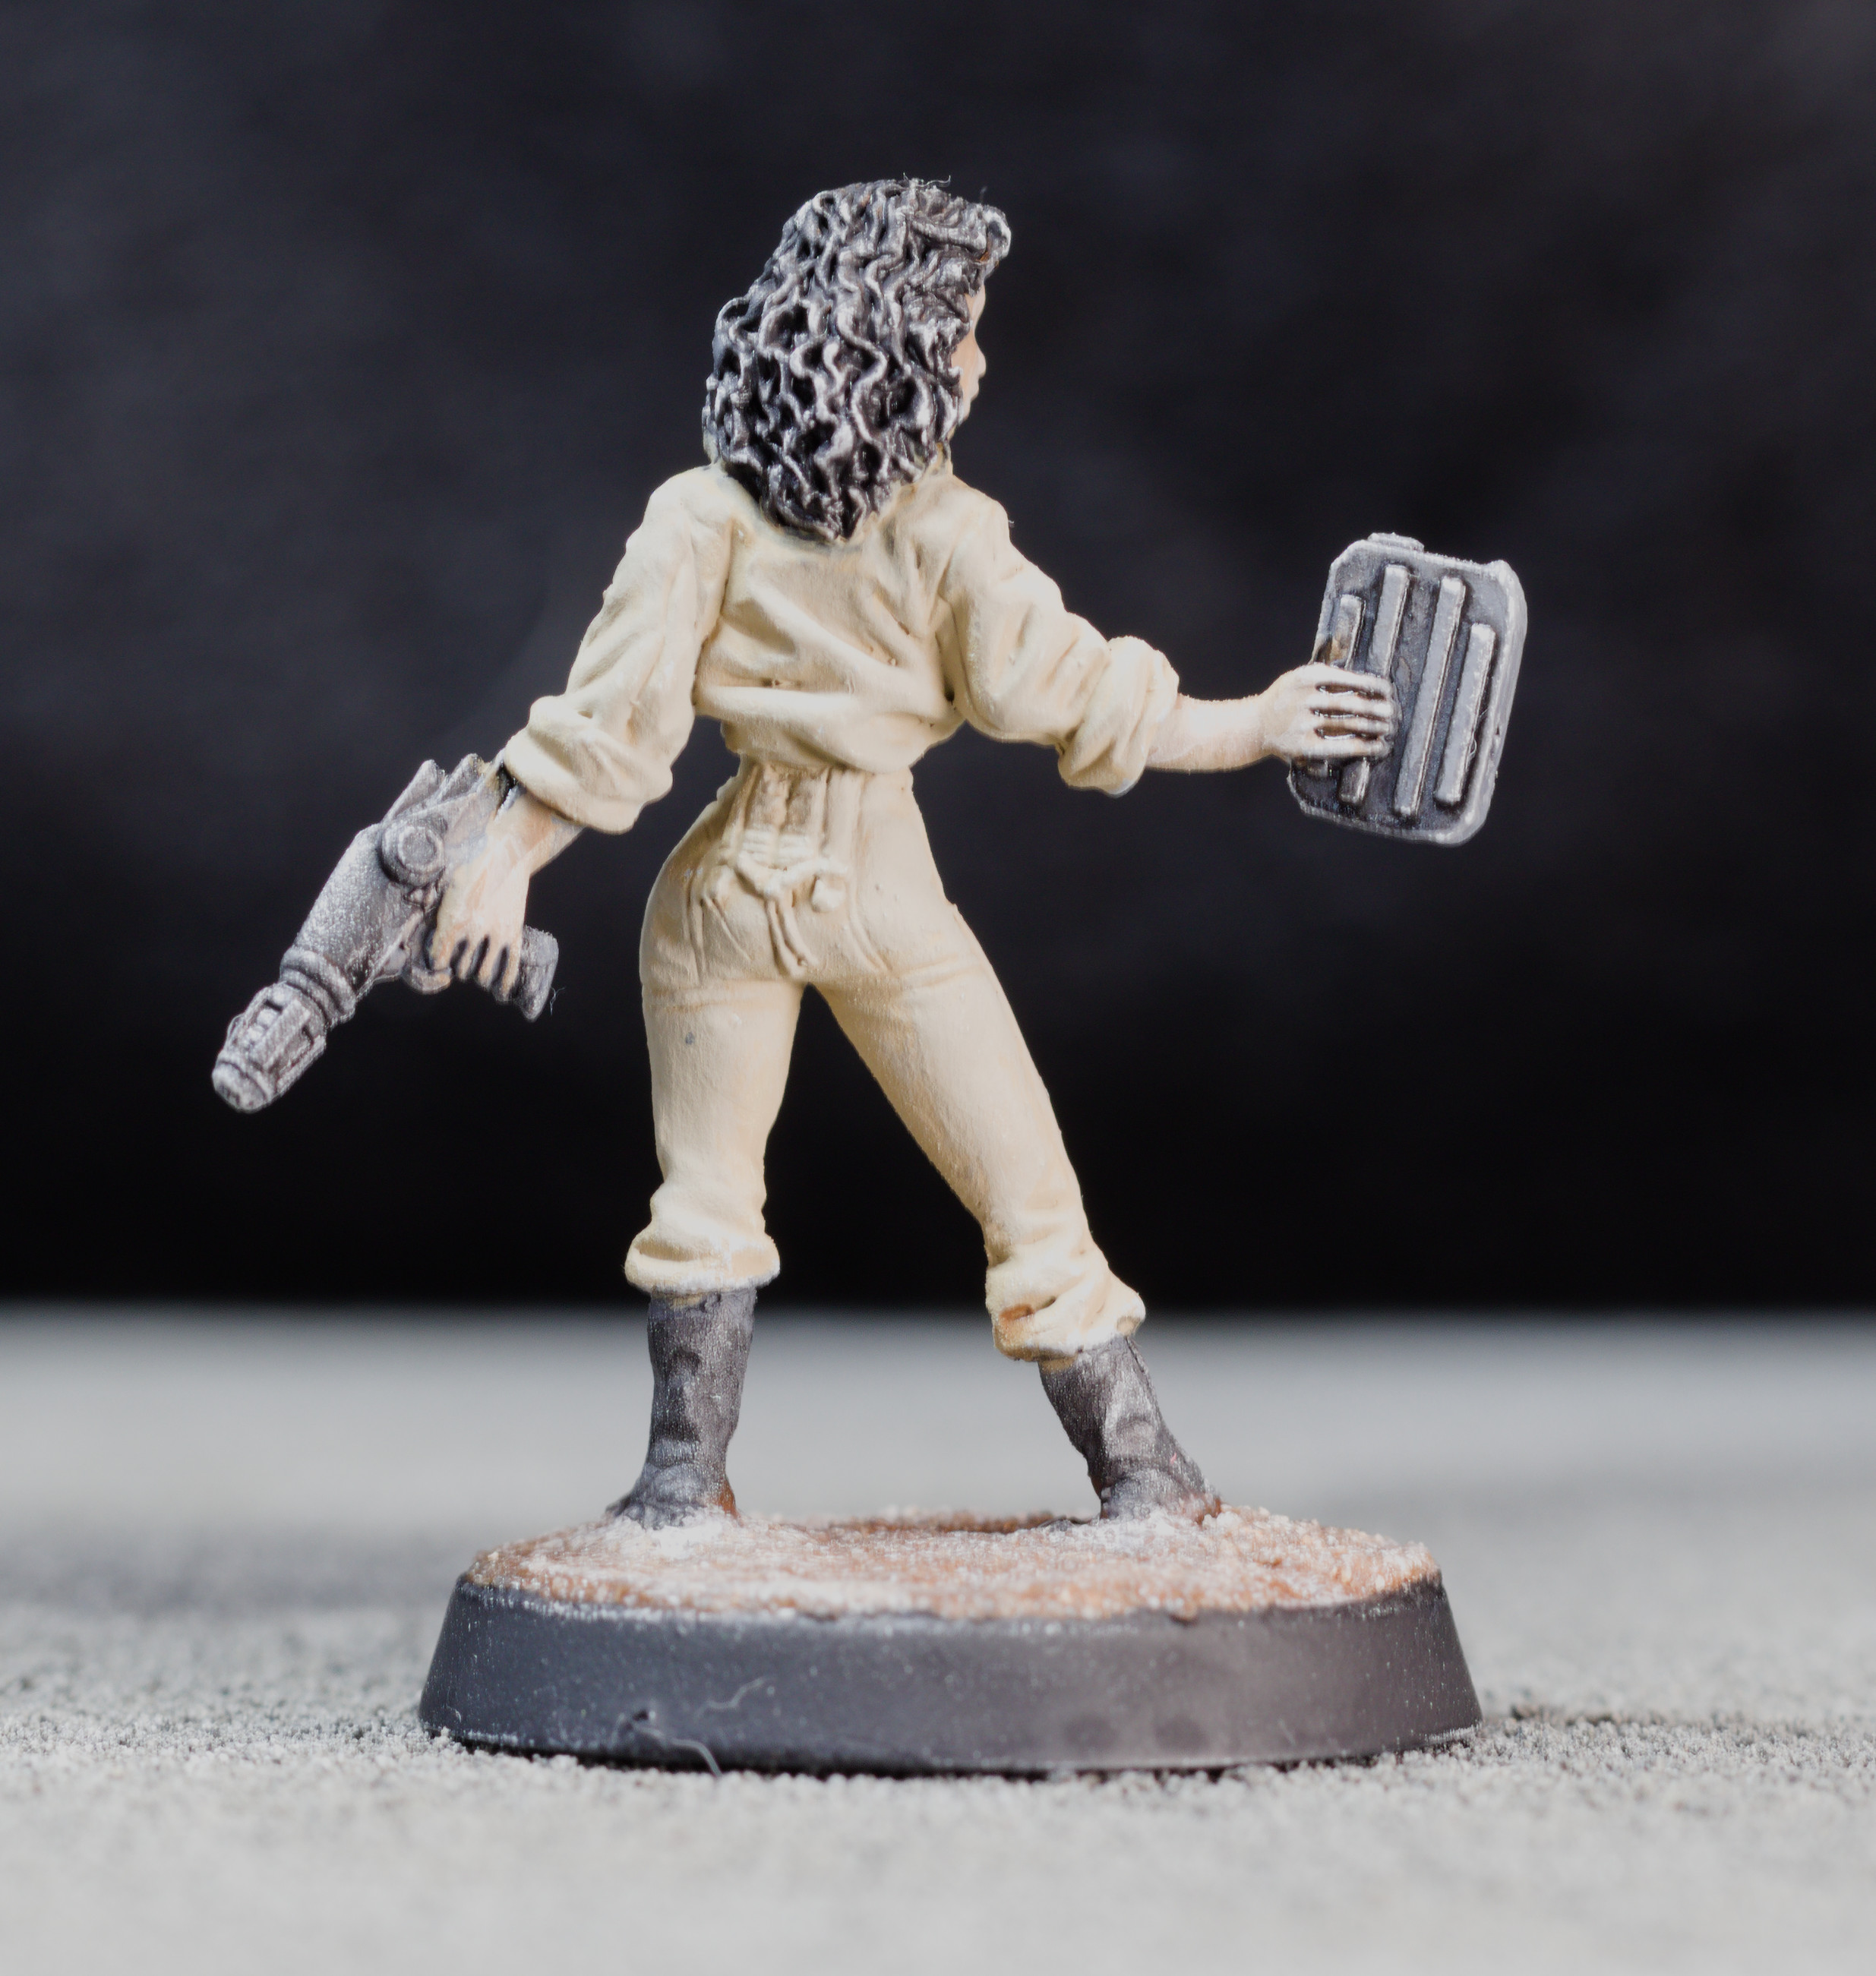
So that's where Lin (portrayed by Rosie) found those grenades.

These are Warsenal's Garage Dumpsters. They are sold two to a pack. Most of the pieces are MDF except for the acrylic rod that works with the lids as a hinge. There are plastic and resin pieces available at comparable prices, but lids that open and the durability of MDF appealed to me.

Preparation
I would recommend running a blade around the parts before punching them out of the MDF sheets. A couple parts refused to separate cleanly and needed some fixing up.

Assembly
There are no assembly instructions packaged with this product. The product page includes a link to a YouTube video, but there are no printable instructions. I recommend that anyone putting one of these together for the first time watch the entire video while dry fitting the parts to see how they fit together.

I used Tacky Glue, but any wood or PVA glue should provide a solid bond. Some of the parts need convincing to fit together and super glue may bond too quickly.

On the topic of convincing the parts to fit, I had some issues with the first one I built. The lids don't close all the way since they aren't aligned properly. That's not a problem with the product, but with me not making sure that everything was lined up before the glue dried. I exercised more care with the second one and it seems fine. The lid issue isn't a huge problem - there are plenty of these things with damaged lids and hinges out in the real world.

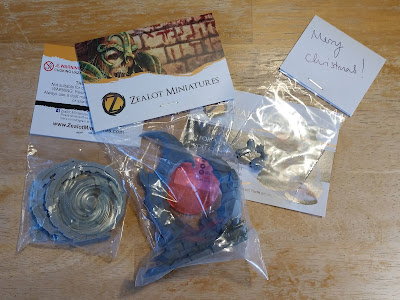
Warsenal including a thank you card with every order is a nice touch.

Paint Scheme
I was going for a worn, but not decaying appearance. Dust and grime, but not much rust. Green seems to be the default color for dumpsters around here. The lids on these things are often plastic and tend to discolor in the sun, so I took that into account.

Spray Paint - First Coat
Krylon Fusion All-In-One Matte Black. This is a paint and prime product. It doesn't have the coverage or finish of Krylon Camouflage Ultra-Flat Black. Unfortunately, I ran out of that stuff and haven't been able to restock.

Spray Paint - Second Coat
Krylon Camouflage Ultra-Flat Brown. I sprayed this at an angle for a zenithal effect.

Spray Paint - Third Coat
I removed the lids and painted the dumpster bodies with Krylon Camouflage Ultra-Flat Olive. Again, this was sprayed to leave some of the previous coats showing in the recesses for a shadowing/weathering effect.

Wash Coats
I reassembled the pieces and hit them with two coats of washes - black and brown. This resulted in a couple of nicely weathered pieces, but they turned out way too dark.

Dry Brush - First Layer
FolkArt 527 Forest Moss. This is a light olive color. I applied it heavily on the edges and flat surfaces of the dumpster bodies while leaving the weathering intact.

Dry Brush - Second Layer
FolkArt 480 Titanium White. A very light gray. Hitting the edges resulted in a dusty appearance that is not out of place here. I've seen enough dumpsters on enough construction sites to know that these things get coated in a layer of light colored grime.

A representation of the years 2020 and 2021.

The interior is just large enough to fit a miniature on a 25mm base. Note that a base that is not exactly 25mm may not work - I tried a couple that are just a little larger and they are a tight squeeze. There might be enough room for a couple of miniatures on 25mm bases, depending on the poses and weapons, but I couldn't find a pair that worked. A 30mm or 35mm base is right out. Of course, the interiors could be filled with setting-appropriate trash or the lids could just be left closed.

I like these pieces. The assembly was a little fiddly, but putting them together and painting them was a fun project to spread over a few weeknights. Their appearance fits in a modern, cyberpunk, or near future setting.

Wednesday, December 22, 2021

Black Friday/Cyber Monday Haul 2021 - Part 2

Here's the last couple of tabletop gaming related items that a combination of crass commercialism and lack of self-discipline put into my possession. Since I've done a fair job of getting things done lately, I don't feel too guilty about adding to the project pile. We will see how long they sit around until I get to them.

From left to right - Magic Portal, Demon Gate, 

Zealot Miniatures

This is a company in the United Kingdom that offers a variety of resin miniatures, terrain pieces, and conversion bits for fantasy and sci-fi settings. My order was processed quickly and arrived as soon as could be expected given the state of international shipping. This order is my first purchase from them.

Magic Portal (Blue)
I've had my eye on this one for awhile due to its resemblance to the means of interstellar transport of a popular sci-fi franchise. It also wouldn't look out of place in a fantasy setting. The acrylic insert is also available in red.

Demon Gate (Red)
A more ominous looking alternative to the above terrain. The appearance is more fantastic than the Magic Portal, but it could work in a sci-fi game as an alien construct. A blue insert is also available.

As the names suggest, these pieces represent generators for space-time distortions that can be wandered through to end up at a far away destination. Both are part of Zealot Miniatures' Dungeon Scenery line. Each is made of resin with a clear acrylic insert representing the distortion. The resin body comes in multiple parts, requiring assembly and painting.

Zealot Miniatures also included some Christmas freebies with my order. These are tiny resin pieces resembling a stocking and Christmas decorations. I'll put these aside until I get around to a Christmas themed board.

Tuesday, December 21, 2021

Atmospheric Water Condenser Scatter Terrain

The Atmospheric Water Condenser is a device for extracting drinkable water from air. The harvested water can be stored in an adjacent collection tank or underground cistern. Piping the water directly to a hydroponic farm or into a settlement's infrastructure for immediate use is also common. Larger models are available for harvesting water in the quantities required for industrial applications, but arrays of standard models are also used for this purpose. Similar technology is commonly employed in agricultural projects on backwater worlds in a far away galaxy.

- Kessler's Upcycling Sales Catalog

I had no idea of what this piece would represent while building it. The process started when I noticed how well some of the recovered printer and computer parts fitted together. Things snowballed from there. I posted a WIP photo on the Trash Bash International Facebook group to get some feedback. Thanks to Gary Golding for inspiring the name!

Rosie giving another bit of tech the once over.

Assembly was straightforward - I just dug around my boxes of greeblies and fit things together where they looked good. Most of the parts are joined with Gorilla Super Glue. The main tower needed a more robust solution to convince it to stay put. Fortunately, all my scavenging has resulted in a collection of suitable screws.

First Spray Coat
Krylon Fusion All-In-One Matte Black sprayed evenly over the piece.

Second Spray Coat
Krylon Camouflage Ultra-Flat Khaki sprayed at a downward angle to achieve a zenithal effect with the black.

Wash Coat
I mixed a black wash and applied it to all surfaces, taking care to get it into the recesses. The excess was wiped off to prevent pooling.

First Dry Brush Coat
FolkArt 420 Linen. This was a heavy dry brushing to get a weathered, been-out-in-the-blazing-sun-too-long appearance.

Second Dry Brush Coat
FolkArt 480 Titanium White. I brushed on just enough to achieve some highlighting.

Sometimes glue just isn't enough for the job.

This piece will likely see the most use as scatter terrain in sci-fi games. I could use it as an objective marker. In that case, its stated function may change to a sensor array, communications relay, terraforming widget, or other technobabble gadget depending on the scenario.

Monday, December 20, 2021

The Last Call - Campaign Start and Turn #1 Pre-Battle

In the previous post of this series, I described generating a crew and their stuff. Here I kick off the campaign and take all the steps just short of my crew's first battle. I get the feeling that a battle report will take up a post by itself.

I've settled on the following names and miniatures the crew of The Last Call. The Background, Motivation, and Class previously generated for each crew member are also listed.

Captain Wilhelmina "Mina" Derring
Bombshell Miniatures 36003 Wanda Whitestar
Industrial World, Adventure, Scoundrel

William "Bill" Baxter
Reaper Chronoscope 50028 Kirby McDowell, Space Privateer
Drifter, Glory, Scavenger

Roxanna "Rocky" Gaussi
Bombshell Miniatures Bug Spray
Wasteland Nomads, Discovery, Mercenary

Yelena Waverly
Bombshell Miniatures 36020 Science Officer Helen Salinger
Dystopian City, Technology, Trader

Freyja Niobe
Reaper Chronoscope 50132 Jessica Blaze, Smuggler
Mining Colony, Wealth, Negotiator

Rosalina "Lin" Johansen
Reaper Chronoscope 50016 Rosie, Chronotechnician
High-Tech Colony, Survival, Technician

The rulebook, miniatures, and dice. Now all I need is the time to set up a board and play.

Last Call Campaign Start

With a crew ready to go, I just had to decide on which options to take going in. These decisions would influence how things would be handled from here on.

Story Track - No. This would have introduced mechanics for an overall story arc to the campaign. I decided to keep things simple for my introductory campaign. There would still be narrative elements, but no overarching plot in the background.

Victory Condition - Play 50 campaign turns. There are a variety of Victory Conditions available in the rules. This seemed the most straightforward.

Difficulty Mode - Normal. This indicates no changes to the rules. There are more challenging modes in addition to an Easy mode.

Story Points - 8 total. Since this is my first campaign, the rules state that I roll two D6 and keep the better result to determine the number of story points I have at the start. A good thing, since my first die roll was a "1" and a "6" came up on the second die. This combined with the 2 story points from crew generation for a total of 8.

I noted the options available in "The Stars of the Story" section. These are rules that can be used to keep the campaign going in the event of a disastrous set of events. Each allows the game to be fudged a little to prevent an unrecoverable result. However, each option can only be used once during a campaign.


Turn 1 Start

Travel Steps

It is assumed that a campaign begins with the crew already on a planet. Thus, most of Travel and the first two steps of New World Arrival are skipped. These rules will come up should I choose to go elsewhere.

Licensing Requirements - I rolled a "2" on a D6. This world doesn't require a Freelancer License for my crew to operate.

World Traits - "01" on percentile dice. "Haze" - visibility is reduced to 1D6+8" during battle. Why a planet has a particular trait is left to the imagination of the player. I decided to make it the home of Mina - an industrial world. The haze is the result of smog from various pollutants in the atmosphere. I named the world the Pandora Innovation Zone.

A fist full of credits. A small fist.

World Steps

Upkeep - 1 credit. This represents the crew getting paid.

Ship Debt - With a fair amount of starting funds, I chose to knock the ship debt down by half by spending 11 credits. This put the new ship debt total at 11 credits and left 12 credits remaining in the war chest.

Normally, things like repairs to the ship and medical attention for the crew would come up at this stage. Fortunately, the ship and crew are in good shape - so far!

Crew Tasks - I already had a Patron for work and didn't a have Rival to worry about. The temptation to just have everyone Train to get some XP coming in was strong, but I wanted to try my luck rolling dice and checking tables.
  • Mina, Rocky, and Freyja hit the gun range and gym. Each received 1 XP.
  • Yelena and Lin wanted to see if they could Trade for a deal or two at the local markets. I rolled percentile dice for the results of their efforts. "94" indicated that Yelena obtained 2 Stim-Packs and 2 Med-Patches. "59" revealed that Lin turned up 3 grenades - 2 Frakk and 1 Dazzle.
  • Bill went out to Explore the town. Rolled "03" - he ran across a deal he couldn't pass up, represented by a roll on the Trade Table. That roll was "89" - a roll on the Loot Table, but the item received would need Repair. A series of rolls resulted in Bill striding back to The Last Call with a "gently used" Plasma Rifle.

Job Offers - It was time to determine the identity of the Patron and what kind of work they had in mind. A series of rolls revealed that the Patron was the Local Government, was offering 2 credits in Danger Pay, and was willing to wait for awhile - the job could be done in the current turn or in the following two campaign turns. Checking for Benefits, Hazards, and Conditions turned out some bad news - this was a Dangerous Job. The enemy force would be increased by +1.

Assign Equipment - I distributed what was available to the crew. I didn't have as much firepower or protective equipment as I would've liked, but the extra stuff that turned up during Crew Tasks would come in handy. Too bad the Plasma Rifle would need some time and attention before it could be used.
  • Mina - Machine Pistol, Glare Sword, Frag Vest, Boosted Leg
  • Bill - Hand Laser, Frakk Grenade
  • Rocky - Auto Rifle
  • Lin - Hand Laser, Brutal Melee Weapon (represented by the wrench on the miniature)
  • Freyja - Machine Pistol
  • Yelena - Beam Pistol, Frakk Grenade

Resolve Any Rumors - I had a single Rumor from crew generation, but my roll of "2" was a little too high for anything to come of it. The Rumor would remain and be added to any others that might come up.


Choose Your Battle

With no Rivals (yet) to get the jump on my crew, I had a free hand in deciding what to do. I could always do an Opportunity mission, representing whatever odd job that came my way. In the end, I decided to go ahead and carry out the job for the Local Government. Sure, there was still plenty of time to get it done, but I wanted to get it out of the way.


Readying For Battle

Technically, this is part of the Battle stage, but I got excited. Besides, this way I'll know ahead of time what I need to set up the table.

Deployment Conditions - "89" rolled on percentile dice. "Caught Off Guard" - the crew would all be acting in the Slow Actions phase of Round 1! Argh!

Notable Sights - "81" on percentile dice. "Peculiar Item" - the item is placed 2D6+2" in a random direction from table center. Acquiring it involves moving a crew miniature into contact and foregoing any other actions that round. Getting it would be worth +2 XP.

Patron Mission Objectives - "3" on a D10. The Last Call crew had been hired to Eliminate a target.

Determine the Enemy - A series of die rolls revealed that the crew would be fighting 8 Large Bugs. I'm not sure why the Local Government wanted one in particular knocked off, but this crew wasn't getting paid to ask questions. I'll come up with a narrative reason why by the time I get the chance to sit down and play it out. Any suggestions would be welcome!


Next time in this series - The Last Call crew guns down Large Bugs in the smog!

Wednesday, December 15, 2021

Black Friday/Cyber Monday Haul 2021 - Part 1

As with previous years (2019 Part 1, 2019 Part 2, 2020) here's the first batch of tabletop gaming stuff I couldn't quite resist getting at sale prices. I'll present the rest when it shows up.

I need to make sure I have enough glue.

DTRPG

Both of these products were purchased in .pdf form.

Five Parsecs From Home Trailblazers Toolkit
An expansion for Five Parsecs From Home, 3rd Edition. It adds all kinds of options for running a campaign or battle. I've only flipped through it, but I can see the appeal for a player who already has a campaign or three under their belt. For me, still starting out, it has limited utility at this time. I'm looking forward to exploring these options a campaign or two down the road.

Desert Moon of Karth
A setting for the Mothership RPG. It's a desert world that pulls inspiration from a variety of sources. Mostly sources that take place on desert worlds. The western vibe is strong and mixes well with Mothership's quirky feel. I'll be waiting for the Mothership boxed set to come out before running it, but a setting book like this is a handy source for ideas in any sci-fi game.

Ah, the smell of freshly lasered MDF. Smells like future terrain projects.

Warsenal

Garbage Dumpsters TR-MDF-INF003-2
This is a pair of identical terrain pieces. They are mostly MDF with a plastic rod to work with the hinges on the lids. Although other companies offer similar terrain pieces in plastic, I wanted something more durable and the price was competitive. Best of all, since the lids open there is enough space for a figure to stand inside.

Comanche Tower Lamps TR-MDF-TWR-LMP
Three street lamps for the urban terrain tiles I made awhile ago.

REM Shack TR-MDF-TER-REM-SHK
I got this for its potential as a multi-scale piece. At 28mm, it can serve as a small workshop. At 15mm, it can represent a garage for servicing a small vehicle.


Now I just need to finish some of my current projects to make room to work on these. Another shipment is on the way from further off - I'll post that stuff when it arrives.

Monday, December 13, 2021

Five Parsecs From Home Turn 0

I finally have barely enough painted miniatures and terrain for my first Five Parsecs From Home campaign. More of both will be needed later, so I'm continuing to get more ready for the table. The biggest hurdle remaining is also the hardest - time. I got the work of generating the start of the campaign done this past weekend, so I'm sharing how that went in this post.

I'd like to say that this made a significant dent in my pile of shame, but...

As mentioned in a previous post, Five Parsecs From Home is a solo miniatures game built around campaign play. The player runs a spaceship crew for hire. They do jobs for employers who prefer to keep their dirty work at arms length. Violence happens, the interests of the employer is advanced, and the crew gets paid - in theory. Things have a way of going off the rails.

Preparing a new campaign involves generating a crew and the resources they have at their disposal. It mostly involves rolling dice, checking tables, and recording the results. Those results only offer the basics. Providing more narrative details is left to the player.


The Crew

The standard crew size is six characters. There are rules for starting with a smaller crew that I'm looking forward to trying out sometime. But this is my first Five Parsecs From Home campaign, so I decided to stick with a standard crew.

I used the "first timer" method. All six characters are Human. As with many rules systems, Humans have middle of the road statistics and minimal special rules. An all Human crew simplifies both character creation and running them during play. It also means that I don't have to find miniatures to represent an unusual character.

Below are the results from the Background, Motivation, and Class tables. The numbers are the die rolls using percentile dice. The names of each result are paraphrased to keep them relatively short. The rules effects of each result are also noted.

Background Table Results:
87 Industrial World - +1 Gear
33 Drifter - +1 Gear
96 Wasteland Nomads - +1 Reactions, +1 Low-tech Weapon
07 Dystopian City - +1 Speed
16 Mining Colony - +1 Toughness
02 Peaceful, High-Tech Colony - +1 Savvy, +1D6 credits

Motivation Table Results:
36 Adventure - +1D6 credits, +1 Low-tech Weapon
19 Glory - +1 Combat Skill, +1 Military Weapon
53 Discovery - +1 Savvy, +1 Gear
48 Technology - +1 Savvy, +1 Gadget
06 Wealth - +1D6 credits
24 Survival - +1 Toughness

Class Table Results:
66 Scoundrel - +1 Speed
98 Scavenger - 1 Rumor, +1 High-tech Weapon
25 Mercenary - +1 Combat Skill, +1 Military Weapon
48 Trader - +2D6 credits
44 Negotiator - Patron, +1 story point
09 Technician - +1 Savvy, +1 Gear

I put the results together and assigned miniatures as follows:
Industrial World, Adventure, Scoundrel - Wanda Whitestar
Drifter, Glory, Scavenger - Kirby McDowell
Wasteland Nomads, Discovery, Mercenary - Bug Spray
Dystopian City, Technology, Trader - Helen Salinger
Mining Colony, Wealth, Negotiator - Jessica Blaze
High-Tech Colony, Survival, Technician - Rosie

I'll come up with names later.


Their Stuff

Character generation provided the following starting equipment:
2 Military Weapons
1 High-Tech Weapon
2 Low-Tech Weapons
4 Gear
1 Gadget
4D6 credits

In addition, all crews start with the following:
3 Military Weapons
3 Low-Tech Weapons
1 Gear
1 Gadget
1 credit per crew member

Finally, the rules provide a benefit for characters who rolled a Savvy increase. Each time that occurs, the player can take a High-Tech Weapon instead of a Military Weapon. With three characters rolling Savvy increases, I opted to substitute three High-Tech Weapons for Military Weapons.

Below are the results from each equipment table. As before, the numbers are the percentile dice rolls.

Military Weapons
70 Auto Rifle - a heavy rifle with a drum magazine used for fire support.
76 Rattle Gun - a belt-fed machine gun of obsolete or dubious design.

High-Tech Weapons
17 Hand Laser - a directed energy weapon in the form of a pistol.
98 Glare Sword - a glowing energy blade projected from a shiny handle.
41 Beam Pistol - a military grade sidearm.
25 Hand Laser - more handheld pew-pew.

Low-Tech Weapons
36 Machine Pistol - a submachine gun or PDW.
99 Brutal Melee Weapon - an unsubtle approach to melee combat.
06 Handgun - a conventional pistol.
17 Scrap Pistol - a conventional pistol bashed together from the parts that happened to be around.
38 Machine Pistol - see above.

Gear
07 Beam Light - gun mod that improves visibility.
47 Frag Vest - armor for a single character.
90 Sector Permit - handy on planets that require a license to operate.
73 Med-patch - single-use item that reduces the recovery time for an injured character.
38 Fake ID - handy for acquiring legal documentation via less than legal methods.

Gadget
05 Analyzer - provides a bonus when looking for certain information.
18 Boosted Leg - cybernetic implant that improves movement for a single character.

Credits
Rolled 18 on 4D6 and added 6 for a total of 24 credits.

"You shorted me five credits." "Uh, taxes?" *Sounds of violence.*

The Ship

The crew's spaceship is handled abstractly. The rule book mentions that a player could have a model for the ship that might appear in a battle, but the ship isn't the focus of the game. The main thrust of the game is the crew and the trouble that they get into.

That said, the ship does have an effect on the game. The debt that the crew owes on the ship - a nod to games like Traveller - provides a motivation and complication. How the ship is fitted can provide benefits for the crew. Finally, an equipment that the crew isn't carrying is assumed to be stored aboard the ship.

I rolled a 38, resulting in a retired scout ship with 25 Hull and the fuel-efficient trait. A rolled a 2 for debt, resulting in 22 credits owed.


Flavor Details

These tables are optional and don't effect gameplay, but add a little extra inspiration for the narrative behind the campaign. Die rolls used percentile dice.

55 The crew met at a bar.

62 "Somewhat honorable bandits" - I choose to interpret this as a collection of lost souls with nowhere better to be and no better prospects that as independent troubleshooters for hire.


I've got some ideas to flesh out the bare bones generated by these results. Names for the crew and more details for their backgrounds. The fact that they all met at a bar has already inspired the name of the ship: The Last Call.

Friday, November 26, 2021

Bombshell Miniatures 36020 Science Officer Helen Salinger

Here's another 32mm pewter figure from Bombshell Miniatures. I'm pretty sure that Science Officer Helen Salinger is inspired by the lead character of a certain sci-fi franchise featuring hive creatures with parasitic life cycles and two sets of toothy smiles each. Note that I didn't follow up on the idea of a homage to that character when coming up with a paint scheme.

"Sign here."

There's more detail than I expected at first glance, particularly on the suit. The figure should fit into a variety of sci-fi settings. Although the pistol does have a "ray gun" appearance.

I used a mix of techniques on this figure. Some areas were painted in a darker base color with brushed on highlights. Others got my more usual approach of a lighter color darkened with a coat of wash. 

"I shouldn't need to ask you twice."

Priming
Zenithal spray priming using Tamiya Surface Primer L in Gray and White.

Skin Base Color
Reaper 09221 Olive Skin. I wanted to experiment with this color.

Skin Highlight Color
A mix of Reaper 09221 Olive Skin and Reaper 09047 Fair Skin.

Shirt Base Color
Reaper 09183 Cloud Pink. A bright color chosen to stand out from the rest of the scheme.

Shirt Highlight Color
A mix of Reaper 09183 Cloud Pink and Reaper 09281 Brains Pink.


Flight Suit Base Color
A mix of Reaper 09122 Terran Khaki and Reaper 09129 Faded Khaki. Terran Khaki resembles brand new khaki cloth while Faded Khaki is a darker color.

Flight Suit Highlight Color
Reaper 09122 Terran Khaki.

Hair Base Color
Reaper 09088 Stormy Grey.

Hair Wash Color
Diluted Citadel Colour Chaos Black allowed to flow into the recesses and darken the overall tone.

Accessories Base Color
Reaper 09088 Stormy Grey.

Accessories Highlight Color
Citadel Colour Codex Grey. Also applied to the screen of the tablet computer.

Accessories Wash Colors
Secret Weapon W001 Soft Body Black Wash. Diluted Citadel Colour Chaos Black was also applied to the boots to darken them further.


Overall, I think the combination of approaches worked well on this figure. Some of the wash flowed out of the areas they were applied to. I was able to correct this, but I might choose one method or the other for specific projects in the future.

Wednesday, November 24, 2021

Bombshell Miniatures 36003 Wanda Whitestar

This 32mm scale pewter model is from Bombshell Miniatures and is part of their Counterblast line. Wanda Whitestar would work in a variety of sci-fi settings, but the retro hair style suggests that space opera might be the best fit.


With retro in mind, I decided on a paint scheme influenced by a piece of 1980s sci-fi. Specifically, the Buck Rogers in the 25th Century television series. Many of the costumes worn by Erin Gray as Colonel Wilma Deering were shiny, brightly colored, and form fitting. I picked the pink one as my inspiration.

Preparation
There was no discernible flash or mold lines. I glued the figure to a 30mm round plastic base, being careful to leave a little room between the base surface and the miniature's feet. This space would later be filled by the sand I used for texturing the base.

Zenithal Spray Priming
Tamiya Surface Primer L in Gray and White. This was less for the zenithal priming to show through and more so that I could have a guide for shading later on.

Skin Base Color Coat
A mix of Reaper 09047 Fair Skin and Reaper 09233 Bright Skin. Bright Skin resembles no natural human skin tone I've ever encountered. It works well for non-human flesh, though. In this case, I mixed it with Fair Skin to produce a slightly darker color.

Skin Highlight
Reaper 09047 Fair Skin.

Hair Base Color Coat
Mix of Reaper 09122 Terrain Khaki and Reaper 09139 Faded Khaki. This produces a color that works for dark blonde hair or light tan clothing.

Hair Highlight
Reaper 09257 Blond Hair.


Body Suit Base Color Coat
Reaper 09163 Cloud Pink. This is a medium tone pink.

Body Suit Highlight
Mix of Reaper 09281 Brains Pink and Reaper 09163 Cloud Pink. This produced a cotton candy pink.

Body Suit Wash Coat
The results of the base and highlight were brighter than I liked and the recessed details weren't as clearly visible as I wanted. I applied a light coat of Secret Weapon W025 Just Red Wash to darken down the color and bring out the details.

Jacket and Accessories Base Color Coat
Reaper 09088 Stormy Grey.

Jacket and Accessories Highlight
Citadel Colour Codex Grey.

Jacket and Accessories Wash Coats
Diluted Citadel Colour Chaos Black on the boots, gloves, and weapons to create a subtle difference in shade between them and the jacket. I followed up with a coat of Secret Weapon W001 Soft Body Black over the jacket and areas previously coated with Chaos Black.

Basing
Mix of sand, tacky glue, brown craft paint, and water in the recessed portion of the base. I painted the edge of the base with Citadel Colour Chaos Black.


Overall, I'm happy with how this one turned out. Although I am still debating the merits of hitting the hair and skin with a wash. It would bring out more of the details, but I don't want to change the colors as they are now.

Wednesday, November 17, 2021

Reaper Bones Nova Corp

These are another backer reward from the first Reaper Bones Kickstarter. I was supposed to receive one of each miniature, for a total of five. I'm not sure how I ended up with a total of nine, but I understand that this happened to many backers.

Expendable, not all that bright, and destined to be shot at.

SKU, name, and quantity of each miniature:
  • 80011 Nova Corp: Guard x2
  • 80012 Nova Corp: Soldier x2
  • 80013 Nova Corp: Female x1
  • 80014 Garvin Markus, Nova Corp Hero x2
  • 80015 Nova Corp: Rifleman x2
The Guard, Soldier, Female, and Rifleman are all available from Reaper in sets of three. Garvin Markus comes all by himself. The sculpts are also available in metal as singles as part of the Chronoscope line.

The Nova Corp represents some kinda cyberpunk megacorp security force. I painted them up for Five Parsecs From Home as corporate security, planetary militia, local police, etc. They will also be handy as opposition in near-future role playing games.

These are intended to be used as a group against "hero" figures. Individually painting every detail seemed to be overkill. I used quick and dirty methods to get them ready for the table - lots of dry brushing and washes.

Priming and Basing
I fell back on my usual approach for Bones plastic for the most part. Reaper 09079 Deep Amethyst was mixed with FolkArt Glass & Tile Medium for priming. I didn't bother with adding sand of other material to the bases. Simply gluing the integral bases to previously spray primed fender washers and painting them later would be enough.

First Dry Brush Layer
Reaper 09057 Ashen Blue. I left much more paint on the brush than I normally would when dry brushing. This resulted in a heavy layer while leaving some Deep Amethyst still showing in the recesses.

Second Dry Brush Layer
Reaper 09057 Ashen Blue mixed with Citadel Colour Skull White. This used standard dry brushing techniques to produce a highlight layer aligned with how light would hit the figures from above.

Weapons, Backpacks, and Bases
Citadel Colour Codex Grey. Used to provide some variation on the otherwise all blue color scheme.

Visor
Reaper 09079 Deep Amethyst. The previous dry brush layers covered up the visors, so I picked them out with a darker blue.

Flesh and Hair
I started by coating the exposed heads with Reaper 09110 Oiled Leather. One figure's hair was painted Reaper 09074 Palomino Gold while the other was left as is. I mixed the remaining Oiled Leather, Palomino Gold, and a drop of Citadel Colour Skull White to produce a pale skin tone for the figure I left with brown hair.

Wash
I used a mix of blue-gray wash I had left over from a previous project with a few drops of Reaper 09074 Deep Amethyst to tie it in better with the other colors. This mix was simply brushed over all surfaces and left to dry.

Base Detail Layers
Citadel Colour Chaos Black diluted with water brushed over the bases. The intent was to produce a dirty, oily appearance and fill in the recessed details. I might have gone overboard, but I don't feel that it worth the effort to go back and fix. This was a quick and dirty project, after all.

The paint job on these figures won't win any awards - I didn't post any close up photos for a reason - but that wasn't the goal. Their job is to get shot at by better painted miniatures. They'll be on the table exactly as long as the dice will allow.

Friday, November 12, 2021

Reaper Chronoscope 50028 Kirby McDowell, Space Privateer

Another metal miniature from Reaper's Chronoscope line. Kirby McDowell has the look of a 1980s action movie star. He's a big guy who favors casual dress and packs a surprise for those who underestimate him.


This is another experiment in painting highlights as an alternative to using washes for shading. As much as I like the ease of using washes, I like having more tools in my kit even more. The results were better this time. I only had to cheat once.

Primer
Zenithal priming with dark gray coat followed by white sprayed from the top.

Skin
Reaper 09260 Bronzed Skin slightly diluted with water to take advantage of the shading already in place. Using the diluted paint as a glaze over the zenithal priming worked well this time.

Pants
Reaper 09285 Demin Blue. Highlighted with Reaper 09057 Ashen Blue. I was careful to duplicate the techniques I used on Jessica Blaze and achieved the same results.

Hair, Shirt, and Boots
Reaper 09088 Stormy Grey. Highlighted with Reaper 09090 Misty Grey. This is the same combination of colors and techniques used on Jessica Blaze before I applied a wash to darken down the colors. The lighter initial results worked better here, so no wash was necessary.


Pistol
I painted this the same as the shirt and added a little Citadel Colour Mithril Silver to the raised areas. This draws attention to the weapon even though it is partly hidden away.

Base Texture
I used a backer reward from the Happy Seppuku Modelworks Base Texture Stamps Kickstarter to produce the look of the base. It is a flat silcone rubber sheet with various textures. I simply placed a little putty on a plastic base and pressed it on the sheet to pick up the desired pattern. In this case, I used Random Steel Plate. Regrettably, Happy Seppuku Modelworks seems to have closed their doors, so I'll have to look elsewhere for more base texturing tools in the future.

Base Painting
Reaper 09088 Stormy Grey. Reaper 09090 Misty Grey used as a highlight. The results matched the other gray areas on the miniature, but looked too faded for the base. I decided to cheat regarding my "no washes" goal for this project. A little diluted Citadel Colour Chaos Black brushed over the base darkened the color and filled in the recesses nicely. The sides were finished with undiluted Citadel Colour Chaos Black.


This experiment gives me another technique to use. There's nothing wrong with washes, but I prefer having more options when tackling hobby projects. And I'm another painted miniature closer to getting a game of Five Parsecs From Home on the table.

Wednesday, November 10, 2021

Reaper Chronoscope 50132 Jessica Blaze, Smuggler

Jessica Blaze is a metal miniature from Reaper Miniatures' Chronoscope line. I bought this figure back in my "it looks cool, I must have it NOW" days of miniature collecting. After putting it off for multiple sci-fi games, I finally put paint on this model for Five Parsecs From Home.


I experimented with shading using highlight layers over darker coats. This technique requires more brush control than my usual reliance on washes. The outcome was mixed, so I ended up using washes on some areas to get the results I wanted.

Primer
The initial coat was a dark gray sprayed to evenly coat all surfaces. A second coat of white was sprayed from above. I recently learned that his technique has a name - zenithal priming. It gave me a better idea of which areas needed to be highlights and which would be shaded.

Skin
Reaper 98982 Golden Skin diluted with water to act as a glaze. The idea was to let the zenithal priming to show through. It didn't quite take, so I followed up with Secret Weapon W006 Parchment Wash.


Hair and Top
Reaper 09183 Cloud Pink. Highlighted with Reaper 09281 Brains Pink. The result turned out more pastel than I intended. Some Secret Weapon W025 Just Red Wash pushed the color over to the bright pink I was aiming for.

Pants
Reaper 09285 Demin Blue. Highlighted with Reaper 09057 Ashen Blue. This actually came out as desired.


Jacket, Boots, and Accessories
Reaper 09088 Stormy Grey. Reaper 09090 Misty Grey used to highlight these areas. The outcome was lighter than I intended. I used Secret Weapon W001 Soft Body Black to darken these areas and fill the recesses. A few spots turned out a little too dark, so I highlighted them with Citadel Colour Codex Grey.

Pistol
The pistol was painted using the same colors and techniques as the Jacket with one additional step. I lightly brushed on a little Citadel Colour Mithril Silver on some of the raised details to represent bare metal showing through the worn paint of a well-used weapon.

Base
I cut the miniature off its slot and glued it to a Champ Industries Industrial Design Base before priming. Even though I am happy with the brand of super glue I favor, I wonder if I should start pinning figures to such bases in the future. The base is painted with Citadel Colour Chaos Black. I diluted it for the top to fill in the recesses while not completely coating the raised areas and used it undiluted for the sides.


My experiment with not using washes turned out to need washes to get the desired results. Still, I did learn a thing or two that I can apply moving forward. And I have another sci-fi miniature suitable for Five Parsecs From Home painted and ready.

Monday, November 8, 2021

Cork Urban Terrain Tiles WIP, Part Two

I had a change of plans with this project. My original idea was to knock out one tile at a time with a post to match. However, I had a breakthrough last week and managed to finish the remaining tiles over the weekend.

The street is strangely quiet now, but I'm sure that will change as soon as I get more miniatures painted.

The major issue I had was figuring out how to cut the cork tiles cleanly. I hid the rough edge on the first tile with the pavement squares, but that wouldn't be an option for all the remaining tiles. More practice resulted in cleaner cuts, but it was still slow going. It was the discovery that I could sand down the edges for a smooth finish that greatly accelerated progress.

Counterclockwise from the bottom left: First street tile (with drain cover), flat tile, courtyard tile, and second street tile (without drain cover).

The Flat Tile
This is a flat tile to support large buildings and other terrain. While a solid cork sheet would be completely functional, I wanted something more interesting looking. I drew diagonal lines over the cork sheet until I found a pattern I liked and cut along those lines. Then it was a matter of gluing the cut pieces down, putting some books on top of it all, and waiting for the glue to dry.

The Courtyard Tile
This is an open area surrounded by a low border. Add planters and it can represent a park. Keep it clear except for a landed spacecraft and it becomes a landing pad. It is essentially a slightly more interesting looking flat tile.

The Second Street Tile
There are some key differences between this and the first tile. There is no drain cover to simplify assembly. The pavement is also streamlined. The result was faster construction, but the pavement on one side doesn't match the first tile. I'm fine with that, given how often I see mismatched pavement and roads while driving around.

Tiles with 28mm scale miniatures and some terrain.

Spray Painting
All of the tiles were spray painted using the same colors and techniques as the first tile.

Finishing Touches - Roads
I wasn't quite happy with the roads, so I brushed some FolkArt 479 Pure Black over them. This validated my choice of using spray paints for most of the painting. The cork, even though it was already coated with Krylon, absorbed far more paint than I expected. The result was a nicely coated black surface with no cork showing though.

Finishing Touches - Concrete Surfaces
The next step was a light dry brushing with FolkArt 480 Titanium White over all areas except for the roads. A few spots came out a little too light, so I stippled a little FolkArt 479 Pure Black over them. The result is an uneven gray color that suggests wear and staining.

All three stackable buildings. Ready to block movement and lines of sight.

Bonus - Stackable Trash Bash Sci-Fi Buildings!
These were finished at the same time as the tiles. I placed the stickers in different patterns to vary their appearances slightly. Otherwise, they are identical to the first. And they still stack for storage and transport.

Saturday, October 30, 2021

Canon, Horror, and Star Trek Adventures

Does the spirit of Halloween fit in Star Trek Adventures? Can a horror story be told in the Star Trek setting? Well, various Star Trek series have aired ghost stories, zombie stories, and a Halloween episode. So I'm going with yes to these questions. Here's a look at how some episodes have handled horror and how the resulting canon can be applied in a Star Trek game. As with the Year By Year posts, I start with a summary and put my comments in italics.

Ensign Shay finds herself with a zombie problem.

"Catspaw" - TOS

A literal Halloween tale by Robert Bloch. It has all the tropes - a spooky looking castle, a black cat, a witch, a dungeon with a chained up skeleton, and enough cobwebs to make this viewer want to reach for a duster. Of course, the magic using antagonists turn out to be aliens using advanced technology in the end. It's still Star Trek, after all.

This episode uses the visual language of Halloween IN SPACE! This is the shortest path to pulling off a Halloween adventure. Just take the kind of movie starring Vincent Price, set the story on a distant planet, and say "aliens did it" to explain the use of dark powers in a sci-fi setting. Maybe even decorate the game room with paper bats, cotton cobwebs, a plastic skull, and hand out candy. Just don't try using candy as tokens. They just get eaten.

The aliens in this episode answer to the "Old Ones" - a term also used in "What Are Little Girls Made Of?" for a different alien race. It is likely deliberate on the part of Robert Bloch, who wrote both episodes. A gamemaster might be tempted to throw in a reference to the Cthulhu Mythos just to see the reactions of the players. Alternately, just put some tentacled horrors in the adventure like in "Et In Arcadia Ego, Part 2" - PIC.


"Wolf in the Fold" - TOS

Another episode penned by Robert Bloch. Scotty takes shore leave on a poorly lit planet with foggy weather and becomes the suspect in the murders of multiple women. It is eventually revealed that the murderer is actually Redjac - AKA Jack the Ripper. Redjac is a formless alien entity that feeds on fear and can possess humanoid bodies and USS Enterprise's computer.

Redjac ended up getting beamed into space with a transporter set for wide dispersal. The plan was for Redjac to starve from being unable to feed after getting strayed over thousands of kilometers of vacuum. However, there's nothing stopping a gamemaster from coming up with a way for Redjac to survive and menace the player characters. Imagine the fun if Redjac takes over a holodeck or EMH!

My favorite bit of this episode is hearing John Fiedler delivering lines written for a serial killer in the voice of Piglet.


"Beyond the Farthest Star" - TAS

USS Enterprise investigates mysterious radio emissions and encounters a 300 million year old alien derelict orbiting a dead star. Kirk and company discover that the crew destroyed their own vessel to prevent a threatening entity from using it to reach other worlds. Naturally, the entity ends up on USS Enterprise and makes trouble until the crew figures out how to get rid of it.

The basic outline of the story is a staple of sci-fi horror. Follow a vague signal. Find a weird looking derelict in a creepy location. Awaken something that should have been left alone. Everything else is details. How well equipped the characters are to deal with the outcome determines the level of horror.


"Schisms" - TNG

A literal alien abduction episode. Members of USS Enterprise-D's crew experience a lack of sleep and other psychological issues. Investigating turns up physical evidence, like Riker's arm having been removed and reattached. The culprits are solanogen-based lifeforms from a tertiary subspace manifold who favor hooded robes with a metallic sheen. The crew figure out a way to cut off contact, but not before a hapless crewmember dies.

The episode plays on the fear of something happening while a person is asleep, unaware, and helpless. The aliens live deep in subspace and cannot exist outside of it. However, they can create spatial ruptures to create a pocket of normal space in their reality. This is how they were able to experiment on members of USS Enterprise-D's crew. Although they were initially drawn to USS Enterprise-D due to modified sensor emissions, they could find other ways to access the normal universe.


"Sub Rosa" - TNG

The one where Doctor Crusher falls in love with a ghost residing in a family heirloom. Who also had a relationship with her grandmother. On a colony intended to recreate the Scottish Highlands, including foggy weather and stone buildings. The ghost turns out to be anaphasic lifeform who bonds with those of compatible biochemistry and can effect technology like weather control systems.

An anaphasic lifeform and host can be used for similar ghost stories or to explain hauntings in the Star Trek setting. Anaphasic lifeforms are vulnerable to phasers, so a direct confrontation should be avoided until the climax of the adventure.


"Empok Nor" - DS9

The one were Garak hunts and kills the rest of an Away Team aboard a station of the same design as Deep Space Nine, except that it's even more poorly lit. O'Brien, Nog, and four expendable crewmembers are sent off in a Runabout to salvage Cardassian spare parts. Garak is along since the Cardassians are poor sports and tend to leave booby traps behind when they abandon a facility. One of those booby traps takes the form of Cardassian soldiers in stasis chambers, who awaken and menace the Away Team. Even worse, the soldiers were given a psychotropic drug that amplified their xenophobic tendencies. Garak is exposed to the drug and kills everyone who isn't a recurring character.

This one turns a familiar character - who is already known to be dangerous - and turns him into a threat. This is just one of many Star Trek episodes that explore this territory. A gamemaster has a decision to make early on when using this idea. Use a NPC that the players value enough not to immediately rid themselves of when they present a threat. Or see if one of the players is game to become the antagonist for awhile. Just make sure that there are no hard feelings later if using the second option.


"Dead Stop" - ENT

A clean, well-lit automated repair station with user-friendly interfaces turns out to have a dark secret. Surprise! After running over a Romulan mine in the previous episode, Enterprise NX-01 has a gaping hole in the side that the crew can't fix with the resources at hand. They find out about a repair station, which automatically reconfigures for the ship and crew when they approach. Captain Archer agrees to trade supplies for the station's services. Things go well until Mayweather is found dead. The body turns out to be a copy and the crew finds the real Mayweather hooked up to the station's computer. The other people who are there are too far gone and can't be disconnected. They grab Mayweather and blast their way to the end of the episode.

Horror stories don't need to take place in gloomy locations that haven't kept up on maintenance or their lighting bills. Sometimes a mysterious lack of people is enough for a sense of unease even in the brightest places. As for this specific location - the episode never reveals who built the station or why. And the station was last seen repairing itself.


"Silent Enemy" - ENT

Enterprise NX-01 encounters a ship of aliens who act like jerks - opening fire, boarding the ship, shrugging off attempts to drive them off, and only communicating with demands for surrender. The crew gets them to leave only after hastily cobbling together space guns and figuring out how to overclock phase cannons.

This episode emphasizes that the Star Trek setting isn't a safe one outside of settled space. The aliens have their own agenda and are operating on their own schedule. They aren't interested in mutual benefit and have all the power early in the story. This creates a tension that is emphasized by the crew's efforts to craft an effective response to the threat. In later periods, this role can be filled by the Dominion or the Borg, but a mysterious adversary works better to play up the fear of the unknown.


"Impulse" - ENT

The one with the ship full of Vulcan zombies. It turns out to be the effects of Trellium-D. The substance insulates against the anomalies of the Delphic Expanse, but is also a neurotoxin to Vulcans. It initially removes emotional inhibitions and soon leads to insanity and violent rages. The neutral pathways of Vulcans exposed to it long enough eventually degrade to the point they become shambling wrecks.

Zombies are also featured in "Second Contact" – LD. Borg drones generally act like the "bionic zombies" that Lily Sloane calls them in Star Trek: First Contact. It's relatively easy to expose a crew to some substance or virus and kick off a zombie adventure. The questions that the gamemaster needs to address are how many hits with a phaser set to stun are needed to incapacitate one and how hard is it to come up with an airborne cure and spread it through the life support system?


Note that this is not intended to be a complete list, only some cherry picked examples. Any favorites or good examples I missed? Feel free to comment!

Wednesday, October 27, 2021

Alternative Armies EH03 Space Brain

Took a break from terrain making to paint up one of these little horrors. Besides, the month of Halloween seems like a good time for this B movie escapee. I had to improvise a stand for it, but I think it'll do.

Space Brain on patrol.

Alternative Armies offers these in packs of five and as suitable for a range of scales. They are very large for human brains in 28mm. However, they should work fine as big floating cyborg brains extracted from a dying species of mutated alien overlords even in 15mm. I acquired my set as a freebie with an order I placed in June 2021.

Stand
I had no flight stands on hand that would work with this figure, so I ended up cobbling together one from a paper clip, some air drying clay, and a 25mm slotted base. The assembly was spray painted with Krylon ColorMaster Paint + Primer Flat Black and textured with a mix of sand, PVA glue, and brown craft paint. The small hole sculpted into the bottom didn't seem quite deep enough, so I drilled it out a little more to be sure. The miniature is secured to the stand using Gorilla Super Glue.

Zombies hunting for a feast. I better get to work on the rest of the set - it looks like this Space Brain could use some reinforcements!

Primer Coat
Krylon ColorMaster Paint + Primer Flat White. In retrospect, a neutral color might have been better for painting gray matter.

Brains - First Coat
Reaper 092881 Brains Pink. A bottle of this stuff has been knocking around my paint collection since I got it as a backer reward from the first Reaper Bones Kickstarter. With a name like that, I couldn't resist using it for this project.

Brains - Wash Coat
Citadel Washes Baal Red. The pink turned out a little too pale and the details weren't coming through. A red wash shaded the overall color and settled nicely into the recesses.

Cybernetic Bits - First Coat
A mix of Reaper 09038 Rainy Grey and Reaper 09037 Pure Black. This mix produces a very dark gray that I used as the base color for the mechanical elements.

Cybernetic Bits - Second Coat
Reaper 09038 Rainy Grey. This medium gray was used to highlight the upper and raised surfaces of the mechanical elements.

Cybernetic Bits - Wash Coat
Reaper 09255 Black Wash. Some of the gray ended up in the recesses, obscuring those details. I used a black wash to reverse the effect.

Rosie sneaking up to perform percussive maintenance on this Space Brain's cybernetics.

This figure was a welcome break from terrain making and a reminder that I need to paint some sci-fi miniatures as well. Of course, a set of these could work as weird aliens for a Five Parsecs From Home game. Maybe as proxies for Converted or Abductors?

Monday, October 25, 2021

Stackable Trash Bash Sci-Fi Building

This is made from a piece of plastic packaging I saved awhile back. It caught my eye due to its blocky, industrial-looking shape. A couple more turned up later and I also noticed how neatly they stacked up inside each other. I stored them away until I started my most recent project - cobbling together enough terrain to play a game of Five Parsecs From Home.

Rosie dabbing in real estate.

My goals for this project were:
  • Retain the ability to stack the finished pieces. This would greatly enhance the ability to store and transport them later.
  • Minimal resources. That meant using what I had on hand and not spending too much time. Good enough would be good enough.
  • Compatibility. They had to work with the terrain mats and tiles I had or would have ready. Muted, neutral tones would work best.
Retaining the ability to stack the finished pieces meant that my usual approach of putting glue all over something and rolling it around in my bits box was right out. Any bits sticking out too far from the sides would get in the way. The exception was the small surface on the top. There is a small gap between the pieces there when they are stacked. This allowed for thin parts to be glued to the top.

How many previous owners has this place had?

Preparation
I roughed up the packaging with a sanding pad to insure good bonds with the glue and paint I would be applying later. All surfaces were also cleaned with warm soap and water.

Assembly - Top
Some digging around in my bits collections turned up a couple of parts from a Hexagon Construction Set and a key from a USB keyboard. A test fit verified that they would not interfere with stacking if placed on top of the piece. My initial attempt to attach the parts used hot glue, but I found that Gorilla Super Glue provided a stronger bond.

Assembly - Sides
My solution to detailing the sides was using some self-adhesive warning labels I found awhile back. They add details to the sides without protruding far enough to interfere with stacking.

Finished piece and the next one with the bits used for detailing.

First Spray Coat
Krylon Camouflage Ultra-Flat Brown. This coat was sprayed for full coverage on all surfaces.

Second Spray Coat
Krylon Camouflage Ultra-Flat Khaki. Sprayed at an angle from the top to produce highlighting on the upper and raised surfaces.

Drybrushing Layer
FolkArt 480 Titanium White. This is an off-white paint with a gray tint. The stickers were too flush with the sides to catch much paint from a light drybrushing. I ended up using more and more paint to make these details visible. The more aggressive brushing did generate the worn appearance I was going for on the finished piece.

Wash Coat
FolkArt 221 Real Brown mixed with Liquitex Matte Medium and diluted with water. Brushed over all surfaces. I wiped off the excess and pooling with a dry cloth.

"Yard" Texturing
Mix of sand, tacky glue, and diluted FolkArt 221 Real Brown. FolkArt 480 Titanium White brushed on to the mix after it dried for contrast. I decided to texture the surface around the building to create a "yard" surrounded by a low fence.

The test piece stacked under the others.

Overall, it's not bad for a quick and dirty project. And the test piece still stacks under the others! I'll use the same techniques on the other two, but I might experiment with overlapping some of the stickers to simulate patchwork repairs to the walls.