Wednesday, April 27, 2022

Trash Bash Monowheel Cycle WIP

This started off as an experiment with making wheels for sci-fi models out of soda bottle caps. Then it turned into a unicycle robot build. It ended up as a monowheel cycle when I cobbled together a seat and threw on some stowage. Now that I see what it looks like with a coat of primer, I'm thinking of adding some wires and a couple more details after some initial painting.

Side view after priming.

Big Wheel Keep On (Not) Turning
The wheel is a pair of soda bottle caps glued together. The edges were sanded down a little so the two pieces fit flush and to give the glue a rougher surface to work with. The ends were also sanded in preparation for painting. The overall shape and the pattern molded into the plastic creates the appearance of a wheel and tread pattern. The idea will come in handy the next time I need wheels for a sci-fi ground vehicle, robot, or in the landing gear of an aerospace craft.

Rear three quarter view before primer.

Unicycle
I was intrigued by the possibilities of the model wheel in my hands. The idea of a single wheeled robot or vehicle has been in the back of my mind for awhile now. A little digging around the bits collection turned up a number of parts that either fit or could be convinced to fit around the wheel. I was initially going for a robotic probe equipped with sensors to explore some unknown world. That's a concept I may return to, but that's not the direction this project went.

Rear three quarter view after primer.

Monowheel Cycle
As I piled things on, the project's appearance diverged from the lines of a purpose-built planetary probe towards a vehicle built from salvage. I started deliberately going for the look of a custom vehicle built by someone who had to scavenge the parts. Greeblies suggesting an engine exhaust and suspension add mechanical plausibility. Some stowage and fuel containers from a Tamiya 1/48 Jerry Can Set give the impression of an owner on the move.

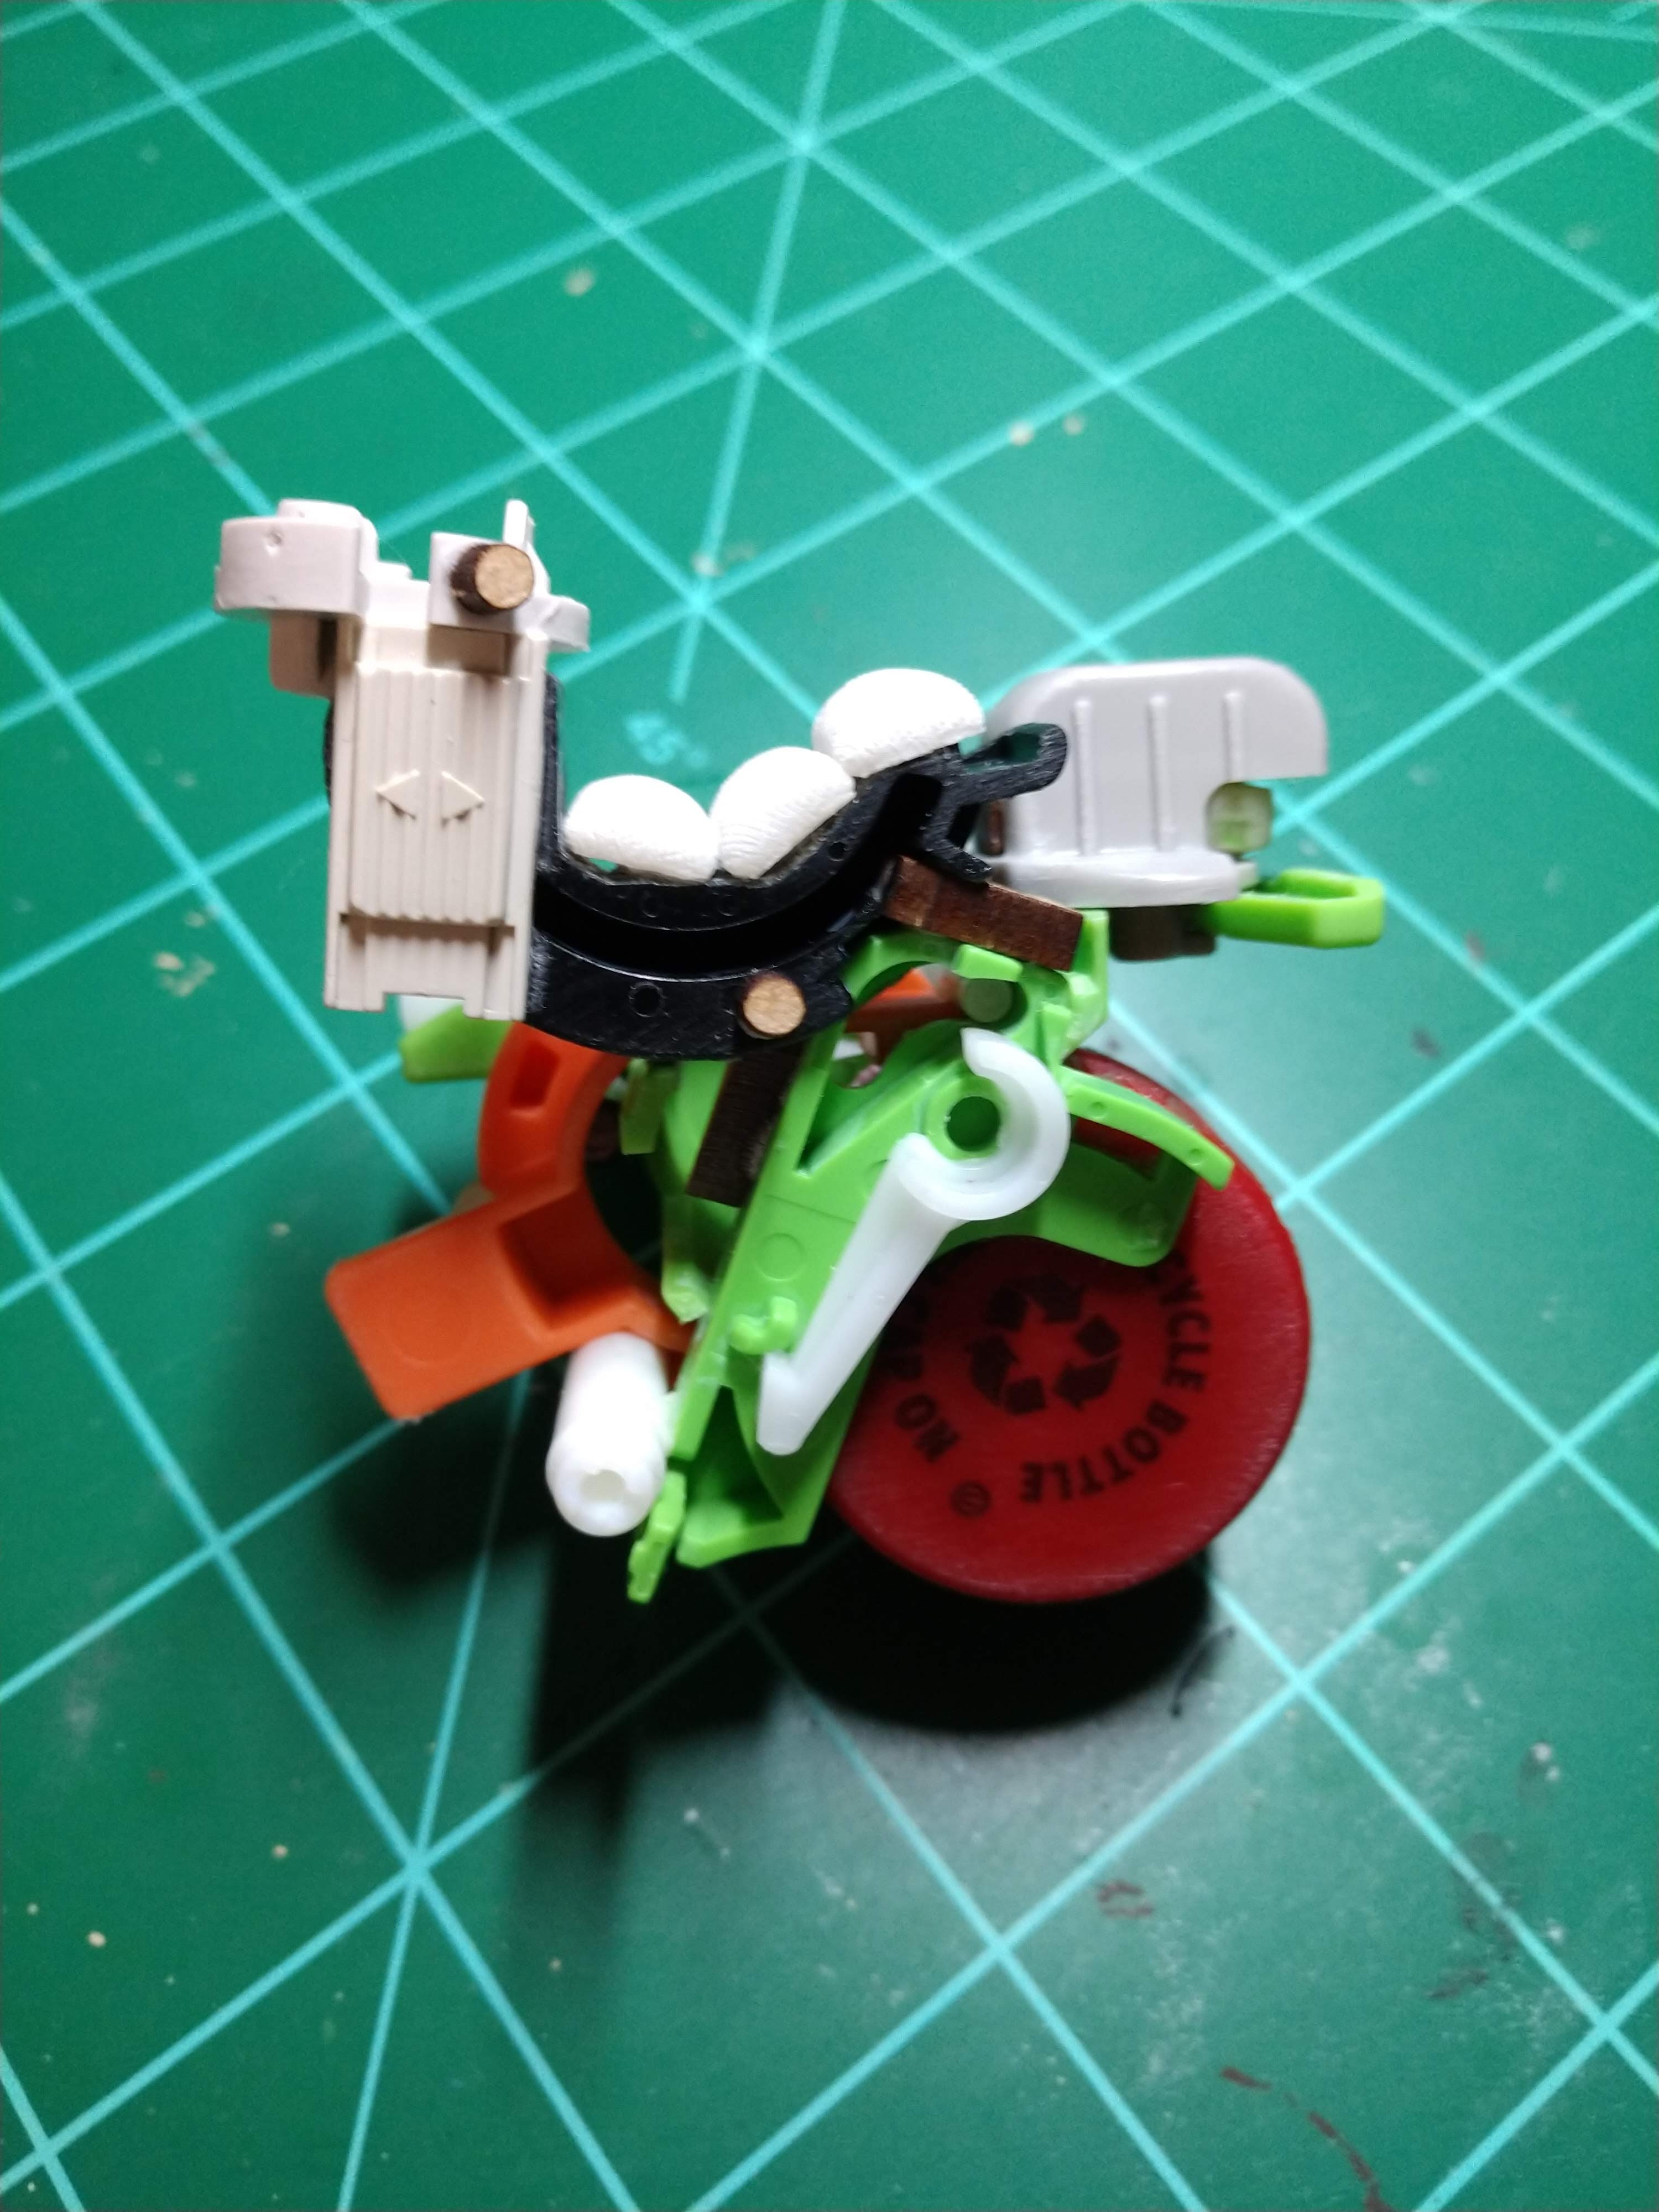
Top down view showing stowage and seat cushions.

The Seat and MDF Reinforcement
Adding a seat was a challenge. With no ready made options at hand, I built one from various plastic parts and used resin sandbags for the cushions. Unfortunately, glue alone wouldn't be strong enough to hold it in place. I used some small MDF pieces to reinforce the seat and add details. These were popped out of laser cut parts from previous projects. Using super glue between MDF and plastic creates a strong bond suitable for structural support.

Top down view after priming.

Priming
Tamiya Surface Primer (L) in Gray spray for full coverage. Priming a project like this is an almost magical moment. The chaotic mix of different colors and shapes turns into a single object, unified under a coat of flat gray.

Side view during assembly. A couple details were added before priming.

Moving Forward
I've got some ideas for putting this project on a plastic base, but there's some testing to be done first. After that, I might brush on some paint to see how it looks with some color on it. Final details will be added after that - I have some wire that will join together some of the mechanical details. And, of course, a couple of wash coats to bring out the details and add weathering.

Monday, April 25, 2022

Zealot Miniatures Magic Portal (Blue)

This is another resin terrain piece using a translucent plastic insert to represent an inter-dimensional passageway. In this case, the popular circular shape was chosen for the generating mechanism. I purchased this piece at the same time as the Demon Gate late last year. The plastic insert is available in blue or red.

Remember: It's a portal, not a gate. Very important.

Preparation
The resin required nothing more than a scrubbing with warm soap and water. I had to remove and sand down a tab on the clear plastic insert. The insert has a significant flaw, but it doesn't stand out (much) at tabletop distances.

Planning
The Magic Portal comes in four parts - the two halves of the circular portal, the platform, and the insert. I decided to prime and paint everything before assembly. Painting the assembled piece would require trying to keep paint off the insert. That seemed to be a great deal of trouble for no real benefit.

Rosie considers another piece of hardware she's been asked to fix.

Plastic Insert
The insert was a little underwhelming out of the package. The swirling details weren't really visible in the clear plastic. There was also the flaw in the material. I decided to apply a wash to bring out the details, hide the flaw, and protect the plastic from the fogging effects of the glue I would be using later on. The initial layers of Secret Weapon W015 Blue didn't coat to my satisfaction. The follow up layers of Secret Weapon W016 Green covered this material better.

Primer Coat
Tamiya Surface Primer (L) in Gray sprayed over all resin parts.

First Paint Coat
As with the Demon Gate, I applied a layer of FolkArt 479 Pure Black diluted with water to darken up the Tamiya Gray and fill the recessed details on the resin parts.

Second Paint Coat
FolkArt 480 Titanium White brushed on the upper areas as a highlight and outward from the inside of the portal.

Magic Portal and Demon Gate comparison.

Source Lighting
A mix of FolkArt 720 Cobalt Blue and Sargent Art Cadmium Green lightened with FolkArt 480 Titanium White as needed. The circular generator would block some of the light from the magical portal, so the glow effect didn't need to be as extensive as on the Demon Gate. I started by brushing on the Cobalt Blue/Cadmium Green mix over all areas that would be touched by light from the portal. Each following layer covered a slightly smaller area closer to the portal. I mixed in a little more Titanium White with each layer until I was using almost pure white right next to the portal.

Touch Up
I ended up overdoing the glow effect in some areas. I brushed on some FolkArt 2561 Steel Gray to bring back an approximation of the base color.

Assembly
This was a straightforward matter of gluing the two halves of the circular gateway around the plastic insert. I had to clamp the halves together to give the Gorilla Super Glue time to work. Then I glued the assembled portal to the platform and clamped that together until everything was solid.

Does this remind anyone of anything?

There is a visible line around the circular resin piece. This is one of the resin halves overlapping the other. I considered sanding it down and repainting the edge, but decided against it. This would remove some the details on the edge and the line isn't as noticeable at tabletop distances.

Close up of the seam between the two halves of the circular portal generator.

It's ironic that this was the piece that I was most looking forward to while the Demon Gate was an afterthought. The Magic Portal works with 28mm scale miniatures, but a 32mm figure might have to duck down a bit to fit through. It would fit in fine if used for 15mm scale games. Together, the Magic Portal and Demon Gate give me options whenever I need an extradimensional passage to and from another space and time. Overall, though, I like the Demon Gate a little more than its rounder counterpart.

Thursday, April 7, 2022

The AD&D Monster Manual (1979) A - Z: Episode 2: "A - How Is Anhkheg Pronounced, Anyway?"

Continuing a series expressing a middle aged guy's opinions about the AD&D Monster Manual (D&D First Edition) from 1979. This video covers the "A" section. Warning: Attempts at humor include a dad joke referencing a decades-old sitcom.


This video is shorter than the introductory episode, mainly because the "A" section is only a couple of pages long. I decided on a longer shot to make it easier to get hand gestures in frame. Might try a middle ground for the next one.