Saturday, September 15, 2012

The Workbench #5 - Alien Plant Terrain


These were the results of a couple of experiments in terrain making. The goal was to some "scatter terrain" useful for sci-fi miniature games. The terrain had to be small, inexpensive, and within my current skill level. It also had to work with both 15mm and 28mm scale miniatures.
A little research introduced me to the idea of using drinking straws as the basis for alien looking plant pieces. TerraGenesis has an article covering the basics and Miniwargaming has a video demonstrating the techniques involved.

The above links do a fine job of describing the idea and the process. I see no real need to repeat the details here, so my descriptions will mainly focus on where I varied from the sources above.

Manufacture:

I used a candle as a stationary heat source to deform the straws. A word of warning about this step - it uses an open flame to melt plastic. Do it in a well ventilated area with a bucket of water nearby. The plastic can get plenty hot even if it doesn't liquefy enough to drip down on your hands.

Assembly:

I reshaped a pair of flat wood pieces with a craft knife for the bases. Next, I mixed some Milliput to use as mounting point for the straws. The Milliput was pushed down on the wood bases to form small mounds. I pushed the straws far enough into the Milliput to provide firm support.

Painting:

The undercoat was some black spray paint left over from another project. The coverage was not perfect, so I watered down some black craft paint to cover up the bare spots. I paid particular attention to the areas where the interiors of the straws were exposed.

The base coat was a couple of layers of thinned down dark green craft paint. I drybrushed on some lighter green craft paint to serve as highlights.

Basing:

I applied some watered down PVA glue to the base and over the Milliput and covered the glue with sand. Next was a watered down mix of brown craft paint and PVA glue to color and further fix the sand into place. Finally, I drybrushed some linen craft paint over the sand.

Results:

These pieces look like they should work well as sci-fi scatter terrain. They were simple to make and the costs were very reasonable, especially since I had some of the materials on hand already. As the picture indicates, they look convincing with different miniature scales.

Monday, September 3, 2012

The Workbench #4 - Alternate Energy Scenery from Scene-A-Rama


These were a lucky find in the local Hobby Lobby's clearance section. I had previously passed them up at full price, but a few bucks off made them worthwhile. I wasn't the only one to think so. Every other Hobby Lobby in the Austin area has been sold out for awhile now.

These models are made by Scene-A-Rama under their Scene Setters line. Each package comes with two windmills and two solar panel arrays. The windmills are are roughly six inches tall and the solar panel arrays are about an inch in height.

These models are largely scale independent, although I did have 15mm in mind when I purchased them. They can be an objective for a sci-fi game on a distant colony world. Destroying or capturing the power generation for a small colony or outpost is a realistic mission for an attacking force. Alternately, they could just be terrain to add some flavor to a board.


Ambush Alley Games uses these models for their Tomorrow’s War demos, as seen on their Facebook page. They can also be seen in the Tomorrow’s War rulebook on page 103.

Assembly was straightforward. I used plastic cement to attach the pieces and gave it a day to cure. The windmill blades could either be glued down or left to move freely on the shaft. I left them free to spin.

The bases that came with the windmill models were too small to be stable enough for a gaming table. I fixed the issue by gluing the original bases on larger plastic bases. Then came the sand and a watered down mix of glue and brown paint to hold the sand in place and give it a base color. After it dried, a quick drybrush with a linen acrylic craft paint finished things up.

Reaper Bones Kickstarter Update

The Reaper Bones Kickstarter funded with 11,430% of its goal, so I'm reasonably sure they have enough money to go forward with expanding the Bones line. I ended up pledging just shy of $250. That's the $100 "Vampire" level pledge plus some of the extras made available by stretch goals.

Yes, I did end up raising my original pledge amount. By about a hundred dollars.

Reaper's shipping target is March, but I wouldn't be surprised if the date slips a little. Some of the stretch goal miniatures were still in the concept art stage when Reaper presented them. There is the whole process of getting the infrastructure in place to start production. And 17,744 backers is alot of folks to ship miniatures to.

The over 200 miniatures showing up early next year has put a deadline on clearing my worktable. It will be much easier to prioritize the Reaper Bone Kickstarter miniatures if I have my backlog of miniatures related projects under control first. To that end, I've been knocking out some quick and easy projects first. Expect to see some progress reports soon.

Sunday, August 12, 2012

Reaper Miniatures Bones Kickstarter

I've been keeping an eye on Reaper Miniatures Bones Kickstarter. The original "Vampire Level" pledge was a pretty sweet deal at a $100 for over 60 fantasy miniatures. Still, I decided to wait and see.

When it hit the point where the $100 level worked out to less than a buck a miniature, I just couldn't justify waiting any longer. It was too good a deal to pass up.

At the time of this writing, the Vampire pledge gets 111 miniatures. This includes the original 67 and those unlocked by the project achieving several stretch goals. It does not include the optional rewards that require raising the amount pledged. Those optional rewards include paint sets, a figure case, and additional miniatures. All of which was nice deals at the prices Reaper is offering.

Which presents me with two problems.

First, that's gonna be alot of miniatures to paint.

The second is the temptation to raise my pledge every time this thing hits another goal...

Saturday, August 11, 2012

The Work Bench #3 - More Gamecraft Miniatures Buildings

These are the other two MDF terrain pieces I purchased from Gamecraft Miniatures. Much of what I wrote about the Small Cargo Module applies here: 15mm, made for Ambush Alley's Tomorrow’s War, and expect a wood smoke smell after getting the parts out the package.


The larger piece is named the Garage/Shop Module (15MTW003) and has the Optional Raised Detail (15MTW003-1) added. The cargo door and the building itself are a little small to hold most 15mm vehicles, so I'm not sure about calling it a garage. It works fine as a workshop or storage building, though.

The Small Module (15MTW001) also has the Optional Raised Detail (15MTW001-1) offered for this piece. It could represent a small residence, office, or storage building by itself. On the other hand, Gamecraft Miniatures made it just the right size for another option: stack it on top of a larger piece in the same product line. Placed on the Garage/Shop Module, it becomes a second story office or on-site residence.


Assembly was fairly simple, but I did run into an issue not present on the Small Cargo Module. I used super glue for the initial assembly followed by watered down craft glue to seal off any gaps. The roof and corners were still uneven after assembly. The MDF parts fit together well, but not perfectly, resulting in small gaps. I spread some filler (the same stuff used to fit holes in drywall) over the top and on the corners. A day and a little sanding later, the issue was mostly resolved. Some of the gaps can still be seen, but are not really noticeable at table top distances.

I used almost the same painting methods as on the Small Cargo Module. The only difference was going easy on the weathering for these pieces. I wanted them to look used, but still kept up.

The laser etched detailing is pretty good. It is deep enough to be seen after painting, especially if using thinned paints and washes.

The optional raised detailing does add to appearance of the pieces. It has a much stronger effect than the laser etching and is clearly visible even from across the room. It also almost doubles the cost of each piece. Personally, I like the optional detailing, but I can see how the choice between it and more pieces for roughly the same price might be an issue for some folks.

Overall, these are good, solid pieces that I'm looking forward to putting on the table. I plan on buying more when time and finances permit.

Sunday, August 5, 2012

Austin Boardgame Bash 2012

Spent most of Saturday afternoon, all of the evening, and a fair chunk of early Sunday morning at the Austin Boardgame Bash. It's only the second year for this convention, but it's already proven popular for the local gaming community. I tried out some new games and enjoyed the chance to catch up with some familiar faces. Best of all, some commemorative dice to remind me of the event!

Saturday, August 4, 2012

The Work Bench #2 - Gamecraft Miniatures Small Cargo Module


I picked up three of Gamecraft Miniatures' 15mm scale MDF terrain pieces during one of their recent sales. The ones I purchased were made for Ambush Alley's Tomorrow’s War game. That said, there is nothing so distinctive about these pieces that they can't be used for any futuristic game.

This particular piece is a Small Cargo Module (15MTW031). Not being familiar with assembling and painting MDF, I decided to use it as a test piece before working on the other two (which will be seen in a later post).

The piece came unassembled in a plastic bag. I noticed a strong, smoky smell immediately after unsealing the bag. This is to be expected as the parts are laser cut wood. It wasn't unpleasant, but the smell was still noticeable days after taking the parts out of the package.

Assembly was straightforward. Test fitting revealed that the parts fit together well. The piece went together quickly and without a struggle. I used super glue to hold the parts together during assembly. After the super glue set completely, I applied watered down craft glue to the seams to strengthen the piece and to seal any gaps.

Although it is called the Small Cargo Module, the piece is a good size for a terrain piece. It is big enough to provide cover, influence maneuver, and effect lines of sight. It is also small enough to be added in without dominating the board or getting in the way as players move and measure.

The assembled piece is very durable. It survived getting knocked off my desk without damage. This piece should survive years of gaming with nothing more than touching up the paint.


Painting took longer than I expected. Online research suggested that priming would not be necessary and that the best approach would be multiple layers of thinned paint. The MDF absorbed the initial layer while barely changing color. It ultimately took four layers until I was happy with the coverage of the basecoat.

My initial concerns with filling in the laser etched details on the piece proved unfounded. The etching is deep enough not to be effected by the layers of thinned paint. I did apply some Reaper Black Wash (09255) over the etching to being out the details a little more, just in case.

The next step was highlighting. I gently brushed on a thinned down linen color over the medium gray basecoat. I paid particular attention to the upper edges where light would catch on a real structure.

Finally, I detailed and weathered the piece. I used some thinned down Reaper Black Wash to simulate shadows in between and below the panels. Some thinned down Reaper Brown Wash (09254) went into the lower parts of the piece to represent the build up of soil and dust over time.

I'm pretty happy with the piece. Its price is offset by its quality, durability, and utility. It would not look out of place as part of a near-future location here on Earth or in a far-future space colony or industrial world.

Tuesday, July 24, 2012

Checking In

Just a quick check-in and an observation. I've made progress on some terrain pieces since the last post. Expect pics as soon as I can find the time to take them.

In the meantime, an observation – wipe down your work area regularly. I had just finished applying a nice, smooth coat of paint on a flat area of my latest project when I noticed a problem. A cat hair was stuck in the middle of it! Fortunately, the paint was still wet enough for me to fish out the hair with a spare brush and reapply the paint. Unfortunately, a quick check of recently worked on pieces revealed more cat hair. At least none of it is visible at table top distances. Looks like some touching up is in order...

Saturday, June 30, 2012

Painting By Numbers #5 - 15mm ARC Fleet Infantry


Here's my first fully painted bunch of 15mm infantry figures intended for sci-fi wargames. These were actually completed after the first attempts at making terrain out of cardboard and electrical boxes, but before the second attempts.


What Company Made These Miniatures?

Critical Mass Games. These are the ones ordered back in November. I completed a test batch back in February and have used them for scale comparison shots ever since.

How Did These Get Painted?

I primed the figures with gray auto body primer. The base coat was a thinned down medium gray. Next was a blue-black wash. The final step was painting on details like the face plates and shoulder pads.

The bases are steel washers super glued to the integral bases that came with the figures. I textured the base with sand applied over watered down tacky glue. Once this was dry, the sand was colored with a mix of dark brown paint. tacky glue, and water. The mix also further secures the sand on to the base. I drybrushed on some linen paint to produce a sandy color and glued on a few pinches of static grass.

Why This Particular Paint Scheme?

Basically, I wanted to avoid the “Master Chief” look (no green with gold face plates) and the “Stormtrooper / Clone Trooper” look (no white or light gray). The test pieces I did in brown and khaki just didn't look good to me. So medium gray with a dark wash it is.


The colored shoulder pads to denote specialization isn't realistic nor is it intended to be. I just wanted something clearly visible at tabletop distances and didn't feel much like mucking around with coloring the bases.

What About Storage?

Not much to tell, really. The plastic box is part of a stackable storage container that I picked up years ago. The strips are magnetic material from Hobby Lobby. The strips tend to curl since the stuff comes in a roll. I ended up supergluing the ends down to keep them from popping up like seen in a couple of the images. The whole process only took a few minutes.


Any Lessons Learned?

This was my first experience with painting 15mm figures and with painting large numbers of figures in batches. Choosing a simple paint scheme that can be applied to multiple figures in steps enabled an efficient, assembly-line approach. Breaking down the job into batches was also critical. Each batch went quickly and rewarded effort by making progress easy to track.

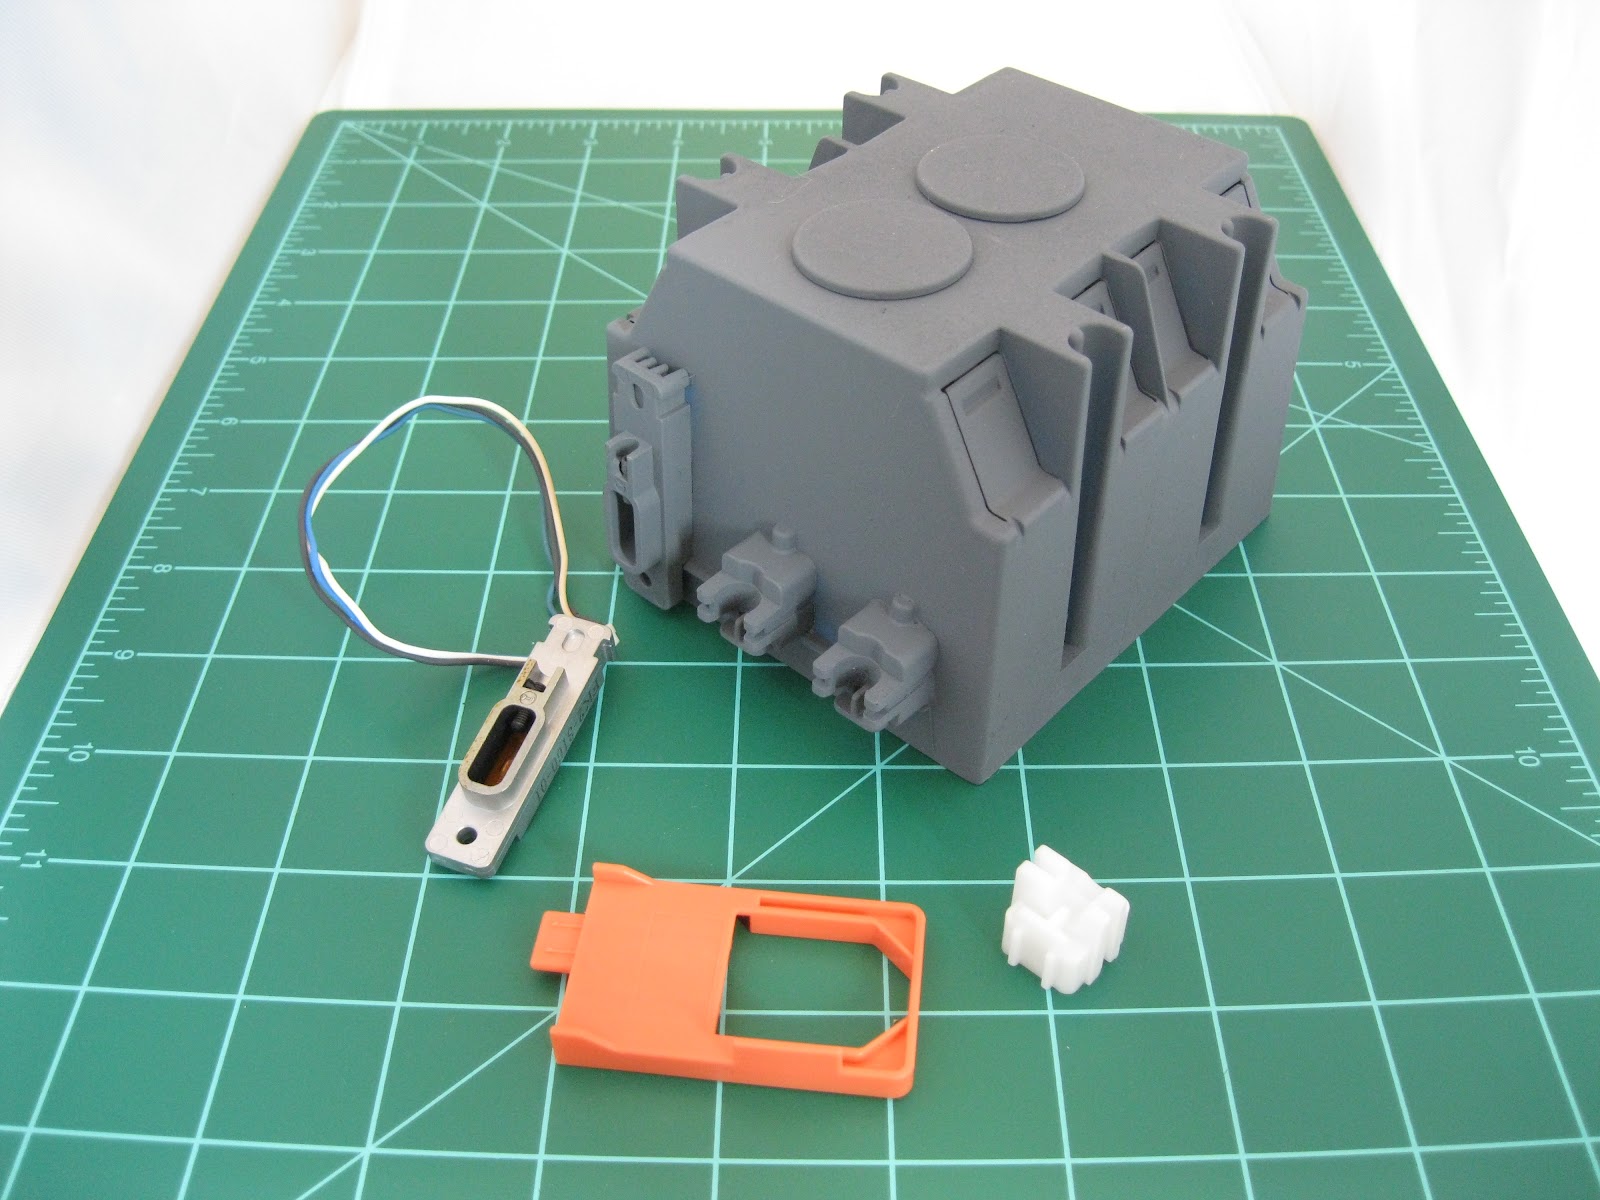
Learning Experiences, Case #2a – UPDATE: Electrical Box Terrain, Ready for the Tabletop

This is a fresh start incorporating the lessons learned from my previous attempt.


First Lesson Learned – I used super glue to reassemble the piece this time. Some tugging and a short drop served to test the bonds after the glue set. It should stand up to normal use - place it on the table, remove it from the table, put it in a box, maybe drop it on the way a couple of times - just fine.

Second Lesson Learned – I got out the auto body primer and started spraying. Sandable auto body primer is good stuff - it leaves a surface that holds on well to paint and bonds to plastic, metal, and resin. It took two thin layers to get a good, even coat that covered up the original colors of the plastic.

Third Lesson Learned – A darker color for better coverage seemed like a good idea. I also went back to the tried and true method of paint large, flat surfaces - multiple layers of thinned down paint. The paint dried smoothly.


The end result wasn't bad, but it looked dull and flat. Applying a thinned down dark wash brought out the details, but the piece was still missing something. I highlighted the corners and top with the original base color. Finally, I applied a thinned down brown wash to weather the piece. Small steps like these add character to a piece, but I might have gone overboard with the brown wash.


There is another, larger piece in the wings. I plan on adopting the same techniques to complete it later. For now, I've got some other projects to complete first.