Wednesday, June 15, 2022

Reaper Bones 80008 Rosie, Chronotechnician

It's been months since I did anything with my Five Parsecs From Home campaign. Sizing things up, there's three things I need to continue and a substitute miniature for Lin is the easiest to check off the list. Lin, previously represented by Rosie, Chronotechnician from Reaper's Chronoscope line, failed to repair her signature Brutal Melee Weapon and will be wielding a more conventional weapon for the next fight. Fortunately, I received the Bones version of her miniature as a reward from the first Reaper Bones Kickstarter.

I didn't want to simply reproduce my previous paint scheme on this figure. First, it's boring. Second, a quick change of clothes along with the weapon makes sense for the character. Third, it would allow me to use the figure as a different character later on.

Lin's got a loaner weapon until her big wrench gets fixed.

Base

I glued the integral base to a spray primed steel fender washer. The gap was filled after painting the miniature with a variant on my standard basing mix. This variant adds black rather than brown craft paint to a mix of sand, PVA glue, and a little water to improve flow. Some gray drybrushed on after the basing mix dried completes the industrial look of the base.


Preparation

The same approach I use for all white Bones plastic. Details are at the end of this link.


Skin

Menoth White Base

This with a wash creates a pale skin tone. I've never been happy with this approach and moved away from it, but used it here to match the Chronoscope version I painted before.


Shirt

Reaper 09017 True Blue

This is a bright blue that coats well. As the shirt is a small, flat area, I didn't feel the need to paint any highlighting over what the wash I applied later would provide.


Weapon

Citadel Colour Chaos Black
Citadel Colour Codex Grey
Army Painter Warpaints Quickshade Dark Tone

Not the neatest or fanciest approach, but one that brings out the mechanical details.


Overalls

Reaper 09158 Olive Drab
Reaper 09177 Camouflage Green

These are darker and lighter versions of an olive green camouflage color. They work well paired as a base and highlight.


Leather

Reaper 09284 Lonestar Leather
Reaper 09110 Oiled Leather

This is the same combination I used for the leather on the metal version and has become my go-to for a base and highlight combination.


Hair

Reaper 09183 Cloud Pink
Citadel Washes Baal Red

Again, the same combination I used for the metal version. To my surprise, the Baal Red was still perfectly viable, but most red washes should work fine.


Wash

Army Painter Warpaints Quickshade Strong Tone

Everything except for the hair and weapon got a coat of this wash slapped on it. Again, this reproduces my approach to the metal version and remains how I paint Bones plastic.

Bones (plastic) version on the left, Chronoscope (metal) version on the right.

Chronoscope and (Early) Bones Comparison

This is a chance to compare the metal and plastic versions of the miniature. To my mild surprise, I haven't actually painted the same sculpt in two different materials before.

The details of the Chronoscope version are sharper and better defined when compared to the Bones version. This is the expected finding. The soft white plastic used in the initial waves of Bones doesn't seem to be able to retain fine detail like metal or the harder gray plastic that Reaper switched to later on. The difference in detail is significant. The face is less detailed and the goggles are a muddy mess. It made for a less pleasant painting experience as I kept hunting for details that I knew were there on the metal version.

A comparison between the metal and plastic versions is incomplete without discussing pricing. Here are the prices in USD at the time of this writing:

Reaper Bones 80008 Rosie, Chronotechnician $3.99 (USD)
Reaper Chronoscope 50016 Rosie, Chronotechnician $5.99 (USD)

The plastic version can be picked up for two-thirds the price of the metal one. However, two bucks isn't a huge price difference in absolute terms. It comes down to personal preference. Is the difference in detail worth paying a little extra? The Bones version wouldn't be my first choice as a hero miniature or display piece. Which material is the buyer more comfortable working with? Metal and plastic demand different approaches. A painter set up for one material may not wish to adapt to the other.

Bones (plastic) version on the left, Chronoscope (metal) version on the right.

Bones - even early Bones - do have a place. Most of my Bones collection is from the first Kickstarter and is therefore the white plastic from the beginning of the line. All of the ones I've painted are serviceable when painted to a tabletop standard. The majority of the figures are monsters or other opposition that will only be on the table as long as the players allow them to survive. Also, a Bones figure makes for a fun "rainy day" painting experience. The work goes quickly since I don't stress much about getting the best results possible like I might with a metal, resin, or higher quality plastic figure.

In the end, comparing this figure to its metal counterpart didn't change my option on early Bones miniatures. They are a cost effective option for the kinds of miniatures meant to be used in bulk. Orcs or zombies? Oh, yeah, I'm going for the white plastic Bones versions. Likewise, large miniatures are much more practical in any form of plastic when compared to metal. However, I'm happy to shell out a little more for a centerpiece miniature of metal, resin, or higher quality plastic that I'm painting to look the best I can manage.

Saturday, June 11, 2022

Trash Bash Pill Bottle Stasis Tube

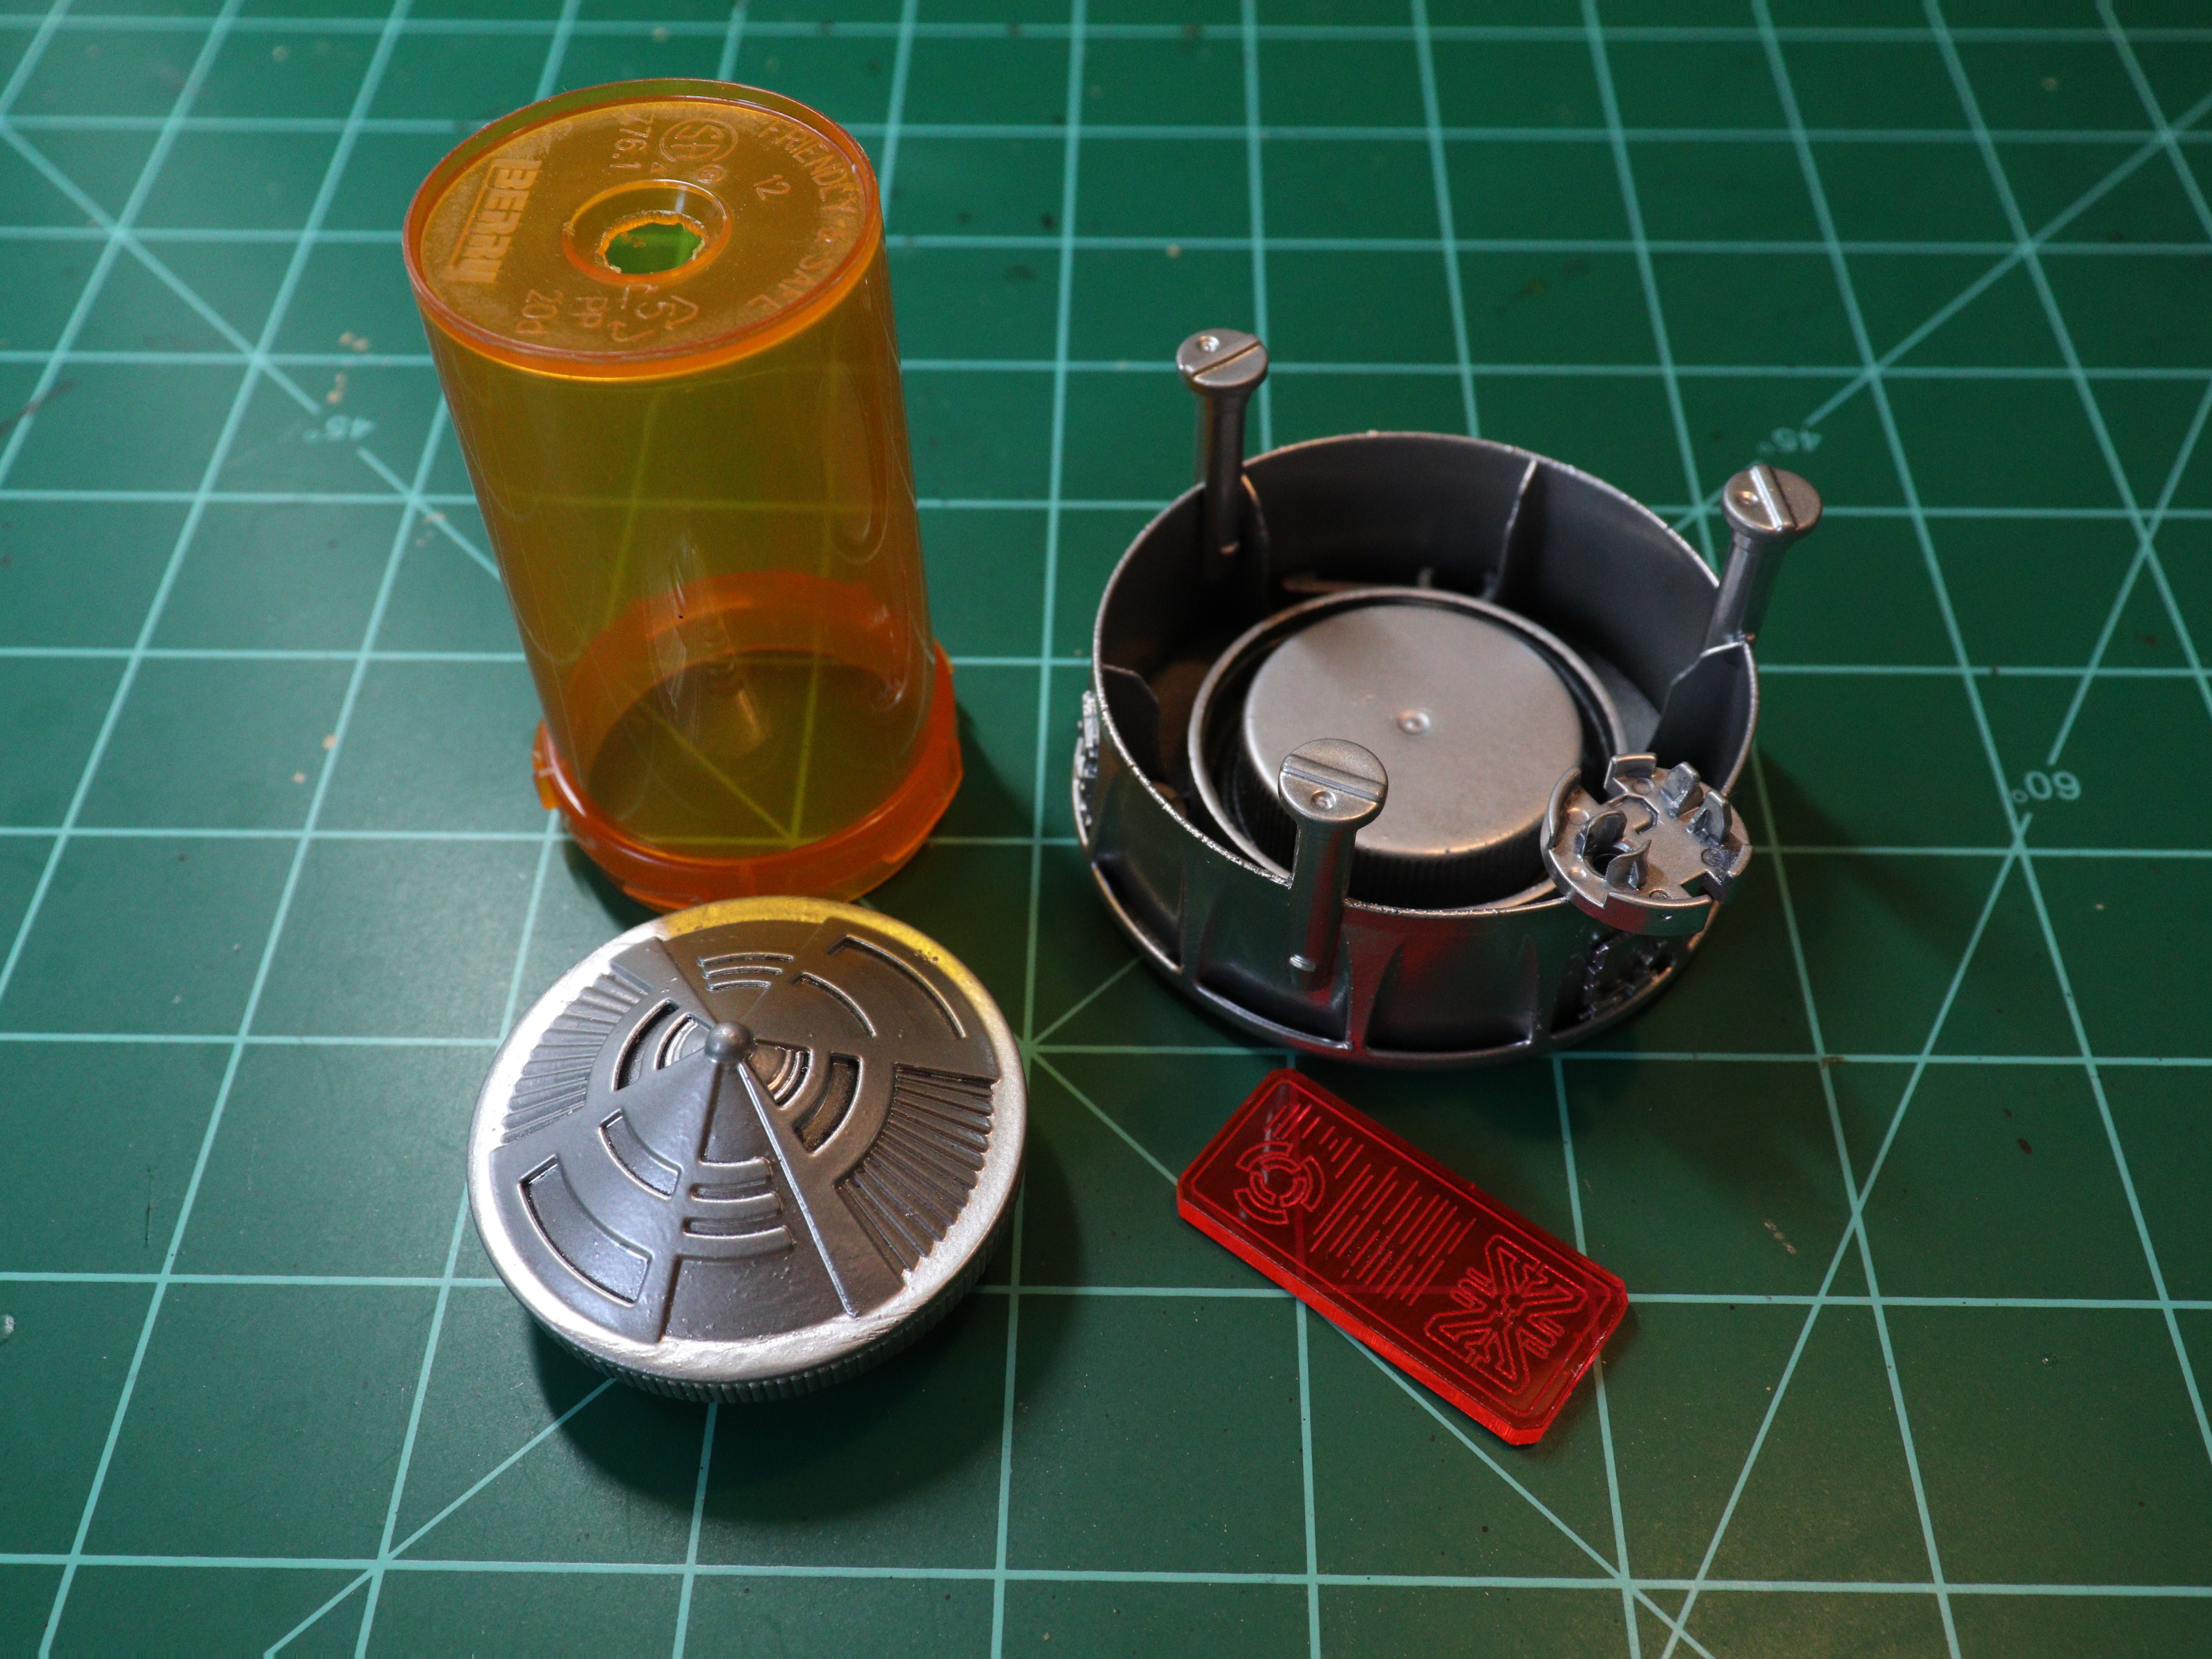
Awhile back, I made some Stasis Pods using pill bottles as a quick and dirty project. The idea behind this terrain is to be able to place a 28mm scale miniature inside and still see it through the transparent pill bottle. The original set met a sudden need for the campaign I was running at the time, but I knew I could do better. This is my second try at the concept.

Final test fitting. Just waiting for its first patient. Or victim.

Top Cap
This is a McDonald's Happy Meal toy from ages ago. I'm pretty sure it's a Star Wars themed spinning top. I wiped it down and realized that the protrusion would get in the way of mounting it on the pill bottle. I didn't relish the idea of cutting through the tough plastic of the toy, so I did the other thing.

Stasis Tube Body
A transparent pill bottle with the labels removed and cleaned with warm soap and water. I drilled a hole to accommodate the top piece's protrusion.

Mounting Hardware
The bottom piece is the cap from a juice bottle. I removed most of the threading to improve the fit of the pill bottle.

Initial test fit prior to painting.

Mounting Hardware Internal Platform
I glued a bottle cap inside the juice bottle cap to cover up some markings. It also raises up any figures placed inside the tube.

Display Panel
From a set of Fluorescent Scifi Screens from Warsenal. I purchased these awhile back to add exactly this kind of detail to my terrain projects. Not sure about the color, though. I'll try the blue and green options before gluing anything down.

Various Mounting Hardware Details
The towers are plastic clips of some kind. I don't recall the source. The round piece that I used to mount the display panel is a salvaged printer part. The square details were recovered from a nonfunctional keyboard. Finally, the parts glued inside to add some internal detail are the same as the ones I used as arms for the "Astromecha" robot. I may add some wires to simulate hoses running between them at some point.

Test fit after black spray coat.

Painting
The top cap and mounting hardware were spray painted black and then metallic. I then applied a dark wash, wiping off any excess with a sponge.

Major components after painting and prior to assembly.

Assembly
The spinning top and pill bottle fit together perfectly. It's almost snug enough to not require glue. Almost. The fit of the display panel is also good, but it will also be glued in place once I settle on the color. The pill bottle sits evenly in the juice cap and can be easily removed so that a miniature can be placed inside.

Tin Man Miniatures Princess Livia recovering from a beach trip.

I'm content with the results. but I still think I can do better. It's a more convincing terrain piece than the originals. It's missing something, though. I'll have to give it some thought and make another attempt later.

Thursday, June 9, 2022

Trash Bash "Astromecha" WIP

Something I threw together the other day. I was digging around in my bits collection for something else, noticed how well these parts fit together, and spent about twenty or thirty minutes building this robot miniature. Then I set it aside and got back to what I was doing in the first place.

Arms raised in threat, surrender, or just stretching?

In my defense, I've been considering cobbling together a trash bash robot for awhile now. I even collected a few images for inspiration. Maybe my brain seized on the first opportunity it came across.

Going from the bottom up to the top, the parts are:
  • A 25mm plastic slotted base. Pretty standard in the tabletop miniatures world. This particular one is from Games Workshop.
  • A pair of metal weights from a gaming mouse. Intended to customize the mouse to the exact specifications of the user. Salvaged after the mouse in question stopped working.
  • A plastic button from either a telephone or a fax unit. Again, salvaged after the unit they were once attached to stopped functioning. The plastic protrusions were clipped down so the mouse weight "wheels" would fit properly.
  • Three white plastic bits - the "arms" and "head" are separate parts. Printer salvage. I'm not sure, but I think they were paper feed roller parts from two different devices. How well the "head" fit on to the button "body" is what started this unplanned project.
  • The plastic "head" is hollow, so I glued in a flat sided plastic bead to partly fill the space.
Maybe not the droid she's looking for.

Everything is held together with Gorilla Super Glue. The bond with the base will be reinforced with my usual choice of basing material (sand, glue, paint, and a little water to improve flow) after the detail pass. The stuff sets like concrete. I'll just have to remember to tape the slot closed beforehand. Yes, I've made a mess by forgetting that step before.

The basic form is done. I've put off hitting it with a coat of spray primer until I can dive back into my bits collection and give it a detail pass. I'm hoping for an antenna or some access ports. Maybe something additional to fill in the empty "head" space. Until then, it's just not quite ready for painting yet.

Rear view showing the bead partly filling the space in the top piece.

More after I finish what I was working on in the first place and get back to this project.

Tuesday, June 7, 2022

Tin Man Miniatures Princess Livia

Presenting her royal highness, Princess Livia from Tin Man Miniatures. Tin Man Miniatures is best known for producing 28mm-32mm scale figures based on the Barsoom planetary romance series written by Edgar Rice Burroughs. This is the non-"A" version of the figure. The "A" version represents the same character, but wearing less than what is seen here.

Extraterrestrial beach attire.

Figures representing women clad more in concept than reality don't regularly feature on this blog, but this one has been in my unpainted pile for more than long enough. I picked her out of the pile since I was in a swords and sorcery mood after an involuntary month long break. Although "sword and planet" might be a better description here.

My first attempt ended with Livia taking a bath in Simple Green. I tried out a different spray primer and found that it went on too thick and obscured the finer details. Then the nozzle broke and I threw out the can. Worse, I didn't like how the paint scheme I picked out - pale skin and gold metallics - blended together.

Sometimes a fresh start is the best option. Besides, I need more practice with painting flesh tones. This wasn't the end of the challenges I ran into with this project, though.


Preparation

This figure required nothing other than the warm soap and water cleaning I give to all of my miniatures as a first step. I wasn't able to find any mold lines or flash.


Base Assembly

I decided that the small integral base is not fit for the purpose of keeping the figure standing upright. My solution is the same one I use for Reaper Bones miniatures - gluing the figure on a steel fender washer.


Color Scheme

I opted to paint this figure as a human rather than a Red Martian. No offense intended to Edgar Rice Burroughs, but I felt that I would get more utility out of a swords and sorcery appearance for this figure.

The warm colors of the figure's skin and hair contrast with the cold metallics of the figure's outfit and jewelry. The small amount of blue cloth continues the warm/cold contrast.

Hair flowing in the winds of an alien desert.

Spray Primer

Tamiya Surface Primer (L) Gray
Tamiya Surface Primer (L) White

Sprayed in a zenithal pattern. This worked much better for preserving the details of the model.


Skin

Reaper 09041 Dark Skin
Reaper 09221 Olive Skin
Reaper 09260 Bronzed Skin
Secret Weapon W005 Flesh Wash

I built up a tanned appearance from the Dark Skin base layer to the Bronzed Skin highlights. All of these paints work well as various skin tones. The wash added surprisingly little and I'll skip it the next time I use this recipe.


Hair

Reaper 09221 Olive Skin
Reaper 09257 Blond Hair
Secret Weapon W005 Flesh Wash

Using Olive Skin as a base layer meant one less paint bottle to dig around for. The wash was much more useful here, bringing out the flowing hair sculpted on the figure.


Metal

Citadel Colour Codex Grey
Citadel Colour Boltgun Metal
Citadel Colour Mithril Silver
Formula P3 Armor Wash

Metallic paints don't always coat well, so I started with a non-metallic base layer. Even applied as a highlight, the Mithril Silver overwhelmed the layers it was sitting on. The wash toned down the shine and brought back the details of the metallic areas.


Cloth

Reaper 09017 True Blue


Basing

The basing material is my usual mix of sand with water, PVA glue, and FolkArt 231 Real Brown to fix it in place. Next came a dry brush of FolkArt 420 Linen to give the surface a drier, sandy appearance. I used Citadel Colour Chaos Black for the rim and - judging by the photos - I'll need to touch it up.

The base still needs a little work, but good results overall.

The initial set of photos I took of this miniature revealed all of the flaws in my paint job. This wasn't the first time I ran into this issue, but it was the first time it was bad enough for me to go back, fix things, and reshoot. Most of the flaws were with the cloth and skin tones. Also, it was at this point that I applied the wash to the metallic areas since the reflections were giving my camera fits.

This project turned out to be more of a challenge that I anticipated. This is not the fault of the figure, which is well sculpted and cast. An unplanned month off from painting left me a little out of practice. Perhaps something else might have been a better choice for a first project back. On the other hand, I did come out with new recipes for painting skin tones and metallics. Overall, I enjoyed the process of finding solutions for the problems I ran into and extracting a figure from the unpainted miniatures pile.

Wednesday, May 4, 2022

May the 4th - More Atmospheric Water Condenser Terrain

I wanted a project that tied into May the Fourth Be With You, but I also didn't want to just pick up a Star Wars miniature or model. Instead, I looked through my mess to see if there was anything Star Wars inspired I could do. While last year's Atmospheric Water Condenser Scatter Terrain didn't start as such a project, it went that way after I slapped on a worn desert themed paint job. So I decided to make a couple more.

Original terrain piece in the middle for comparison. Rosie included for scale.

And I immediately ran into the problem of not having all the parts and paint to replicate the original Atmospheric Water Condenser exactly. The others could represent different models or field modifications using after market parts. In any event, discussing the original parts and their replacements might be instructional for those tackling their own projects.

Core parts from left to right: dial, hub, pull tab. Original terrain piece in background for comparison.

The circular section of the original terrain piece was assembled from a selector dial, a pull tab, a ballpoint pen part, and an upside down keyboard button. I had more dials and pull tabs, but didn't have the same pen parts or buttons. What I used instead were alternate pen parts and cylindrical bits that I can't remember the origins of. It was fortunate that I had some left, but I was prepared to use plastic lids, bottle caps, or other round parts for the dial.

The central tower is the hub of a paper feed roller from some model of printer. I found more in my collection. However, I had the idea of substituting the pump from a liquid soap dispenser or spray bottle while digging around for the hubs. All that was really needed was a tall section for the middle of the piece.

Alternatives to the core parts that I considered, but didn't have to use.

I built the circular sections, but did not attach the towers to make spray priming and painting easier. After priming everything in black, I ran into the next issue. My supply of Krylon Camouflage Ultra-Flat Khaki was down to a single, almost empty can that I've been reserving for another project. I substituted a gray for the khaki on the circular sections. This ultimately resulted in a less earthy tone to the finished pieces. It works fine, but I prefer the warmer color of the original. They were looking a little flat, so I brushed on some FolkArt 480 Titanium White over them to produce some highlights and weathering. For the towers, I went in an entirely different direction - metallic. A coat of Krylon ColorMaster Paint + Primer Metallic Aluminum over the black primer contrasted nicely with the dull gray circular assemblies.

Next, I attached the towers to the circular assemblies. Gorilla Super Glue wouldn't be enough to keep the towers in place by itself. The original used a mechanical solution that I repeated here. I drilled out the bottoms of the hubs and used an existing hole in the dials for a screw. I still applied a little glue to the hub as a backup.

I applied a dark wash. Unfortunately, it turned out to be way too dark, even after wiping off the excess. Correcting the colors involved brushing on some Citadel Colour Mithril Silver over the tower and more FolkArt 480 Titanium White over the circular assembly. I left the wash still showing in the recesses.

Original terrain piece in the middle.

And there they are. Some more scatter terrain that is reminiscent of Star Wars while not directly copying anything from the franchise. Doing Star Wars stuff was fun! Maybe I could do more this month?

Tuesday, May 3, 2022

The AD&D Monster Manual (1979) A - Z: Episode 3: "B - Baboon to Beholder"

Commentary and opinions on the "Advanced Dungeons & Dragons Monster Manual" by Gary Gygax. This video covers the first half of the "B" section.


The following is the original script. Changes were made during recording and editing the video. This version doesn't reflect those changes. It is provided for those who prefer a written version over video.

I was hoping to get section B done in one go. However, since it is twice as long as the previous section, I've decided to break it up into two episodes. This episode covers section B from the Baboon to the Beholder. Next episode will cover the rest of section B.

Baboon
Curiously, "Climbing" is listed as a Special Defense of the Baboon, but no details are given. Much like the Ape, Baboons are relatively non-threatening to an adventuring party. While they will defend their territory, half the group will be young who will not attack and there is a 90% chance that the Baboons will flee if pressed. This is another entry that I question. It doesn't seem to have much in the way of utility.

Badger
The Badger is described as "typically solitary" but their Number Appearing is listed as 2-5. Badgers were historically hunted or trapped for their fur and the entry gives the value of a Badger pelt as 10-30 gold pieces. This presents an adventuring party with an option for supplementing their income while moving through a wilderness area. The entry also describes the Giant Badger as being twice the size with scaled up combat stats. It does not state that Giant Badger pelts are any more valuable than the regular variety.

Baluchitherium
This was based the world's largest land mammal, which lived roughly 35 to 24 million years ago. Combat wise, it can deal a good amount of damage while tanking anything an adventuring party can throw at it with its 14 hit dice. In the end, it's another prehistoric animal converted into an AD&D monster. Given its lack of treasure, I'm not sure why an adventuring party would choose to take one of these on.

Barracuda
An adventuring party is unlikely to encounter these animals unless they were diving in the ocean or deep sea fishing. It's possible, given the existence of various magics, but is a situation that I've never personally encountered.

Basilisk
This slow-moving, eight-legged reptile is inspired by medieval European myth. It has a bite attack, but who cares because the only reason a DM would bring one in is its petrification attack. Any "fleshy creature" that meets its gaze gets turned to stone. Presumably a saving throw is allowed, but the entry doesn't specify. Reflecting its gaze back will cause the Basilisk to petrify itself, but it is noted that there needs to be enough light around to make this effective. Interestingly, the Basilisk can see into the Astral and Ethereal Planes. Its gaze is lethal in the Astral Plane while victims in the Ethereal Plane are turned into Ethereal Stone, which is invisible except on the Ethereal Plane. This makes it a threat for almost any adventuring party and no doubt inspired groans and thrown objects from generations of players. The Basilisk is a monster with a strong legacy, appearing in later editions and in other F20 games having lost none of its fearsome reputation.

Bear
This entry features the Black, Brown, and Cave Bears. Black and Brown are based on the real world animals of the same names. The Cave Bear could be described as a "Dire" Bear in more recent editions, being larger, more aggressive, and preferring a carnivorous diet. In the real world, most bear encounters involve bears detecting a food source controlled by humans and the resulting interactions. It is entirely plausible that a Black or Brown Bear might investigate an adventuring party's camp site and raid it for their rations or trash while they are away or asleep. The Special Attack of all Bear types - the Bear Hug - is described in detail. It is also noted that Brown and Cave Bears will continue to fight for a short period after reaching negative hit points, although damage pushing them below -9 hit points will kill them immediately.

Beaver, Giant
Giant Beavers are based on the real world animal, but are larger and intelligent enough to grasp abstract concepts. They are sometimes willing to use their skills in building structures out of natural materials - dams in particular - in exchange for "coins and other valuables". This explains their Treasure Type of C, which is presumably stored in their "castle-like" dens. Not all interactions with Giant Beavers are assumed to be equitable, since the value of their pelts and young are also given. This entry is much more interesting than I remember it being.

Beetle, Giant
This entry features the Bombardier, Boring, Fire, Rhinoceros, Stag, and Water varieties of Giant Beetle. All Giant Beetles are described as "basically unintelligent and always hungry". Gygax takes particular care to note how beetles tear their food apart while ingesting it and that "nothing actually eaten by giant beetles can be revived in any manner short of a wish". I'm guessing that the situation must have come up at least once in his campaigns.

Every type of Giant Beetle has a gimmick. The Bombardier Beetle can expel a cloud of acidic vapor a couple times of day. The sound made by releasing the vapor is loud enough to stun or deafen those nearby. The Boring Beetle is a little dull when it comes to social interactions and feeds on rotting wood. Large groups may develop a communal intelligence, but no game effects are noted. The Fire Beetle possesses a pair of glands that glow brightly enough to be a light source. This makes them a target for miners and player characters who don't want to bother with torches or lanterns. Unfortunately for all concerned, the glands only produce light for a few days. Rhinoceros and Stag Beetles are both characterized by their large horns, which they use to attack. Finally, the Water Beetle is found in deep bodies of fresh water.

Of all of these, only the Bombardier and Fire Beetles made any lasting impression on me. I vaguely remember using Bombardier Beetles in a game, where they thoroughly annoyed the players. Fire Beetles featured in many games, since players would seek them out as light sources until Continual Light spells became available to the party.

Beholder
The Beholder is an iconic D&D monster. This is a monster that can wipe whole armies of low level hirelings and the adventuring parties that employed them in one go. In many ways, the Beholder embodies the wild, anything goes nature of early D&D. The Beholder also shows some of the weaknesses of early D&D when compared to more modern RPG designs.

Nine of those ten eyes are on stalks that sprout off its top. The other is larger and located above the mouth. By the way, the Beholder has a bite attack, but who cares? Each of the Beholder's ten eyes can generate a magical attack. The entry goes into detail about how many eyes can attack a target depending on its position relative to the Beholder and how many eyes stop functioning depending on how much damage the Beholder suffers. The entry does not specify which eye possesses which magical attack. Do the listed attacks go clockwise starting from the front-most eye-stalk? Counterclockwise? Does the count start with the main eye on the body? Or is it randomly determined when the encounter is generated?

While the entry listed the magical attacks, it doesn't provide any details. Most of the attacks duplicate spells or the effects on magical items. However, the burden of knowing what these spells and magic items do is placed squarely on the DM. The DM would either have to possess a working knowledge of these spells and magic items or reference the books during play. The first demands an experienced DM, the second slows down the game. Now, it is true that, in an ideal world, the DM would study the rules beforehand and taking notes as necessary. However, this is not an ideal world. Later systems avoid this issue by providing the required information in the monster entry. This was likely an oversight on Gygax's part. This information was likely second nature to Gygax. Also, he may not have internalized the need to convey all of the necessary information on the page. There is also the issue of space. Including more information in this entry would have meant reducing the size of others. However, I have already pointed out monsters of questionable utility. One or more of them could have been omitted to free up space.

Next time, I'll be starting with the Black Pudding and finishing up the rest of section B.

Monday, May 2, 2022

Warsenal Comanche Tower Lamps

These are the final Warsenal terrain pieces from last year's Black Friday/Cyber Monday haul. These sci-fi street lamps come three to a package and are mostly a combination of MDF and acrylic. A short coil of black coated wire is provided, but I decided to go with something more colorful.


MDF Parts Assembly
The instructions are a single page of exploded views available for download from the Warsenal site. I glued together all the MDF parts with PVA glue. White glue isn't my first choice in many cases, but the bond is strong enough when joining MDF. I left the acrylic parts and wire off until after painting.

Primer Coat
Krylon Fusion All-In-One Matte Black.


Base Color Coat
Krylon ColorMaster Paint + Primer Metallic Aluminum. This gives a shiny metallic appearance with minimal effort.

Dark Wash Coat
FolkArt 479 Pure Black mixed with Liquitex Matte Medium and diluted with water to improve flow. Applied evenly over all surfaces. Brushed on paint and washes tend to bead on Krylon, so I wiped off the excess wash with a sponge to avoid pooling and spotting. The main goals were to dark down the bright metallic a little and bring out the recessed details.


Acrylic Parts Assembly
I was concerned about frosting the clear plastic by using CA glue, so I reached for my bottle of PVA glue during this step. I'm a little dubious about the strength of the bond, but it seems to be holding up well enough.

Wire Detail Assembly
I used a spool of red coated wire I salvaged from some dead electronics awhile back instead of the black wire that came in the package. The red wire is a little stiffer and I wanted a brighter color to stand out from the rest of the pieces. I applied a drop of CA glue to one end, inserted it into the provided hole, wrapped the wire around the piece I was working on, cut off the length of wire I needed, and glued the other end to the second hole provided.


These work well for adding a touch of verisimilitude to an urban sci-fi board. It can be argued that the cable and battery pack shouldn't be exposed, but they add some interesting visual detail. The tower lamps might not work for a sleek sci-fi setting where technology is hidden behind clean lines and smooth panels. However, they would fit into a setting with a cobbled together aesthetic.

Wednesday, April 27, 2022

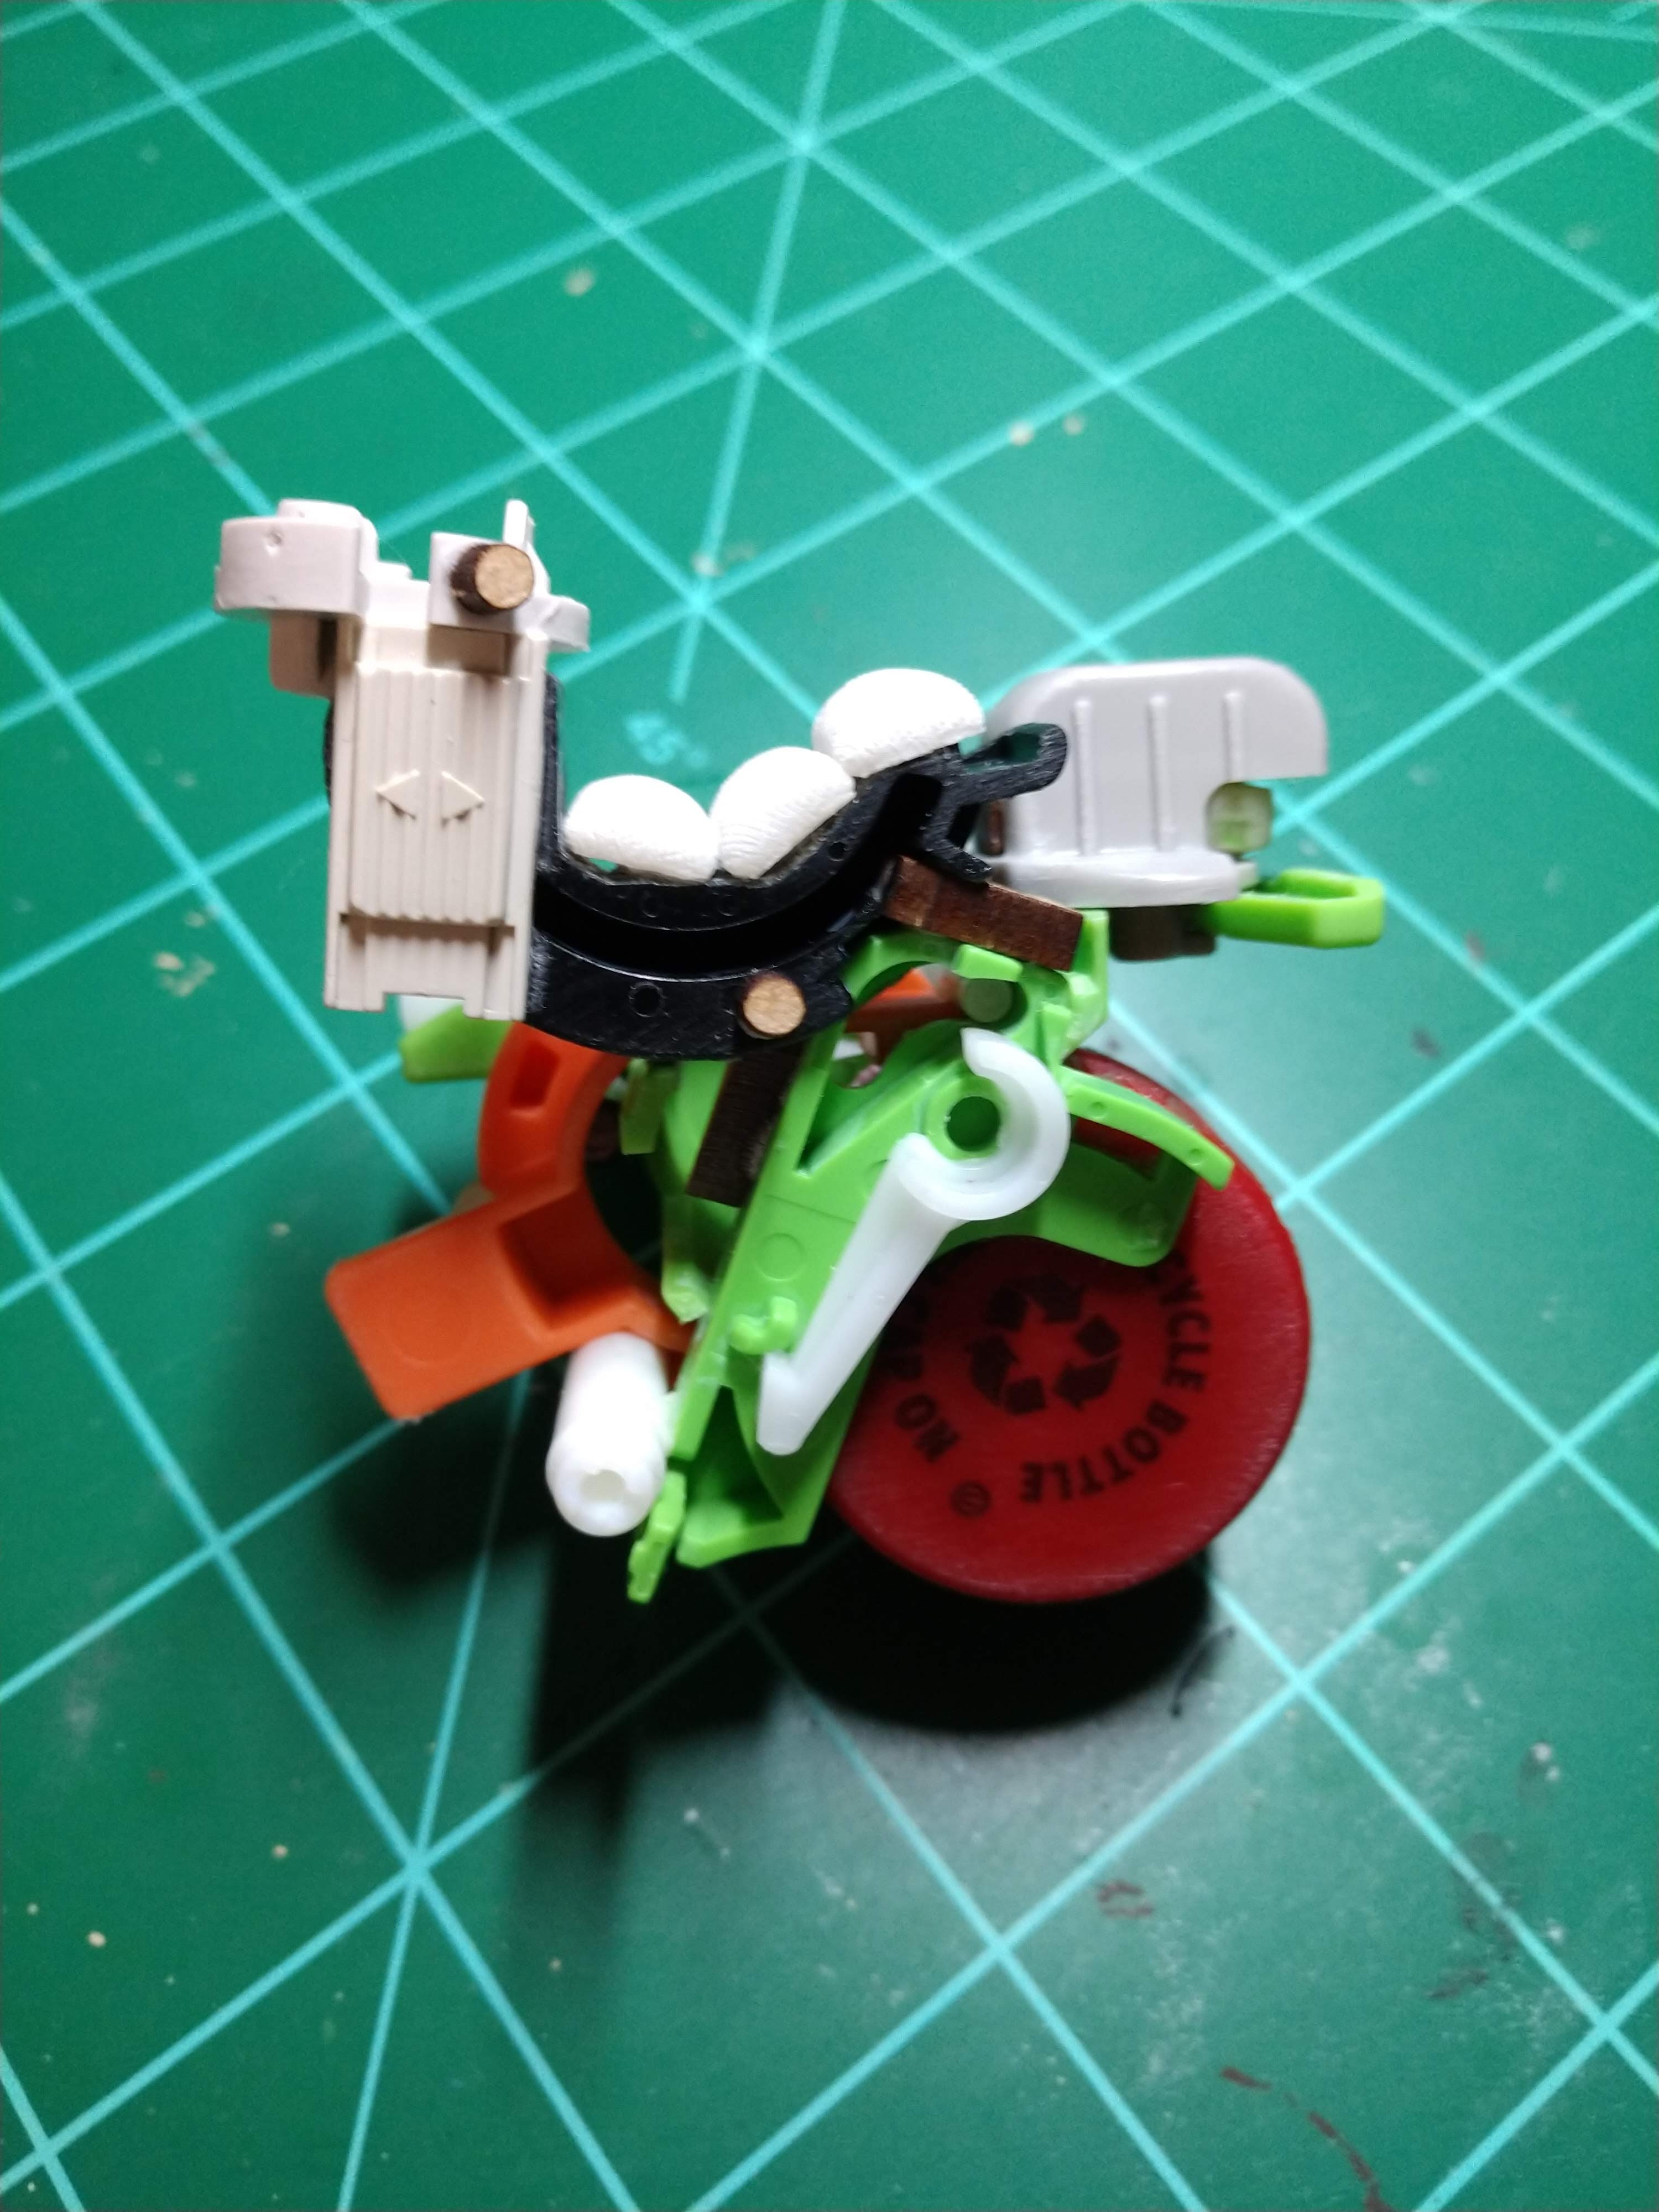
Trash Bash Monowheel Cycle WIP

This started off as an experiment with making wheels for sci-fi models out of soda bottle caps. Then it turned into a unicycle robot build. It ended up as a monowheel cycle when I cobbled together a seat and threw on some stowage. Now that I see what it looks like with a coat of primer, I'm thinking of adding some wires and a couple more details after some initial painting.

Side view after priming.

Big Wheel Keep On (Not) Turning
The wheel is a pair of soda bottle caps glued together. The edges were sanded down a little so the two pieces fit flush and to give the glue a rougher surface to work with. The ends were also sanded in preparation for painting. The overall shape and the pattern molded into the plastic creates the appearance of a wheel and tread pattern. The idea will come in handy the next time I need wheels for a sci-fi ground vehicle, robot, or in the landing gear of an aerospace craft.

Rear three quarter view before primer.

Unicycle
I was intrigued by the possibilities of the model wheel in my hands. The idea of a single wheeled robot or vehicle has been in the back of my mind for awhile now. A little digging around the bits collection turned up a number of parts that either fit or could be convinced to fit around the wheel. I was initially going for a robotic probe equipped with sensors to explore some unknown world. That's a concept I may return to, but that's not the direction this project went.

Rear three quarter view after primer.

Monowheel Cycle
As I piled things on, the project's appearance diverged from the lines of a purpose-built planetary probe towards a vehicle built from salvage. I started deliberately going for the look of a custom vehicle built by someone who had to scavenge the parts. Greeblies suggesting an engine exhaust and suspension add mechanical plausibility. Some stowage and fuel containers from a Tamiya 1/48 Jerry Can Set give the impression of an owner on the move.

Top down view showing stowage and seat cushions.

The Seat and MDF Reinforcement
Adding a seat was a challenge. With no ready made options at hand, I built one from various plastic parts and used resin sandbags for the cushions. Unfortunately, glue alone wouldn't be strong enough to hold it in place. I used some small MDF pieces to reinforce the seat and add details. These were popped out of laser cut parts from previous projects. Using super glue between MDF and plastic creates a strong bond suitable for structural support.

Top down view after priming.

Priming
Tamiya Surface Primer (L) in Gray spray for full coverage. Priming a project like this is an almost magical moment. The chaotic mix of different colors and shapes turns into a single object, unified under a coat of flat gray.

Side view during assembly. A couple details were added before priming.

Moving Forward
I've got some ideas for putting this project on a plastic base, but there's some testing to be done first. After that, I might brush on some paint to see how it looks with some color on it. Final details will be added after that - I have some wire that will join together some of the mechanical details. And, of course, a couple of wash coats to bring out the details and add weathering.

Monday, April 25, 2022

Zealot Miniatures Magic Portal (Blue)

This is another resin terrain piece using a translucent plastic insert to represent an inter-dimensional passageway. In this case, the popular circular shape was chosen for the generating mechanism. I purchased this piece at the same time as the Demon Gate late last year. The plastic insert is available in blue or red.

Remember: It's a portal, not a gate. Very important.

Preparation
The resin required nothing more than a scrubbing with warm soap and water. I had to remove and sand down a tab on the clear plastic insert. The insert has a significant flaw, but it doesn't stand out (much) at tabletop distances.

Planning
The Magic Portal comes in four parts - the two halves of the circular portal, the platform, and the insert. I decided to prime and paint everything before assembly. Painting the assembled piece would require trying to keep paint off the insert. That seemed to be a great deal of trouble for no real benefit.

Rosie considers another piece of hardware she's been asked to fix.

Plastic Insert
The insert was a little underwhelming out of the package. The swirling details weren't really visible in the clear plastic. There was also the flaw in the material. I decided to apply a wash to bring out the details, hide the flaw, and protect the plastic from the fogging effects of the glue I would be using later on. The initial layers of Secret Weapon W015 Blue didn't coat to my satisfaction. The follow up layers of Secret Weapon W016 Green covered this material better.

Primer Coat
Tamiya Surface Primer (L) in Gray sprayed over all resin parts.

First Paint Coat
As with the Demon Gate, I applied a layer of FolkArt 479 Pure Black diluted with water to darken up the Tamiya Gray and fill the recessed details on the resin parts.

Second Paint Coat
FolkArt 480 Titanium White brushed on the upper areas as a highlight and outward from the inside of the portal.

Magic Portal and Demon Gate comparison.

Source Lighting
A mix of FolkArt 720 Cobalt Blue and Sargent Art Cadmium Green lightened with FolkArt 480 Titanium White as needed. The circular generator would block some of the light from the magical portal, so the glow effect didn't need to be as extensive as on the Demon Gate. I started by brushing on the Cobalt Blue/Cadmium Green mix over all areas that would be touched by light from the portal. Each following layer covered a slightly smaller area closer to the portal. I mixed in a little more Titanium White with each layer until I was using almost pure white right next to the portal.

Touch Up
I ended up overdoing the glow effect in some areas. I brushed on some FolkArt 2561 Steel Gray to bring back an approximation of the base color.

Assembly
This was a straightforward matter of gluing the two halves of the circular gateway around the plastic insert. I had to clamp the halves together to give the Gorilla Super Glue time to work. Then I glued the assembled portal to the platform and clamped that together until everything was solid.

Does this remind anyone of anything?

There is a visible line around the circular resin piece. This is one of the resin halves overlapping the other. I considered sanding it down and repainting the edge, but decided against it. This would remove some the details on the edge and the line isn't as noticeable at tabletop distances.

Close up of the seam between the two halves of the circular portal generator.

It's ironic that this was the piece that I was most looking forward to while the Demon Gate was an afterthought. The Magic Portal works with 28mm scale miniatures, but a 32mm figure might have to duck down a bit to fit through. It would fit in fine if used for 15mm scale games. Together, the Magic Portal and Demon Gate give me options whenever I need an extradimensional passage to and from another space and time. Overall, though, I like the Demon Gate a little more than its rounder counterpart.

Thursday, April 7, 2022

The AD&D Monster Manual (1979) A - Z: Episode 2: "A - How Is Anhkheg Pronounced, Anyway?"

Continuing a series expressing a middle aged guy's opinions about the AD&D Monster Manual (D&D First Edition) from 1979. This video covers the "A" section. Warning: Attempts at humor include a dad joke referencing a decades-old sitcom.


This video is shorter than the introductory episode, mainly because the "A" section is only a couple of pages long. I decided on a longer shot to make it easier to get hand gestures in frame. Might try a middle ground for the next one.