This is another product that I bought ages ago, stored away during my tabletop gaming interregnum, and rediscovered while looking for something else. I decided on a paint scheme just in time for weeks of rain and humidity levels too high for spray painting. My patience was rewarded once I was able to get started - the work was quick. Unlike much of my unfinished product pile, this is actually still available for purchase from the manufacturer.
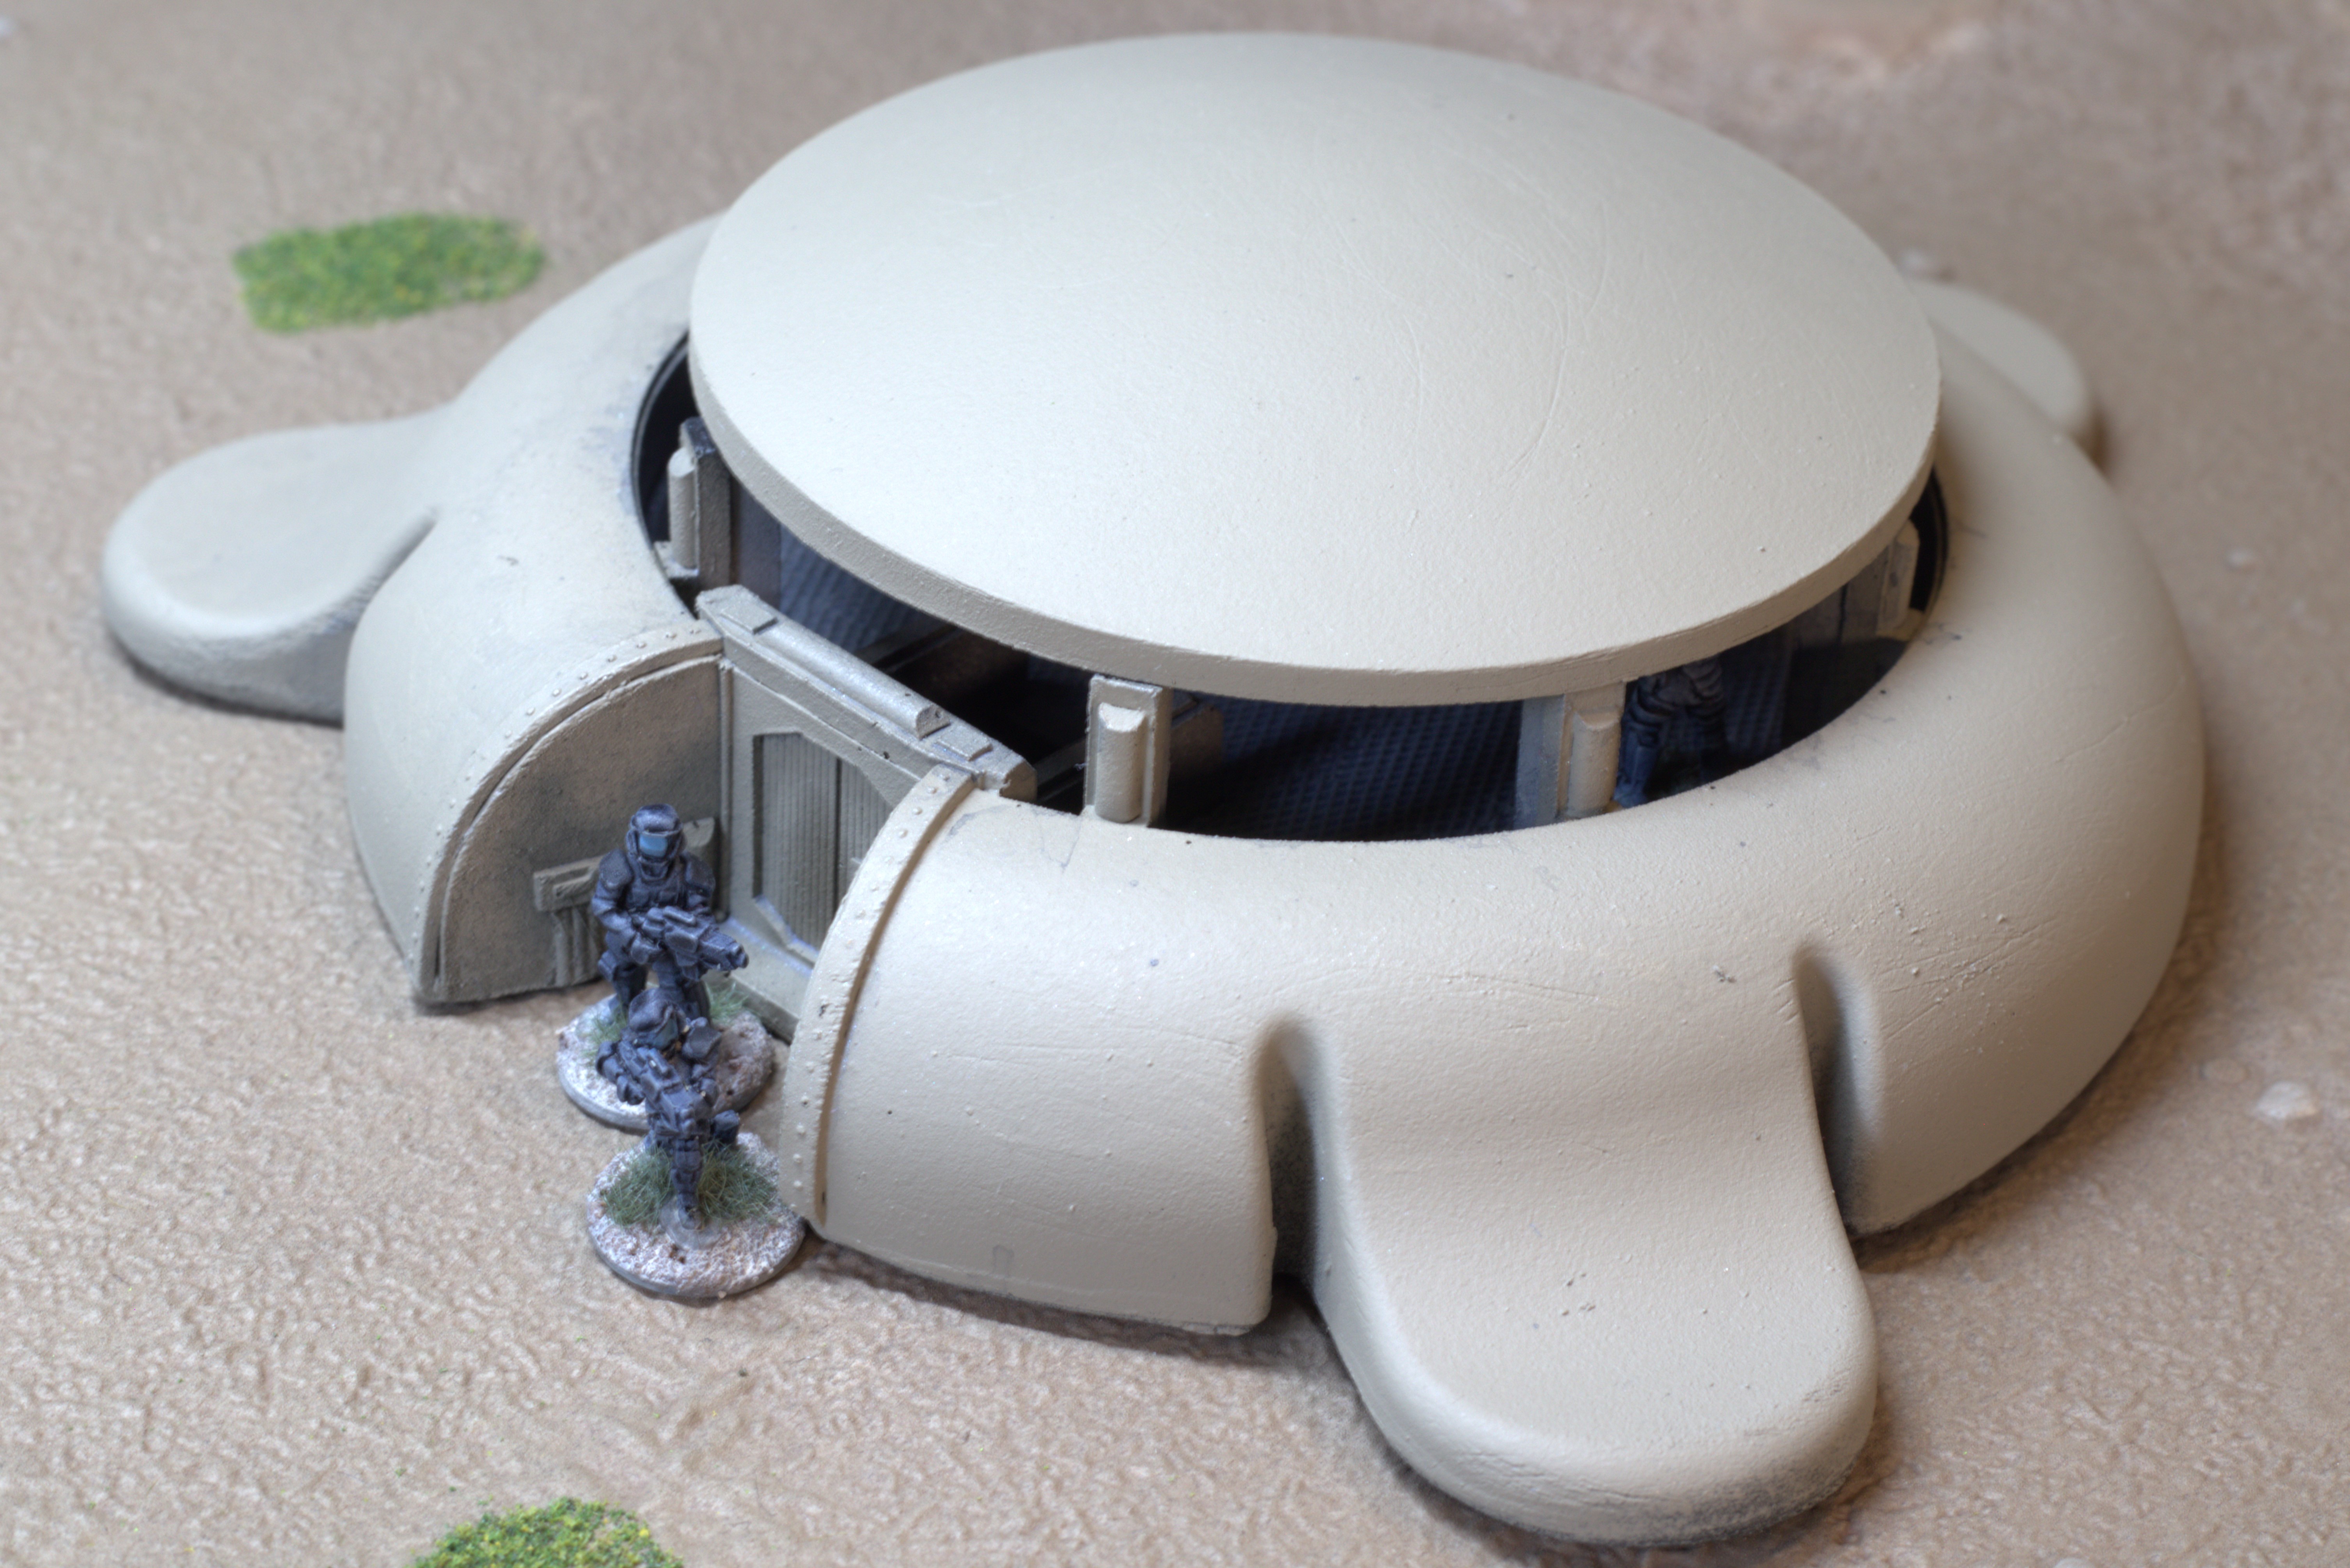
The curved appearance of the bunker puts certain Star Wars visuals in mind. Not the sharp edges of Imperial design, of course. Rather, the rounded architecture seen on some planets away from the core - places like Tatooine and Naboo.
This product comes in two pieces - the main body and a cover. The main body includes a sculpted interior including floor grating and steps down to the entrance. The other piece is a simple round cover for the interior. The two pieces do not lock into each other - there is nothing holding the cover on the main body.

Sanding
The bunker is cast resin and needed some sanding to remove some rough edges and flash. There is also some chipping near the bunker entrance, but it's not particularly noticeable when the piece is sitting on the table. Besides, it adds to the worn look I was going for. I also roughed up the surfaces of the piece due to concerns about the paint bonding to the smooth resin. I wore a respirator during the sanding process, having been warned about inhaling resin dust awhile back.
Cleaning
The next step involved soap, warm water, and a brush. Taking the time to clean what I'm working on is a habit for me at this point.
Spray Painting - First Layer
I sprayed the underside of both pieces and the interior of the main body with Krylon COLORmaxx Paint + Primer in Flat Black. I was planning on a dark gray or metallic for the interior, so black works well as an undercoat. The goal of painting the undersides is simply to put down a layer to protect the resin.

Spray Painting - Second Layer
The base color for the bunker is Krylon Camouflage Ultra-Flat Khaki. A sandy color isn't unusual for a concrete surface, especially one that's been exposed to the outside for awhile. Besides, I've been on enough military bases - mostly American - to know that khaki is a common color for buildings like the bunker.
Interior
The floor got a coat of FolkArt 2561 Steel Gray brushed over the black Krylon. I applied some Craft Smart Premium Wax Silver Metallic Finish over the gray paint to give the floor a hint of metallic shine.
Wash Layer
I still have a bottle of black wash that I mixed for a long-ago project. It's come in handy for terrain projects like this one. I applied a layer of wash over all of the interior surfaces and allowed it to pool. The floor is deeply textured with a grate pattern and I wanted the wash to settle into it. I also brushed a layer of wash over the exterior of the bunker, but I wiped off the excess to prevent pooling on those surfaces.

The bunker is a hefty piece of solid resin. It will likely hold up well to handling, but I'm reluctant to subject it to an unplanned drop test. The interior is a nice touch and holds a fair number of 15mm miniatures - the exact count depends on the size of their bases. It was a good value at $12 USD when I purchased it and is a better deal now, although shipping costs may offset currency exchange rates.
No comments:
Post a Comment